Aller au contenu principal

Beyerdynamic MMX100 Volume Controller Repair

Ce dont vous avez besoin

  1. Beyerdynamic MMX100 Volume Controller Repair, Beyerdynamic MMX100 Volume Controller Repair: étape 1, image 1 de 3 Beyerdynamic MMX100 Volume Controller Repair, Beyerdynamic MMX100 Volume Controller Repair: étape 1, image 2 de 3 Beyerdynamic MMX100 Volume Controller Repair, Beyerdynamic MMX100 Volume Controller Repair: étape 1, image 3 de 3
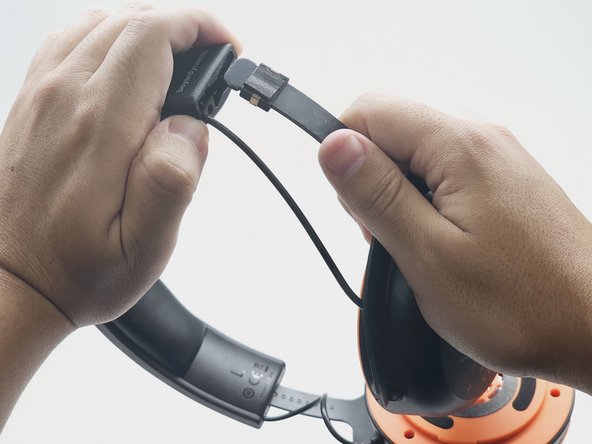
    • Twist the left speaker cushion towards you, and pull off the headset.

  2. Beyerdynamic MMX100 Volume Controller Repair: étape 2, image 1 de 3 Beyerdynamic MMX100 Volume Controller Repair: étape 2, image 2 de 3 Beyerdynamic MMX100 Volume Controller Repair: étape 2, image 3 de 3
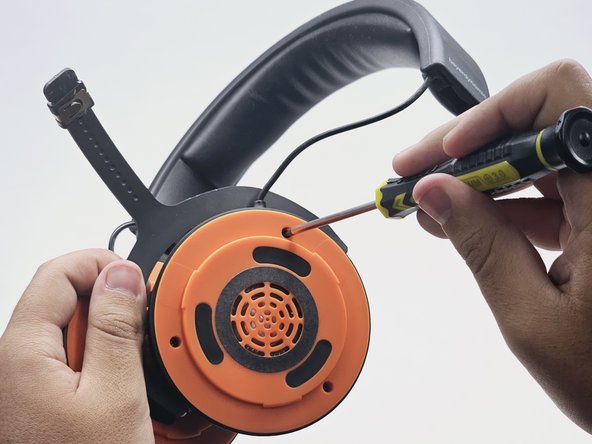
    • Using the 2.0mm Phillips-Head screwdriver, unscrew the two 0.6mm screws at the end of the left side headband.

  3. Beyerdynamic MMX100 Volume Controller Repair: étape 3, image 1 de 2 Beyerdynamic MMX100 Volume Controller Repair: étape 3, image 2 de 2
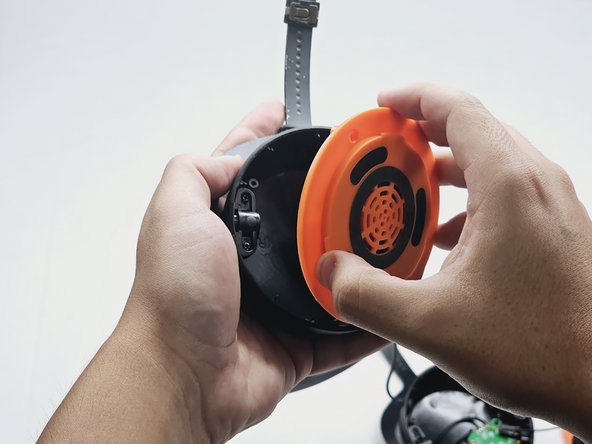
    • Hold open the top part of the headband. Slide out the left earphone.

  4. Beyerdynamic MMX100 Volume Controller Repair: étape 4, image 1 de 3 Beyerdynamic MMX100 Volume Controller Repair: étape 4, image 2 de 3 Beyerdynamic MMX100 Volume Controller Repair: étape 4, image 3 de 3
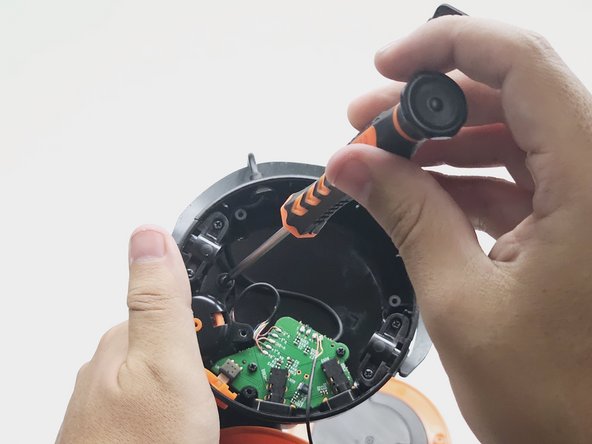
    • Using the 3.0mm Phillips-Head Screwdriver, unscrew the three 0.7 mm screws on the left speaker cover.

  5. Beyerdynamic MMX100 Volume Controller Repair: étape 5, image 1 de 2 Beyerdynamic MMX100 Volume Controller Repair: étape 5, image 2 de 2
    • Using the 2.0mm Phillips-Head Screwdriver, unscrew the two 0.5mm screws on the volume control component.

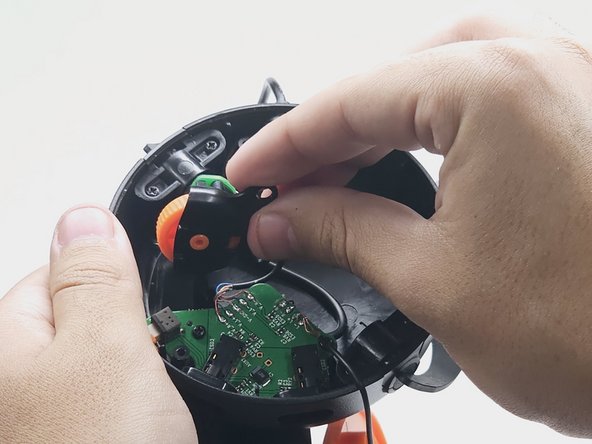
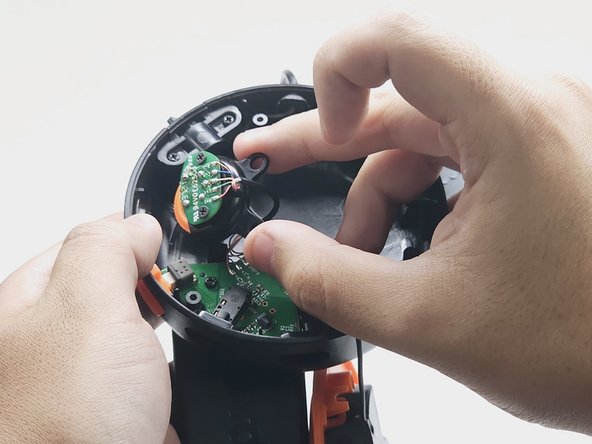
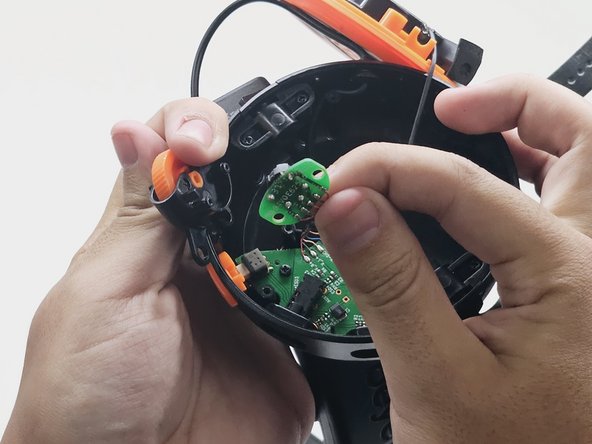
  6. Beyerdynamic MMX100 Volume Controller Repair: étape 6, image 1 de 3 Beyerdynamic MMX100 Volume Controller Repair: étape 6, image 2 de 3 Beyerdynamic MMX100 Volume Controller Repair: étape 6, image 3 de 3
    • Take out, and flip over, the volume control component.

  7. Beyerdynamic MMX100 Volume Controller Repair: étape 7, image 1 de 2 Beyerdynamic MMX100 Volume Controller Repair: étape 7, image 2 de 2
    • Using the 2.0mm Phillips-Head Screwdriver, unscrew the two 0.3mm screws on the board. Then, take off the volume wheel.

  8. Beyerdynamic MMX100 Volume Controller Repair: étape 8, image 1 de 2 Beyerdynamic MMX100 Volume Controller Repair: étape 8, image 2 de 2
    • Hazardous situation which, if not avoided, could result in minor or moderate injury.

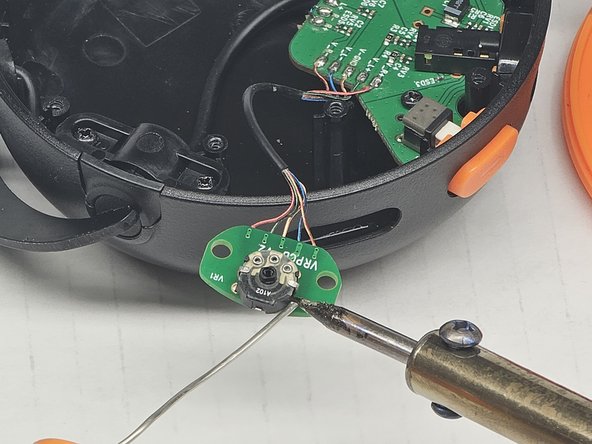
    • Using a soldering iron, desolder the damaged wires and the prongs on either side of the board.

Conclusion

To reassemble your device, follow these instructions in reverse order.

Anthony Grande

Membre depuis le 10/23/23

157 Réputation

1 tutoriel rédigé

Équipe

CSU Los Angeles, Team 5-9, Kershman Fall 2023 Membre de l'équipe CSU Los Angeles, Team 5-9, Kershman Fall 2023

CSULA-KERSHMAN-F23S5G9

1 membre

1 tutoriel rédigé

0 commentaires

Ajouter un commentaire

Nombre de vues :

Dernières 24 heures : 1

7 derniers jours : 13

30 derniers jours : 62

Total : 263