Introduction
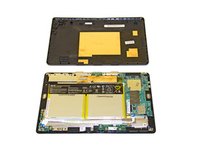
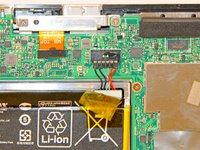
La batterie se trouve à l'intérieur de la partie tablette de l'appareil. Le support en plastique doit être retiré avant que la batterie ne soit accessible.
Ce dont vous avez besoin
-
-
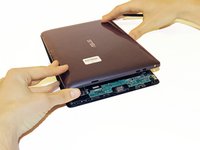
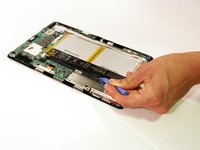
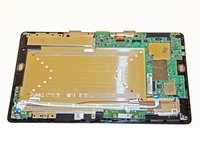
Séparez la tablette de la base en appuyant sur le grand bouton argenté sous la tablette. Le bouton argenté est situé à la base de la tablette.
-
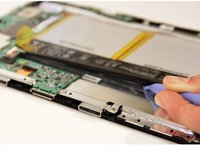
Retirez la tablette en la soulevant.
-
-


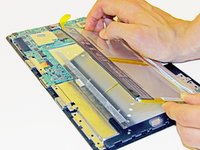
Pour remonter votre appareil, suivez ces instructions dans l'ordre inverse.
Annulation : je n'ai pas terminé ce tutoriel.
70 autres ont terminé cette réparation.
Merci à ces traducteurs :
100%

Toff nous aide à réparer le monde ! Vous voulez contribuer ?
Commencez à traduire ›
Équipe

Cal Poly, Team 13-31, Maness Spring 2014 Membre de l'équipe Cal Poly, Team 13-31, Maness Spring 2014
CPSU-MANESS-S14S13G31
3 membres
8 tutoriels rédigés
22 commentaires de tutoriel
So I switched out my screen for it and its not turning on and I checked it everything was correctly place, but my Asus transformer was dead before hand so I tried charging it, and it wasn't charging, so I checked it and it seems the battery wire harness is loose enough to come off, is it possible to fix that?
Hi christian! How did you solve this problem? That happened to me too...
Part number is C12N1320. They are available from a variety of sources.