Aller au contenu principal

BlackBerry 7280 Battery Connector Replacement

Ce dont vous avez besoin

  1. BlackBerry 7280 Battery Connector Replacement, Battery: étape 1, image 1 de 3 BlackBerry 7280 Battery Connector Replacement, Battery: étape 1, image 2 de 3 BlackBerry 7280 Battery Connector Replacement, Battery: étape 1, image 3 de 3
    • With your thumb press down on the locking- button on the back of the BlackBerry 7280.

    • Slide the battery cover off the device.

  2. BlackBerry 7280 Battery Connector Replacement: étape 2, image 1 de 2 BlackBerry 7280 Battery Connector Replacement: étape 2, image 2 de 2
    • Remove the lithium-ion battery from the back of the device using your index finger.

  3. BlackBerry 7280 Battery Connector Replacement, SIM Card: étape 3, image 1 de 3 BlackBerry 7280 Battery Connector Replacement, SIM Card: étape 3, image 2 de 3 BlackBerry 7280 Battery Connector Replacement, SIM Card: étape 3, image 3 de 3
    • Hold the device with both hands.

    • Lift the SIM card holder using your thumb and index finger.

    • Remove the SIM card from the device.

  4. BlackBerry 7280 Battery Connector Replacement, Back Case: étape 4, image 1 de 2 BlackBerry 7280 Battery Connector Replacement, Back Case: étape 4, image 2 de 2
    • Using a Torx T6 screwdriver, remove all six 1/8 inch screws (marked in red) from the back case. Set screws aside.

    • The SIM card has been removed here to prevent damage to the card. This is recommended, but not not required.

  5. BlackBerry 7280 Battery Connector Replacement: étape 5, image 1 de 2 BlackBerry 7280 Battery Connector Replacement: étape 5, image 2 de 2
    • Use the plastic opening tool to pry the back case away from the front case.

  6. BlackBerry 7280 Battery Connector Replacement, Front Case: étape 6, image 1 de 2 BlackBerry 7280 Battery Connector Replacement, Front Case: étape 6, image 2 de 2
    • Using a Torx T6 screwdriver, remove the lone 1/8 inch screw that holds the upper metal bracket onto the larger metal bracket. Set aside the screw and the bracket.

  7. BlackBerry 7280 Battery Connector Replacement: étape 7, image 1 de 2 BlackBerry 7280 Battery Connector Replacement: étape 7, image 2 de 2
    • Remove the front plastic case from the metal bracket.

  8. BlackBerry 7280 Battery Connector Replacement, LCD Screen and Speaker: étape 8, image 1 de 2 BlackBerry 7280 Battery Connector Replacement, LCD Screen and Speaker: étape 8, image 2 de 2
    • Use the plastic opening tool to pry at the edge of the screen near the track-wheel.

  9. BlackBerry 7280 Battery Connector Replacement, Logic Board: étape 9, image 1 de 1
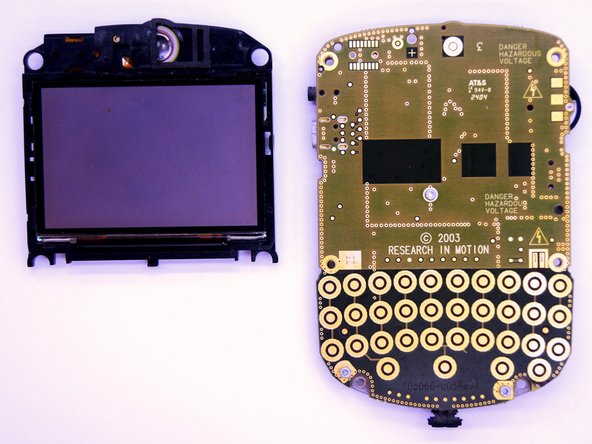
    • Use a Torx T6 screwdriver to remove the 3 1/8 inch screws shown.

  10. BlackBerry 7280 Battery Connector Replacement: étape 10, image 1 de 1
    • Remove the logic board with your hands.

  11. BlackBerry 7280 Battery Connector Replacement, Battery Connector: étape 11, image 1 de 2 BlackBerry 7280 Battery Connector Replacement, Battery Connector: étape 11, image 2 de 2
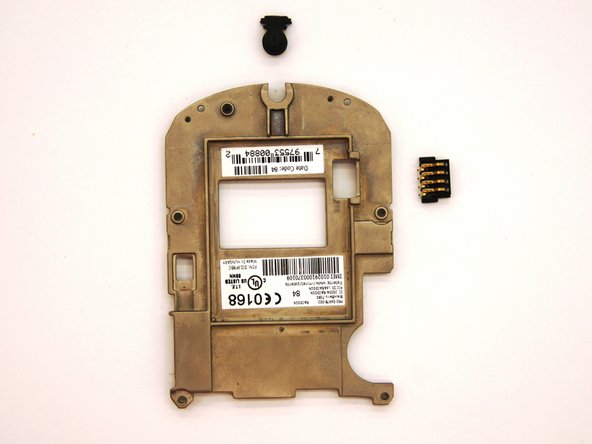
    • To remove the battery connector simply slide it out from the metal bracket using your hand.

Conclusion

To reassemble your device, follow these instructions in reverse order.

Andrew Catlin

Membre depuis le 03/11/13

16 Réputation

3 tutoriels rédigés

Équipe

Clemson, Team 12-2, Benson Spring 2013 Membre de l'équipe Clemson, Team 12-2, Benson Spring 2013

CLEM-BENSON-S13S12G2

4 membres

11 tutoriels rédigés

0 commentaires

Ajouter un commentaire

Nombre de vues :

Dernières 24 heures : 0

7 derniers jours : 1

30 derniers jours : 3

Total : 267