Introduction
The circuit board is a vital component to the function of the Braun Series 7 790cc-7 charging base. Many consumers may discard the charging base if it malfunctions rather than replace the circuit board. This can be expensive but by replacing the circuit board the razor can be used for an extended period of time. With the use of this Replacement Guide, one can easily change the circuit board in the charging base when it is required.
Ce dont vous avez besoin
-
-
-
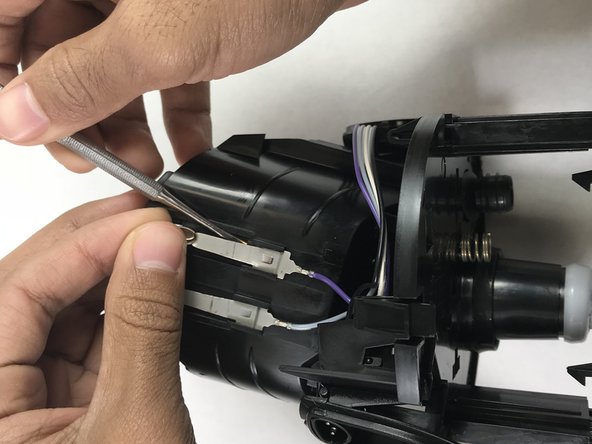
Remove solder from wire harness leading to the charging base motor.
-


To reassemble your device, follow these instructions in reverse order.
To reassemble your device, follow these instructions in reverse order.
Annulation : je n'ai pas terminé ce tutoriel.
3 autres ont terminé cette réparation.
Équipe

IUPUI, Team S3-G6, Harley Fall 2017 Membre de l'équipe IUPUI, Team S3-G6, Harley Fall 2017
IUPUI-HARLEY-F17S3G6
3 membres
5 tutoriels rédigés
8 commentaires
Step 6-8
If you are only doing an investigation you can release the board enough to inspect and reconnect all connectors without desoldering. This was enough to fix my problems. I found it easier to pull the bottom of the board forward and down, rather than force the tab at the top.
Ian has also not mentioned the 3 things that can fall off, and make reassembly tricky. All these needed to be carefully stored and repositioned on my reassembly.
1. The Base spring release button. Although it goes on the outside I refitted to the inner unit first
2. The carbon/rubber button contacts in the case. These fall off when not in contact with the pcb. They fit on very fine pins on the shell button covers.
3. The angular molding that sits in the front of the well. Needs to be fitted completely to the Base before reassemble
Martin, / Anyone,
Can someone provide pictures showing the reassemble process of the parts that fell out when I separated cover from the base (steps 6-8, as Martin Bird mentioned above)?
I have 2 small rubber pieces (assuming they go on the buttons on base, not exactly sure where they go), & the angular molding - not sure how this piece fits in the front somewhere?
But where do I find a replacement PCB?
I found it hard to put the charging base back together again. Seems like something was broken, a tab or two, and it won´t close all the way down. Now there´s a gap at the bottom that I am too lazy to fix (I have already opened and closed the damned unit five times and I got bored of it.)