Aller au contenu principal

Breville BKC600XL On/Off Switch Replacement

Ce dont vous avez besoin

  1. Breville BKC600XL On/Off Switch Replacement, Bottom Cover #1: étape 1, image 1 de 3 Breville BKC600XL On/Off Switch Replacement, Bottom Cover #1: étape 1, image 2 de 3 Breville BKC600XL On/Off Switch Replacement, Bottom Cover #1: étape 1, image 3 de 3
    • Use a Phillips #0 screwdriver to remove the following ten screws:

    • Four 18mm Phillips screws.

    • Four 9.75mm Phillips screws.

    • Two 8mm Phillips screws.

    • The cover will not remove entirely. Keep green ground wire attached to the cover.

  2. Breville BKC600XL On/Off Switch Replacement, Black Water Inlet: étape 2, image 1 de 2 Breville BKC600XL On/Off Switch Replacement, Black Water Inlet: étape 2, image 2 de 2
    • Remove the two 14.5 Phillips screws.

    • Ensure that only the water inlet valve can be moved.

  3. Breville BKC600XL On/Off Switch Replacement, Bottom Cover #2: étape 3, image 1 de 2 Breville BKC600XL On/Off Switch Replacement, Bottom Cover #2: étape 3, image 2 de 2
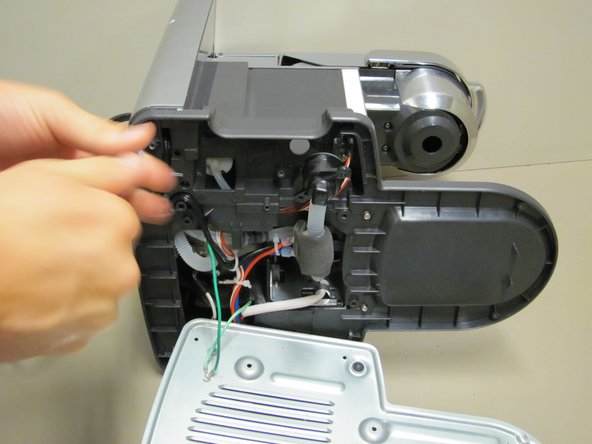
    • Use a Phillips #0 screwdriver to remove the following six screws:

    • Six 14.5mm Phillips screws.

  4. Breville BKC600XL On/Off Switch Replacement, Power Cord: étape 4, image 1 de 2 Breville BKC600XL On/Off Switch Replacement, Power Cord: étape 4, image 2 de 2
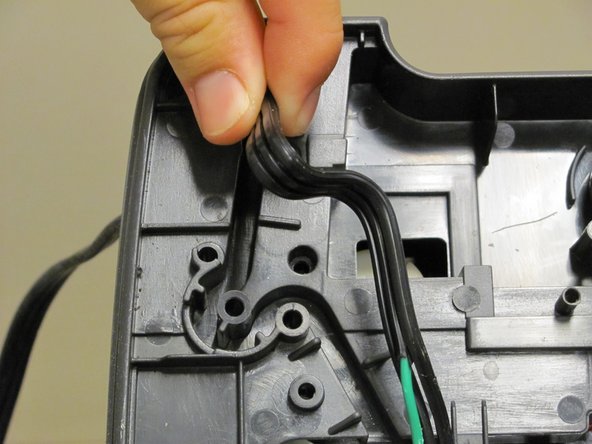
    • Remove the power cord from the groove. (the black cord that leads into the green wire.)

    • This creates more slack in the wire to give you more room to work with.

    • DO NOT remove green wire from the cover its attached to.

  5. Breville BKC600XL On/Off Switch Replacement, On/Off Switch: étape 5, image 1 de 1
    • Carefully pull both the red and blue wires that covered at the tip.

    • Do not yank them out from the other end. Move them aside and out of the way.

  6. Breville BKC600XL On/Off Switch Replacement: étape 6, image 1 de 1
    • Carefully remove the On/Off Switch from its slot on the outside cover.

    • The wires for the switch need to be tied back into the wires that lead to the battery. If needed, use electrical tape.

Conclusion

To reassemble your device, follow these instructions in reverse order.

2 autres ont terminé cette réparation.

Antonio

Membre depuis le 09/26/12

120 Réputation

6 tutoriels rédigés

Équipe

Cal Poly, Team 1-3, Propen Fall 2012 Membre de l'équipe Cal Poly, Team 1-3, Propen Fall 2012

CPSU-PROPEN-F12S1G3

4 membres

6 tutoriels rédigés

2 commentaires

Any source for the switch?

Mark Bell - Réponse

Thanks to this great post, I replaced my Breville BKC700XL On/Off Switch. The momentary switch is JR Products 12815 Black SPST Mini Mom-On/Off Switch, $8 on Amazon. https://www.amazon.com/dp/B002UC6QY0?psc...

Now, my Breville single serve is like new. I almost ordered a new machine, then I found ifixit. Kudos to you guys.

Boyd Gilbert - Réponse

Ajouter un commentaire

Nombre de vues :

Dernières 24 heures : 0

7 derniers jours : 2

30 derniers jours : 18

Total : 3,537