Aller au contenu principal

Dell Inspiron N4010 Keyboard Replacement

Ce dont vous avez besoin

  1. Dell Inspiron N4010 Keyboard Replacement, Battery: étape 1, image 1 de 1
    • Make sure the laptop is not plugged into any wall outlets or the charger

    • Unlock the battery by sliding the right-hand switch to the right.

  2. Dell Inspiron N4010 Keyboard Replacement: étape 2, image 1 de 2 Dell Inspiron N4010 Keyboard Replacement: étape 2, image 2 de 2
    • While holding the left-hand switch to the left position, pull the battery away from the laptop.

  3. Dell Inspiron N4010 Keyboard Replacement: étape 3, image 1 de 1
    • The battery is now fully removed and the laptop will not power on without it.

  4. Dell Inspiron N4010 Keyboard Replacement, Keyboard: étape 4, image 1 de 3 Dell Inspiron N4010 Keyboard Replacement, Keyboard: étape 4, image 2 de 3 Dell Inspiron N4010 Keyboard Replacement, Keyboard: étape 4, image 3 de 3
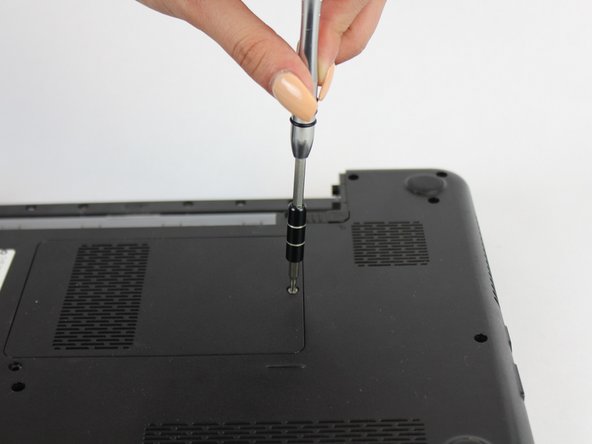
    • Using the #0 Philips head, unscrew the indicated screw.

    • Carefully pull the RAM cover up and away.

  5. Dell Inspiron N4010 Keyboard Replacement: étape 5, image 1 de 1
    • Unscrew the indicated 5.7mm screw beneath the RAM Cover.

    • Remove another screw above the battery release tab

  6. Dell Inspiron N4010 Keyboard Replacement: étape 7, image 1 de 2 Dell Inspiron N4010 Keyboard Replacement: étape 7, image 2 de 2
    • Using a thin plastic tool (such as a guitar pick or spudger) at the top of the keyboard just above the F7 key, gently pry the keyboard away.

    • Move the spudger to either end at the top of the keyboard to fully undo all plastic clips.

  7. Dell Inspiron N4010 Keyboard Replacement: étape 8, image 1 de 2 Dell Inspiron N4010 Keyboard Replacement: étape 8, image 2 de 2
    • Carefully tip the keyboard upwards and pull it slightly away from the body of the laptop.

    • Be careful not to put stress on the ribbon cable below.

  8. Dell Inspiron N4010 Keyboard Replacement: étape 9, image 1 de 2 Dell Inspiron N4010 Keyboard Replacement: étape 9, image 2 de 2
    • Carefully unclip the ribbon cable by tipping the keyboard towards the screen.

    • The keyboard is now completely disconnected.

Conclusion

To reassemble your device, follow these instructions in reverse order.

2 autres ont terminé cette réparation.

Jonathan Sellier

Membre depuis le 09/26/17

952 Réputation

7 tutoriels rédigés

Équipe

USF Tampa, Team S13-G5, Boczar Fall 2017 Membre de l'équipe USF Tampa, Team S13-G5, Boczar Fall 2017

USFT-BOCZAR-F17S13G5

5 membres

9 tutoriels rédigés

Un commentaire

Ajouter un commentaire

Nombre de vues :

Dernières 24 heures : 1

7 derniers jours : 1

30 derniers jours : 10

Total : 979