Introduction
This guide will show you step by step how to replace the motherboard on the GE digital messaging system. You will see how to disassemble and reassemble the casing of the device.
Ce dont vous avez besoin
-
-
Begin by looking at the bottom face of the device. Use tweezers to remove the four foam pads which are covering the four screws.
-
-
-
Use a Phillips head #2 screwdriver to remove the four screws from the bottom of the device. These screw heads are sized 5.3mm (or .209").
-
-
-
Remove the back casing panel by gently pulling back on it until you are able to reach inside. Gently pull the microphone out of its housing. This allows you to pull the device apart.
-
-
-
-
Use a soldering iron to heat up the two solder connections where the speaker wire is attached to the motherboard. This will separate the speaker from the board.
-
-
-
Remove the two screws holding the motherboard to the casing. Use a Phillps head #2 screwdriver.
-
-
-
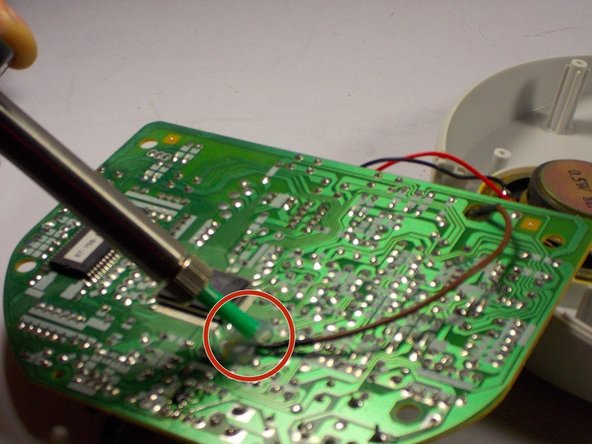
Use the soldering iron to heat up the two solder connections where the microphone wires are attached to on the motherboard. This will separate the microphone from the board.
-
-
-
Once the two screws holding the motherboard in place are removed, the motherboard can be taken out of the device and replaced.
-


To reassemble your device, follow these instructions in reverse order.
To reassemble your device, follow these instructions in reverse order.
Annulation : je n'ai pas terminé ce tutoriel.
Une autre personne a terminé cette réparation.
Équipe

UMass Dartmouth, Team 4-6, Miles Fall 2014 Membre de l'équipe UMass Dartmouth, Team 4-6, Miles Fall 2014
UMASSD-MILES-F14S4G6
3 membres
3 tutoriels rédigés