Aller au contenu principal

Justin Bieber Concert Microphone Printed Circuit Board (PCB) Replacement

Ce dont vous avez besoin

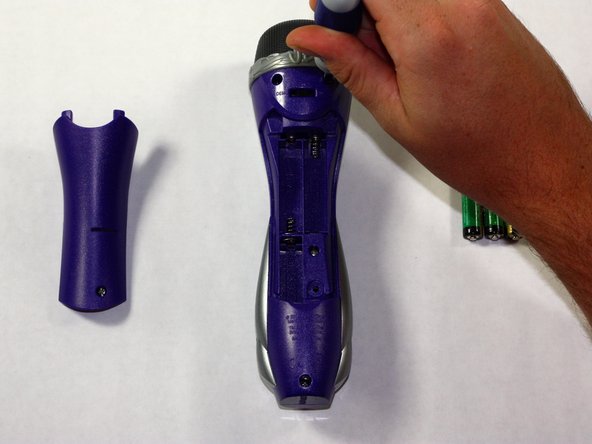
  1. Justin Bieber Concert Microphone Printed Circuit Board (PCB) Replacement, Removing back panel: étape 1, image 1 de 2 Justin Bieber Concert Microphone Printed Circuit Board (PCB) Replacement, Removing back panel: étape 1, image 2 de 2
    Outil utilisé dans cette étape :
    Flathead 1.5 mm Screwdriver
    $5.49
    J'achète
    • Remove the back panel of the device by unscrewing the single #8 11.6 mm Flathead screw on the back of the device.

  2. Justin Bieber Concert Microphone Printed Circuit Board (PCB) Replacement, Removing batteries: étape 2, image 1 de 1
    • Remove the 3 AAA batteries from the device.

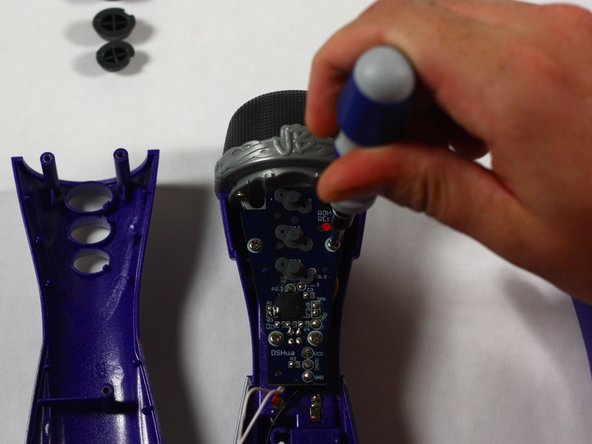
  3. Justin Bieber Concert Microphone Printed Circuit Board (PCB) Replacement, Removing back half of device: étape 3, image 1 de 2 Justin Bieber Concert Microphone Printed Circuit Board (PCB) Replacement, Removing back half of device: étape 3, image 2 de 2
    • Unscrew the other 4, #8 11.6 mm Phillips Head screws to remove the entire back half of the device.

    • Pull apart the device once screws are loose, splitting the device in half.

  4. Justin Bieber Concert Microphone Printed Circuit Board (PCB) Replacement, Positioning device: étape 4, image 1 de 1
    • Keeping all wires connected to their attachments, place the front half of the device face down.

  5. Justin Bieber Concert Microphone Printed Circuit Board (PCB) Replacement, Inspecting PCB: étape 5, image 1 de 1
    • Inspect the printed circuit board for any breaks or cracks.

  6. Justin Bieber Concert Microphone Printed Circuit Board (PCB) Replacement, Removing PCB: étape 6, image 1 de 2 Justin Bieber Concert Microphone Printed Circuit Board (PCB) Replacement, Removing PCB: étape 6, image 2 de 2
    • Remove the 2, #8 11.7 mm Phillips Head screws as well as the 2, #8 7.5 mm screws on the printed circuit board.

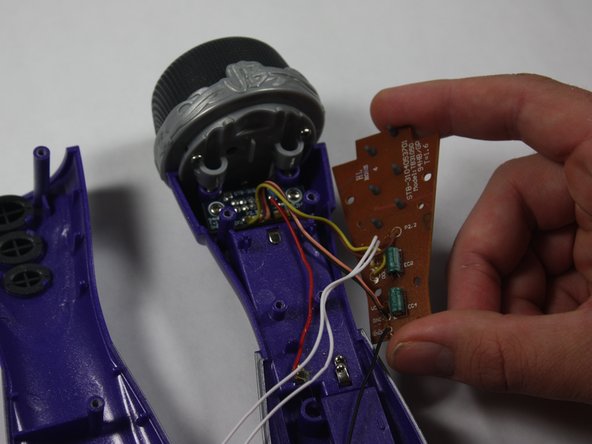
  7. Justin Bieber Concert Microphone Printed Circuit Board (PCB) Replacement, Replacing PCB: étape 7, image 1 de 2 Justin Bieber Concert Microphone Printed Circuit Board (PCB) Replacement, Replacing PCB: étape 7, image 2 de 2
    • Disconnect all wires from the PCB

    • Remove the damaged PCB from the microphone

    • Place new PCB in the Justin Bieber Concert Microphone.

    • Connect all the wires to the new PCB using this soldering guide.

Conclusion

To reassemble your device, follow these instructions in reverse order.

Mike Seyman

Membre depuis le 10/19/14

437 Réputation

4 tutoriels rédigés

Équipe

Baylor, Team 4-1, Williams Fall 2014 Membre de l'équipe Baylor, Team 4-1, Williams Fall 2014

BU-WILLIAMS-F14S4G1

3 membres

4 tutoriels rédigés

0 commentaires

Ajouter un commentaire

Nombre de vues :

Dernières 24 heures : 0

7 derniers jours : 0

30 derniers jours : 0

Total : 289