Aller au contenu principal

Lenovo G40-30 Speaker Replacement

Ce dont vous avez besoin

  1. Lenovo G40-30 Speaker Replacement, Battery: étape 1, image 1 de 3 Lenovo G40-30 Speaker Replacement, Battery: étape 1, image 2 de 3 Lenovo G40-30 Speaker Replacement, Battery: étape 1, image 3 de 3
    • At the top of the laptop you will see two switches, like in image one and two.

    • Pull the switches outwards with your thumb, towards the unlocked lock.

  2. Lenovo G40-30 Speaker Replacement: étape 2, image 1 de 3 Lenovo G40-30 Speaker Replacement: étape 2, image 2 de 3 Lenovo G40-30 Speaker Replacement: étape 2, image 3 de 3
    • Once both switches are pulled, the battery should pop out.

  3. Lenovo G40-30 Speaker Replacement: étape 3, image 1 de 1
    • Now you are ready to insert your new battery.

  4. Lenovo G40-30 Speaker Replacement, Keyboard: étape 4, image 1 de 2 Lenovo G40-30 Speaker Replacement, Keyboard: étape 4, image 2 de 2
    • Use a JIS #1 screwdriver to remove the two 7 mm screws.

  5. Lenovo G40-30 Speaker Replacement: étape 5, image 1 de 2 Lenovo G40-30 Speaker Replacement: étape 5, image 2 de 2
    • Remove the back panel by sliding it away from the battery.

  6. Lenovo G40-30 Speaker Replacement: étape 6, image 1 de 1
    • Use a JIS #1 screwdriver to remove the three 7 mm screws.

  7. Lenovo G40-30 Speaker Replacement: étape 7, image 1 de 2 Lenovo G40-30 Speaker Replacement: étape 7, image 2 de 2
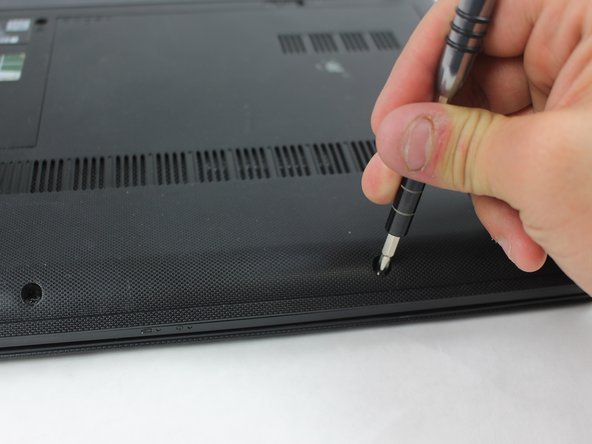
    • Wedge the plastic opening tool in-between the keyboard and the base of the laptop.

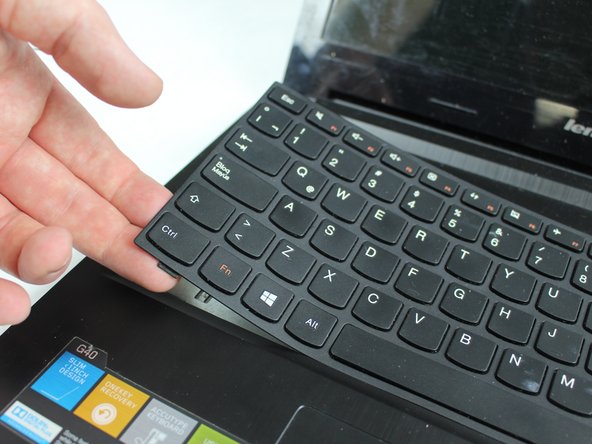
    • Continue using the plastic opening tool to pry around the edge until the keyboard is completely freed form the frame.

    • The keyboard should only be connected by a ribbon on the underside of the keyboard.

    • It is recommended that you slowly pull the keyboard out as your move around the edge. As in picture 2.

    • Be careful not to pull the keyboard too far away from the face as it will damage the data ribbon.

  8. Lenovo G40-30 Speaker Replacement: étape 8, image 1 de 3 Lenovo G40-30 Speaker Replacement: étape 8, image 2 de 3 Lenovo G40-30 Speaker Replacement: étape 8, image 3 de 3
    • Use the tweezers to lift the black hinge on the ribbon connector.

    • Then pull the ribbon from the connector and remove the keyboard from the laptop.

  9. Lenovo G40-30 Speaker Replacement: étape 9, image 1 de 1
    • Now your keyboard is free to be replaced!

  10. Lenovo G40-30 Speaker Replacement, Hard Drive: étape 10, image 1 de 2 Lenovo G40-30 Speaker Replacement, Hard Drive: étape 10, image 2 de 2
    • Unscrew four 4mm JIS #0 screws.

  11. Lenovo G40-30 Speaker Replacement: étape 11, image 1 de 3 Lenovo G40-30 Speaker Replacement: étape 11, image 2 de 3 Lenovo G40-30 Speaker Replacement: étape 11, image 3 de 3
    • After you have the screws out apply pressure with your thumb and slide the hard drive to the left.

    • When the hard drive is completely left gently pull up on the right corner.

  12. Lenovo G40-30 Speaker Replacement, Speaker: étape 12, image 1 de 2 Lenovo G40-30 Speaker Replacement, Speaker: étape 12, image 2 de 2
    • Remove the nine 7mm screws with a JIS #0 screwdriver.

  13. Lenovo G40-30 Speaker Replacement: étape 13, image 1 de 1
    • Using the plastic opening tool split open the laptop on the ends. Starting from one side to the other.

  14. Lenovo G40-30 Speaker Replacement: étape 14, image 1 de 3 Lenovo G40-30 Speaker Replacement: étape 14, image 2 de 3 Lenovo G40-30 Speaker Replacement: étape 14, image 3 de 3
    • These two are the speakers.

    • This is the connector.

    • Unscrew the two 4mm JIS #0 screws.

  15. Lenovo G40-30 Speaker Replacement: étape 15, image 1 de 3 Lenovo G40-30 Speaker Replacement: étape 15, image 2 de 3 Lenovo G40-30 Speaker Replacement: étape 15, image 3 de 3
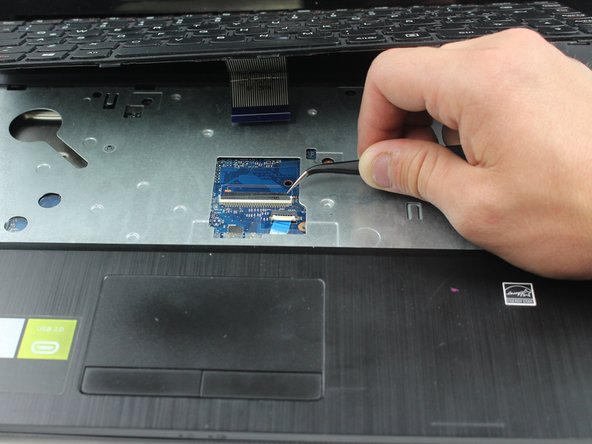
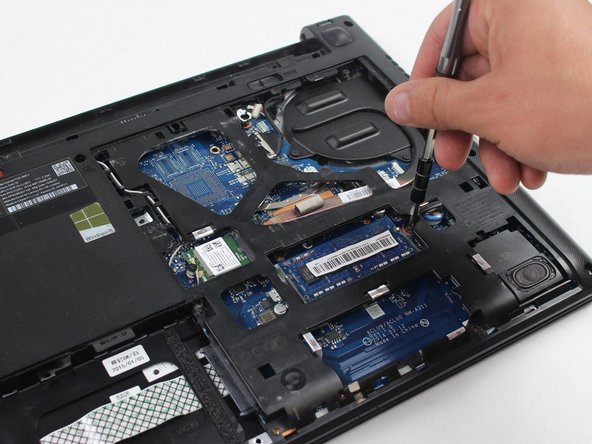
    • In order to remove the speakers you must first pull back the blue circuitry that covers the speakers.

    • Then, remove the left speaker by pulling it up and off the prongs holding it. Repeat this step for the right side

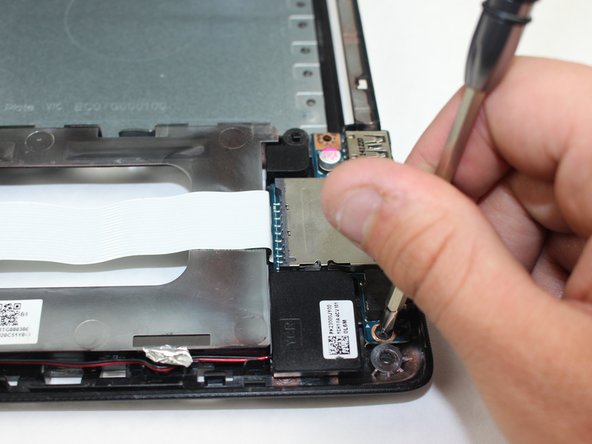
    • Next, use the tweezers to pull the connector out away from the screen.

  16. Lenovo G40-30 Speaker Replacement: étape 16, image 1 de 1
    • Now you are ready to install your new speakers.

Conclusion

To reassemble your device, follow these instructions in reverse order.

Une autre personne a terminé cette réparation.

Randall

Membre depuis le 02/08/18

139 Réputation

1 tutoriel rédigé

Équipe

Sam Houston State, Team S16-G4, Nardone Spring 2018 Membre de l'équipe Sam Houston State, Team S16-G4, Nardone Spring 2018

SHSU-NARDONE-S18S16G4

5 membres

5 tutoriels rédigés

0 commentaires

Ajouter un commentaire

Nombre de vues :

Dernières 24 heures : 0

7 derniers jours : 0

30 derniers jours : 6

Total : 1,527