Aller au contenu principal

Lenovo IdeaPad N580 CPU Replacement

Ce dont vous avez besoin

  1. Lenovo IdeaPad N580 CPU Replacement, Battery: étape 1, image 1 de 1
    • Turn over the device so that the bottom is facing up. Make sure the hinged side is facing you.

  2. Lenovo IdeaPad N580 CPU Replacement: étape 2, image 1 de 1
    • Move the right switch towards the right until it clicks in place. You should then see the color red reveal from where the switch was originally.

  3. Lenovo IdeaPad N580 CPU Replacement: étape 3, image 1 de 1
    • Now take your left hand and slide the left switch to the left.

    • This switch will not click in place like the other switch, so make sure to keep your left hand on the switch.

  4. Lenovo IdeaPad N580 CPU Replacement: étape 4, image 1 de 1
    • Take your free hand and place it on the battery. Gently slide it away from its slot.

  5. Lenovo IdeaPad N580 CPU Replacement, Keyboard and Trackpad: étape 5, image 1 de 3 Lenovo IdeaPad N580 CPU Replacement, Keyboard and Trackpad: étape 5, image 2 de 3 Lenovo IdeaPad N580 CPU Replacement, Keyboard and Trackpad: étape 5, image 3 de 3
    • Rotate the laptop so that now the hinge is facing away from you.

    • Remove the two 2.5 x 4.0 mm Phillips #0 screws from the underside of the laptop.

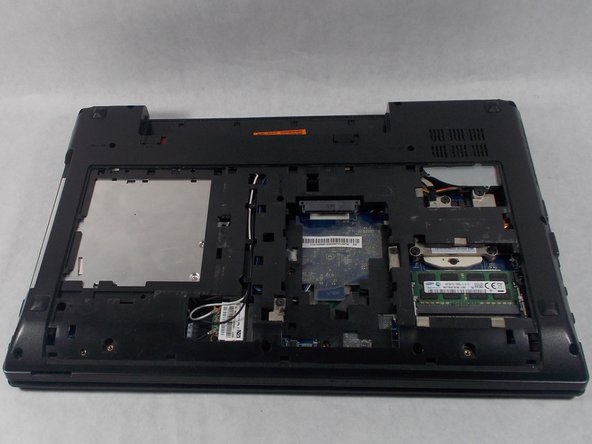
    • Slide the bottom panel towards you until it stops, and then carefully lift it off.

  6. Lenovo IdeaPad N580 CPU Replacement: étape 6, image 1 de 1
    • Remove the three 2.0 x 6.0 mm Phillips #0 screws located on the underside of the device.

  7. Lenovo IdeaPad N580 CPU Replacement: étape 7, image 1 de 3 Lenovo IdeaPad N580 CPU Replacement: étape 7, image 2 de 3 Lenovo IdeaPad N580 CPU Replacement: étape 7, image 3 de 3
    • Turn the laptop right side up and open the lid.

    • Using the spudger and your fingers, get in between the keyboard's edge and lift it up.

    • Carefully lift the keyboard ribbon cable out of the socket it is in.

  8. Lenovo IdeaPad N580 CPU Replacement: étape 8, image 1 de 2 Lenovo IdeaPad N580 CPU Replacement: étape 8, image 2 de 2
    • Remove the 2.5 x 6.0 mm Phillips #0 from the center of the device.

    • Close the laptop and place it face down once again.

  9. Lenovo IdeaPad N580 CPU Replacement: étape 9, image 1 de 1
    • If a hard disk drive is installed, remove the two 2.5 x 4.0 mm Phillips #0 screws.

    • Slide the hard disk drive out of its socket.

  10. Lenovo IdeaPad N580 CPU Replacement: étape 10, image 1 de 1
    • Remove the eleven 2.5 x 6.0 mm Phillips #0 screws.

    • Remove the three 2.0 x 3.0 mm flat head screws.

    • Remove the 2.5 x 4.0 mm Phillips #0 screw.

  11. Lenovo IdeaPad N580 CPU Replacement: étape 11, image 1 de 2 Lenovo IdeaPad N580 CPU Replacement: étape 11, image 2 de 2
    • Turn the laptop right side up and open the lid.

    • Disconnect the two ribbon cables from the center.

    • Lift the keyboard bezel (with trackpad) straight up and out.

  12. Lenovo IdeaPad N580 CPU Replacement, Motherboard: étape 12, image 1 de 1
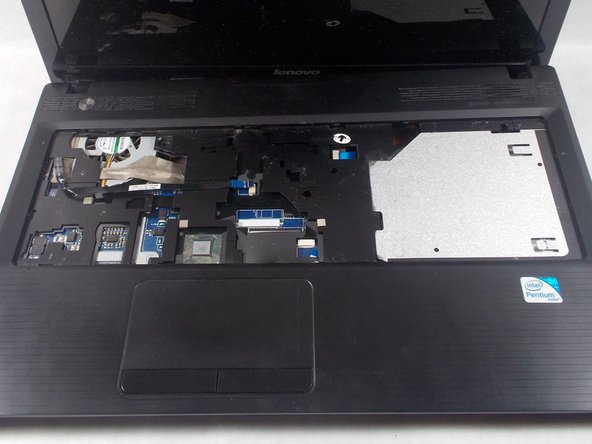
    • Remove the five ribbon cables on the top of the computer.

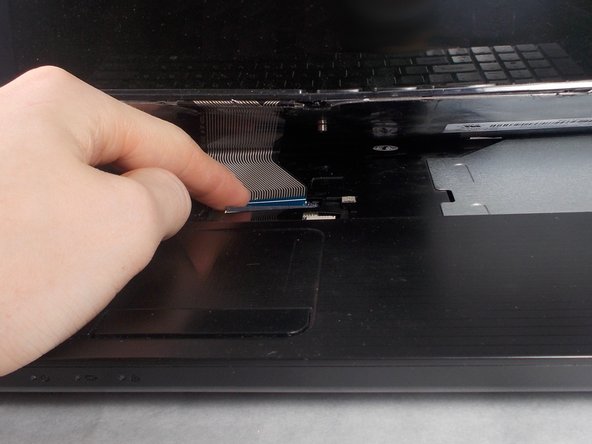
    • Gently remove the single cable from its socket.

  13. Lenovo IdeaPad N580 CPU Replacement: étape 13, image 1 de 1
    • Remove the three 2.5 x 3.0 mm Phillips #0 screws on the motherboard.

  14. Lenovo IdeaPad N580 CPU Replacement: étape 14, image 1 de 2 Lenovo IdeaPad N580 CPU Replacement: étape 14, image 2 de 2
    • Using your fingers or a spudger, lift the motherboard slightly.

    • Detach the single cable from underneath.

    • Lift the motherboard the rest of the way out.

  15. Lenovo IdeaPad N580 CPU Replacement, CPU: étape 15, image 1 de 1
    • Detach the cable next to the fan assembly.

  16. Lenovo IdeaPad N580 CPU Replacement: étape 16, image 1 de 2 Lenovo IdeaPad N580 CPU Replacement: étape 16, image 2 de 2
    • Remove the three 2.0 x 3.2 mm Phillips #0 screws from the fan.

    • Lift the fan straight off the motherboard.

  17. Lenovo IdeaPad N580 CPU Replacement: étape 17, image 1 de 2 Lenovo IdeaPad N580 CPU Replacement: étape 17, image 2 de 2
    • Using a flathead screwdriver, turn the beige lock to counterclockwise to unlocked.

  18. Lenovo IdeaPad N580 CPU Replacement: étape 18, image 1 de 1
    • Lift the CPU out of the socket.

    • Upon replacing the CPU and re-locking back in place, remember to apply thermal paste in order to prevent overheating.

Conclusion

To reassemble your device, follow these instructions in reverse order.

5 autres ont terminé cette réparation.

Alex Amorim

Membre depuis le 03/19/18

907 Réputation

5 tutoriels rédigés

Équipe

UMass Dartmouth, Team S5-G2, Peak Spring 2018 Membre de l'équipe UMass Dartmouth, Team S5-G2, Peak Spring 2018

UMASSD-PEAK-S18S5G2

2 membres

5 tutoriels rédigés

Un commentaire

süper olmuş eline sağlık çok açıklayıcı ve başarılı olmuş teşekkür ederim

Ümit Kocamanoglu - Réponse

Ajouter un commentaire

Nombre de vues :

Dernières 24 heures : 0

7 derniers jours : 1

30 derniers jours : 7

Total : 1,083