Aller au contenu principal

Mad Catz FightPad PRO Joystick Replacement

Ce dont vous avez besoin

  1. Mad Catz FightPad PRO Joystick Replacement, Mad Catz FightPad PRO Joystick Replacement: étape 1, image 1 de 3 Mad Catz FightPad PRO Joystick Replacement, Mad Catz FightPad PRO Joystick Replacement: étape 1, image 2 de 3 Mad Catz FightPad PRO Joystick Replacement, Mad Catz FightPad PRO Joystick Replacement: étape 1, image 3 de 3
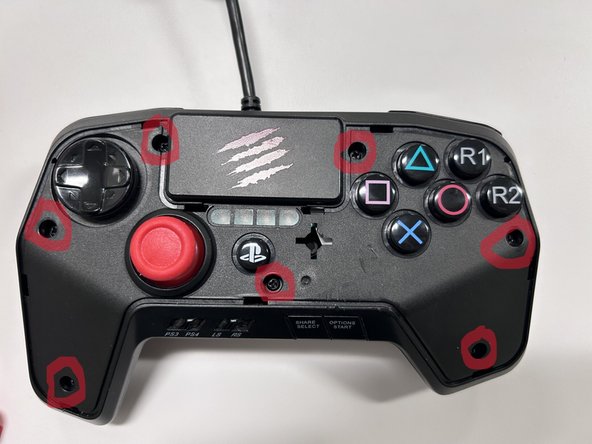
    • Remove the single 6 mm screw on the back shell of the controller using a Phillips #00 screwdriver.

  2. Mad Catz FightPad PRO Joystick Replacement, Step 2: étape 2, image 1 de 3 Mad Catz FightPad PRO Joystick Replacement, Step 2: étape 2, image 2 de 3 Mad Catz FightPad PRO Joystick Replacement, Step 2: étape 2, image 3 de 3
    • Remove the faceplate on the controller.

    • Be gentle as too much pressure can cause damage to the faceplate.

  3. Mad Catz FightPad PRO Joystick Replacement, Step 3: étape 3, image 1 de 3 Mad Catz FightPad PRO Joystick Replacement, Step 3: étape 3, image 2 de 3 Mad Catz FightPad PRO Joystick Replacement, Step 3: étape 3, image 3 de 3
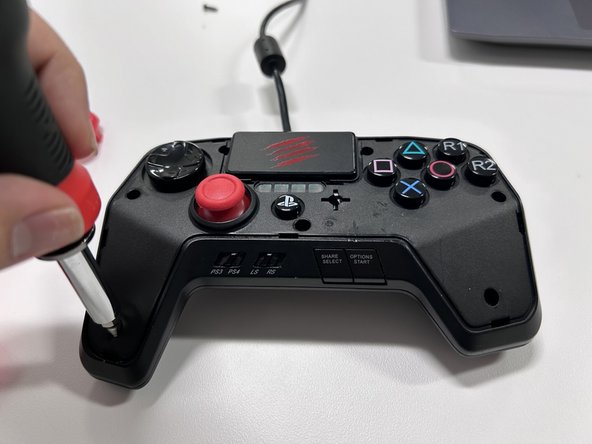
    • Remove the seven screws using a Phillips #00 screwdriver.

  4. Mad Catz FightPad PRO Joystick Replacement, Step 4: étape 4, image 1 de 2 Mad Catz FightPad PRO Joystick Replacement, Step 4: étape 4, image 2 de 2
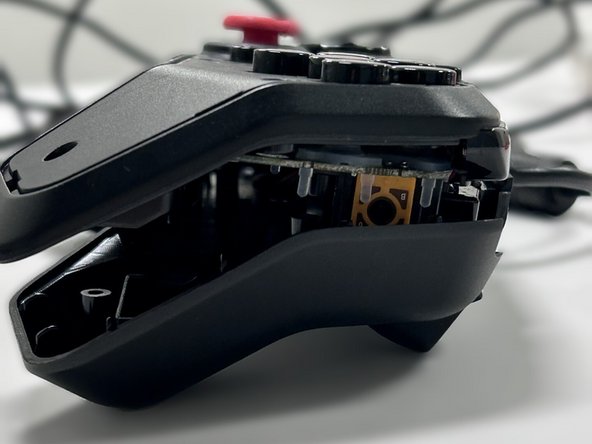
    • Detach the controller from the back shell.

    • Be gentle because you could damage the motherboard with too much pressure.

  5. Mad Catz FightPad PRO Joystick Replacement, Step 5: étape 5, image 1 de 3 Mad Catz FightPad PRO Joystick Replacement, Step 5: étape 5, image 2 de 3 Mad Catz FightPad PRO Joystick Replacement, Step 5: étape 5, image 3 de 3
    Outil utilisé dans cette étape :
    Tweezers
    $4.99
    J'achète
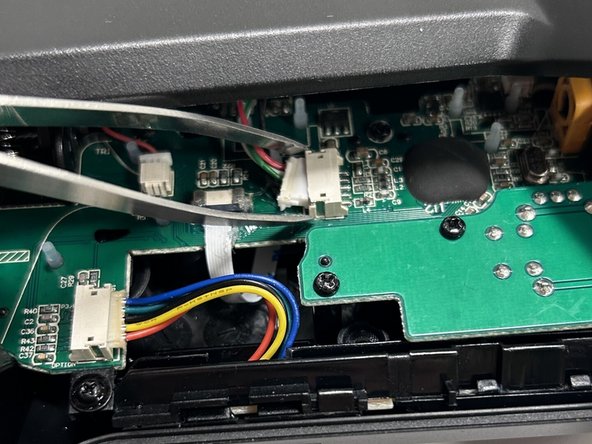
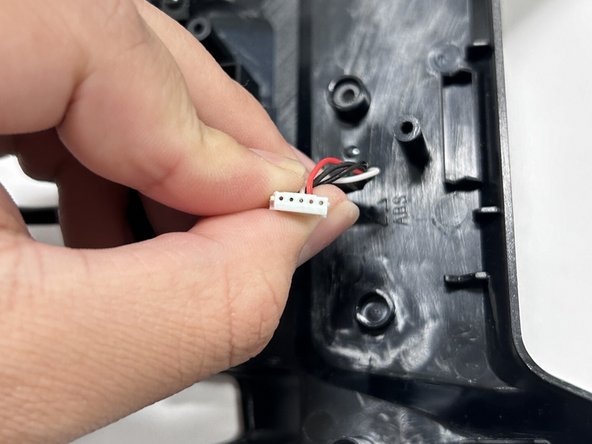
    • Using tweezers or your fingers, detach the wires connecting the motherboard to the rest of the controller.

  6. Mad Catz FightPad PRO Joystick Replacement, Step 6: étape 6, image 1 de 2 Mad Catz FightPad PRO Joystick Replacement, Step 6: étape 6, image 2 de 2
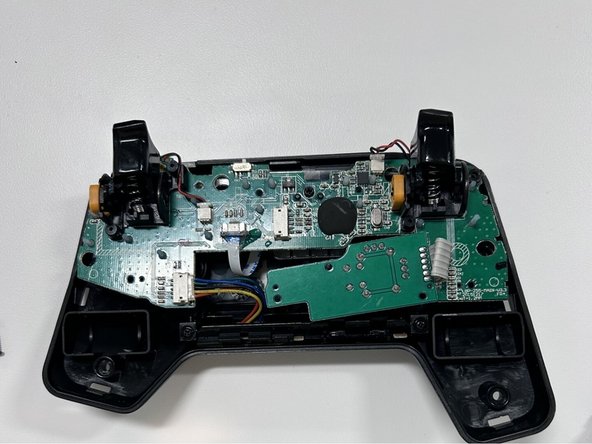
    • Remove the eight 6 mm screws from the motherboard using a Phillips #00 screwdriver.

    • Once the screws are removed, the inner parts of the controller will start to fall apart. Keeping the controller facedown will prevent any parts from falling out.

  7. Mad Catz FightPad PRO Joystick Replacement, Step 7: étape 7, image 1 de 2 Mad Catz FightPad PRO Joystick Replacement, Step 7: étape 7, image 2 de 2
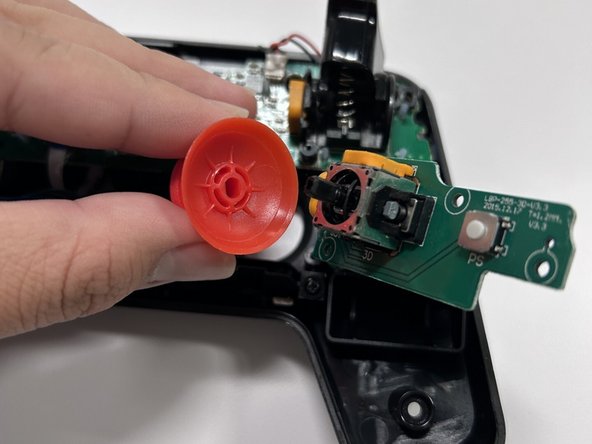
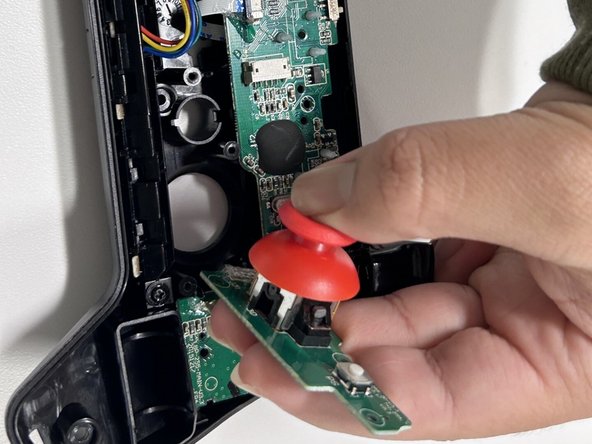
    • Using your fingers carefully remove the joystick until you hear a pop noise.

  8. Mad Catz FightPad PRO Joystick Replacement: étape 8, image 1 de 3 Mad Catz FightPad PRO Joystick Replacement: étape 8, image 2 de 3 Mad Catz FightPad PRO Joystick Replacement: étape 8, image 3 de 3
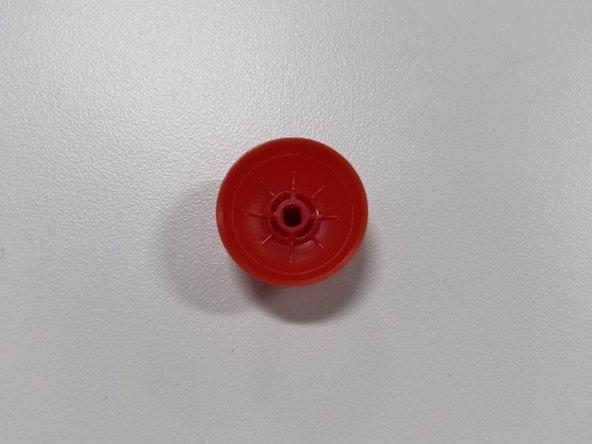
    • Make sure that the new joystick and motherboard pieces match before placing them together.

    • Hold down on the joystick until you hear a click noise.

Conclusion

To reassemble your device, follow these instructions in reverse order.

Une autre personne a terminé cette réparation.

Ian Pimentel

Membre depuis le 10/24/23

217 Réputation

1 tutoriel rédigé

Un commentaire

شكرا افادني هذا 🐤🤍

King 444 - Réponse

Ajouter un commentaire

Nombre de vues :

Dernières 24 heures : 1

7 derniers jours : 17

30 derniers jours : 44

Total : 147