Aller au contenu principal

Memorex CD Alarm Clock Radio PCB Board Replacement

Ce dont vous avez besoin

  1. Memorex CD Alarm Clock Radio PCB Board Replacement, Memorex CD Alarm Clock Radio: étape 1, image 1 de 3 Memorex CD Alarm Clock Radio PCB Board Replacement, Memorex CD Alarm Clock Radio: étape 1, image 2 de 3 Memorex CD Alarm Clock Radio PCB Board Replacement, Memorex CD Alarm Clock Radio: étape 1, image 3 de 3
    • Turn the clock radio over so the bottom is facing up.

    • Pull the tab upward and remove the cover from the battery compartment.

    • Remove the batteries.

  2. Memorex CD Alarm Clock Radio PCB Board Replacement: étape 2, image 1 de 3 Memorex CD Alarm Clock Radio PCB Board Replacement: étape 2, image 2 de 3 Memorex CD Alarm Clock Radio PCB Board Replacement: étape 2, image 3 de 3
    • Remove the five screws on the bottom of the device with a screwdriver.

    • Grasp the top and bottom and gently pull apart.

  3. Memorex CD Alarm Clock Radio PCB Board Replacement, PCB Board: étape 3, image 1 de 1
    • Remove the (5) 7mm screws with a Phillips #1 screwdriver and a pair of tweezers.

    • Using a magnetic tip screwdriver will prevent screw loss.

  4. Memorex CD Alarm Clock Radio PCB Board Replacement: étape 4, image 1 de 3 Memorex CD Alarm Clock Radio PCB Board Replacement: étape 4, image 2 de 3 Memorex CD Alarm Clock Radio PCB Board Replacement: étape 4, image 3 de 3
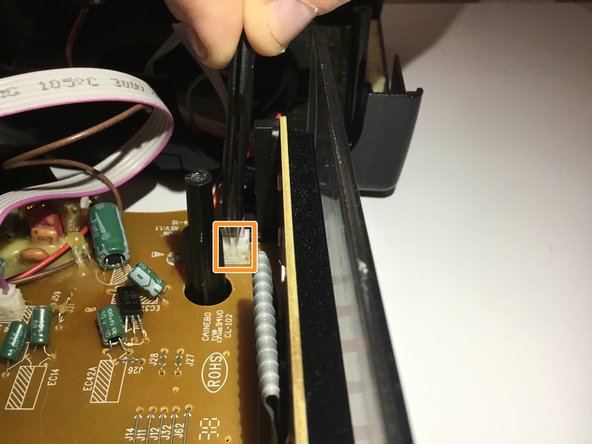
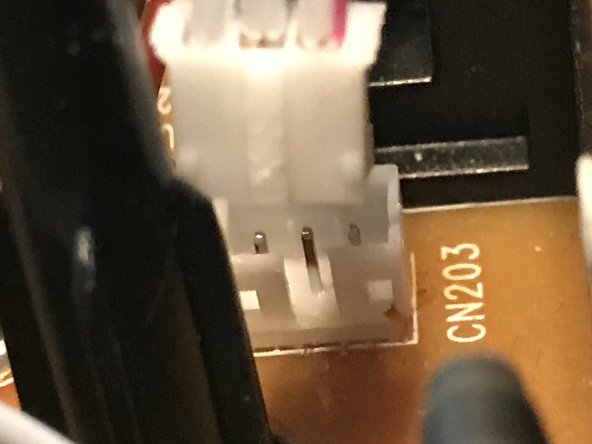
    • Locate the wiring harness.

    • Disconnect the wiring harness using the tweezers.

  5. Memorex CD Alarm Clock Radio PCB Board Replacement: étape 5, image 1 de 1
    • Remove the PCB board from the device.

    • Replace the broken motherboard with a new PCB board.

Conclusion

To reassemble your device, follow these instructions in reverse order.

Aubrey Frank

Membre depuis le 02/15/18

399 Réputation

4 tutoriels rédigés

Équipe

0 commentaires

Ajouter un commentaire

Nombre de vues :

Dernières 24 heures : 0

7 derniers jours : 0

30 derniers jours : 4

Total : 325