Aller au contenu principal

Motorola Moto G Power (2021) Frameless LCD Replacement

Ce dont vous avez besoin

  1. Motorola Moto G Power (2021) Frameless LCD Replacement, LCD (Frameless): étape 1, image 1 de 2 Motorola Moto G Power (2021) Frameless LCD Replacement, LCD (Frameless): étape 1, image 2 de 2
    • Heat up the back of the G Power with a heat gun or iOpener

    • Once the adhesive has softened, insert an opening pick and slide it carefully around the perimeter of the phone to open it.

    • Do not apply too much heat or pressure when prying. You risk bending the plastic back cover.

  2. Motorola Moto G Power (2021) Frameless LCD Replacement, remove plastic cover: étape 2, image 1 de 1
    • Remove the 19 Phillips screws shown on the midframe.

  3. Motorola Moto G Power (2021) Frameless LCD Replacement: étape 3, image 1 de 3 Motorola Moto G Power (2021) Frameless LCD Replacement: étape 3, image 2 de 3 Motorola Moto G Power (2021) Frameless LCD Replacement: étape 3, image 3 de 3
    • Use a prying tool to open up the plastic cover plates.

    • If you're using a Jimmy or other metal tool, be careful to not mar the plastic.

  4. Motorola Moto G Power (2021) Frameless LCD Replacement, Removing battery: étape 4, image 1 de 3 Motorola Moto G Power (2021) Frameless LCD Replacement, Removing battery: étape 4, image 2 de 3 Motorola Moto G Power (2021) Frameless LCD Replacement, Removing battery: étape 4, image 3 de 3
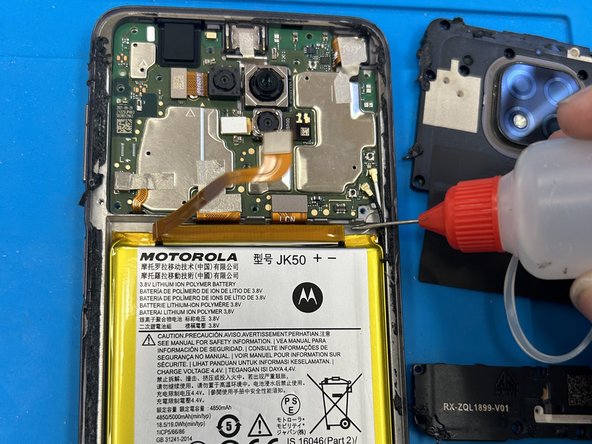
    • Unplug the battery connector with a spudger

    • Apply 100% isopropyl alcohol to the edges of the battery. Wait one minute to let the alcohol loosen the adhesive.

    • Pry the battery up carefully. Remove & set aside.

  5. Motorola Moto G Power (2021) Frameless LCD Replacement, remove lcd: étape 5, image 1 de 3 Motorola Moto G Power (2021) Frameless LCD Replacement, remove lcd: étape 5, image 2 de 3 Motorola Moto G Power (2021) Frameless LCD Replacement, remove lcd: étape 5, image 3 de 3
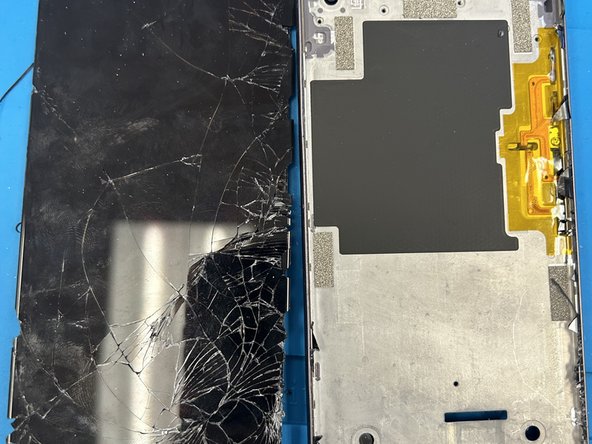
    • heat lcd(can use decent amount of heat to remove)

    • insert opening tool and slide around the perimeter of the LCD to slice the adhesive

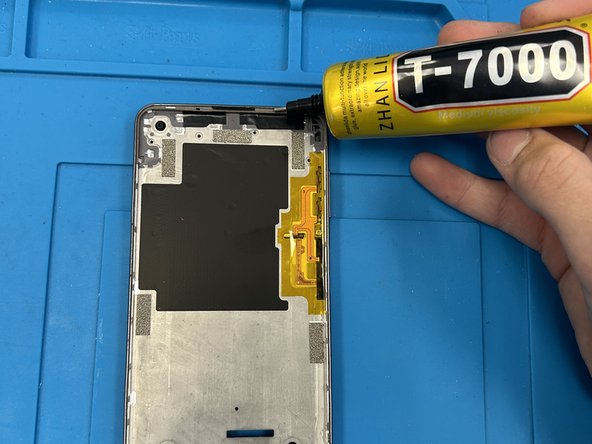
    • clean off old adhesive, then apply new glue(either double sided sticky tape or adhesive)

  6. Motorola Moto G Power (2021) Frameless LCD Replacement: étape 6, image 1 de 3 Motorola Moto G Power (2021) Frameless LCD Replacement: étape 6, image 2 de 3 Motorola Moto G Power (2021) Frameless LCD Replacement: étape 6, image 3 de 3
    • plug in new LCD cable

    • insert battery and plug in the battery connector

  7. Motorola Moto G Power (2021) Frameless LCD Replacement, put phone back together: étape 7, image 1 de 1
    • put plastic covers on and screw them in

    • remove most of the old adhesive

    • apply either double sided sticky tape or adhesive glue and put the plastic back cover on

    • if it is not sitting well try to heat it up and press it in a phone press or in between heavy books

Conclusion

You did it!

2 autres ont terminé cette réparation.

ryley niemi

Membre depuis le 02/05/21

259 Réputation

1 tutoriel rédigé

0 commentaires

Ajouter un commentaire

Nombre de vues :

Dernières 24 heures : 2

7 derniers jours : 21

30 derniers jours : 111

Total : 2,750