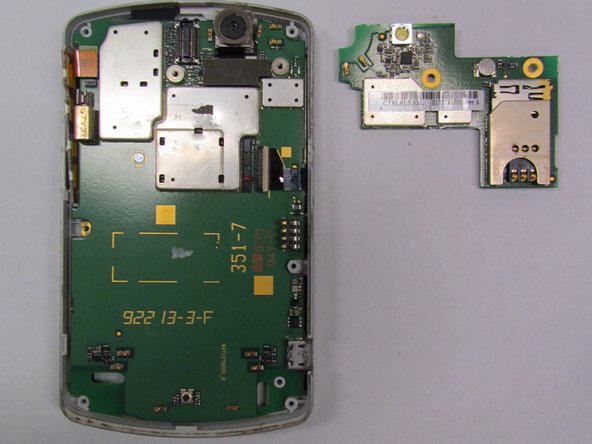
Aller au contenu principal

Motorola Q Global Camera Replacement

Ce dont vous avez besoin

  1. Motorola Q Global Camera Replacement, Battery: étape 1, image 1 de 1
    • Turn the phone face down.

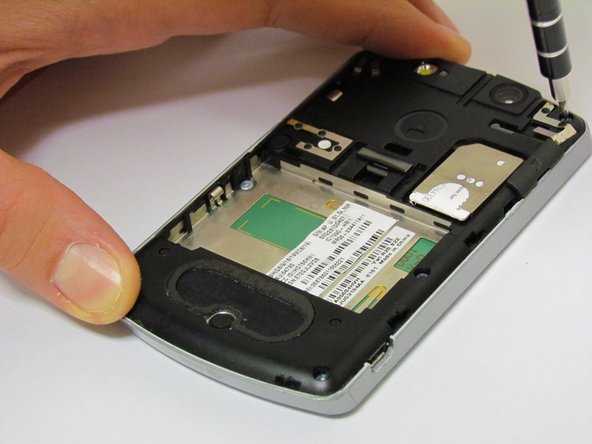
    • Press and hold the release button in the middle of the back panel.

    • Slide the bottom panel down to remove.

  2. Motorola Q Global Camera Replacement: étape 2, image 1 de 2 Motorola Q Global Camera Replacement: étape 2, image 2 de 2
    • Remove the battery pack by prying it out with a fingernail, screw driver or other opening tool at the tab shown.

    • When reinserting the battery, make sure the contacts in the battery are lined up with the contacts in the phone.

  3. Motorola Q Global Camera Replacement, Camera: étape 3, image 1 de 1
    • Press inward on the upper casing.

  4. Motorola Q Global Camera Replacement: étape 4, image 1 de 1
    • Slide the upper case to the right and lift up.

    • Lift the camera sticker so that it doesn't get damaged.

  5. Motorola Q Global Camera Replacement: étape 5, image 1 de 2 Motorola Q Global Camera Replacement: étape 5, image 2 de 2
    • Remove the six labeled screws with a T5 Torx Screwdriver.

  6. Motorola Q Global Camera Replacement: étape 6, image 1 de 1
    • Once the screws are removed, use the plastic opening tool to remove the black casing.

  7. Motorola Q Global Camera Replacement: étape 7, image 1 de 2 Motorola Q Global Camera Replacement: étape 7, image 2 de 2
    • Remove both screws on the mounted surface with a T5 screwdriver.

  8. Motorola Q Global Camera Replacement: étape 8, image 1 de 2 Motorola Q Global Camera Replacement: étape 8, image 2 de 2
    • Remove the glued, mounted surface by lifting it from underneath the SIM card slot by using the plastic opening tool.

  9. Motorola Q Global Camera Replacement: étape 9, image 1 de 1
    • Use the plastic opening tool to lift the camera from the phone.

  10. Motorola Q Global Camera Replacement: étape 10, image 1 de 1
    • The new camera can now be attached to the motherboard.

Conclusion

To reassemble your device, follow these instructions in reverse order.

Équipe

Cal Poly, Team 6-31, Regan Fall 2012 Membre de l'équipe Cal Poly, Team 6-31, Regan Fall 2012

CPSU-REGAN-F12S6G31

5 membres

9 tutoriels rédigés

0 commentaires

Ajouter un commentaire

Nombre de vues :

Dernières 24 heures : 0

7 derniers jours : 0

30 derniers jours : 0

Total : 650