Aller au contenu principal

Motorola Slvr L7 Front Panel Replacement

Ce dont vous avez besoin

  1. Motorola Slvr L7 Front Panel Replacement, Front Panel: étape 1, image 1 de 1
    • To ensure safety, discharge your phone battery below 25% before starting. A fully charged lithium-ion battery may cause a fire and/or explosion due to defects or damage.

    • Turn off your phone before beginning disassembly.

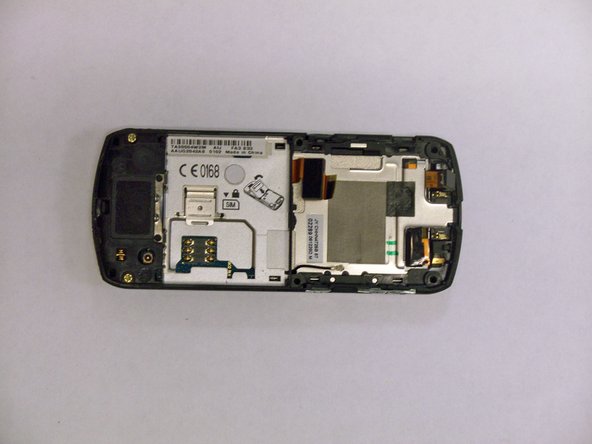
    • To replace the Front Panel, first begin by removing the battery.

    • Push down on the black tab located on the top center of the phone to access the battery.

  2. Motorola Slvr L7 Front Panel Replacement: étape 2, image 1 de 1
    • Remove the battery by pulling it away from the back of the phone.

  3. Motorola Slvr L7 Front Panel Replacement: étape 3, image 1 de 1
    • Using the T6 Torx Screwdriver, remove the four (4) T6 2mm Torx screws from the metal cover.

  4. Motorola Slvr L7 Front Panel Replacement: étape 4, image 1 de 2 Motorola Slvr L7 Front Panel Replacement: étape 4, image 2 de 2
    • Remove the metal cover by inserting the flat end of the iFixit Opening Tool under the side of the cover, prying it away from the phone.

  5. Motorola Slvr L7 Front Panel Replacement: étape 5, image 1 de 2 Motorola Slvr L7 Front Panel Replacement: étape 5, image 2 de 2
    • Carefully disconnect the two connectors from their sockets located on the motherboard using the flat end of the iFixit Opening Tool.

  6. Motorola Slvr L7 Front Panel Replacement: étape 6, image 1 de 1
    • Use the flat end of the iFixit Opening Tool to pry the antenna cable connectors from their sockets located on the motherboard.

    • Pull the antenna cable out to de-route it from the phone.

  7. Motorola Slvr L7 Front Panel Replacement: étape 7, image 1 de 1
    • Use the iFixit Opening Tool to pry the black plastic screw cover away from the bottom of the phone.

    • Because the cover is attached with adhesive, moderate force is needed to remove the plastic screw cover from the phone.

  8. Motorola Slvr L7 Front Panel Replacement: étape 8, image 1 de 2 Motorola Slvr L7 Front Panel Replacement: étape 8, image 2 de 2
    • Remove the frame by inserting the flat end of the iFixit Opening Tool under the frame and prying it away from the phone.

    • Because the frame is attached with adhesive, moderate force is needed to remove the frame from the phone.

Conclusion

To reassemble your device, follow these instructions in reverse order.

2 autres ont terminé cette réparation.

Jorge Trujillo

Membre depuis le 05/19/11

520 Réputation

4 tutoriels rédigés

Équipe

CSU Los Angeles, Team 1-1, Nelson Spring 2011 Membre de l'équipe CSU Los Angeles, Team 1-1, Nelson Spring 2011

CSULA-NELSON-S11S1G1

2 membres

4 tutoriels rédigés

0 commentaires

Ajouter un commentaire

Nombre de vues :

Dernières 24 heures : 0

7 derniers jours : 1

30 derniers jours : 2

Total : 2,964