Aller au contenu principal

PDP Afterglow Wired Xbox 360 Controller Joysticks Replacement

Ce dont vous avez besoin

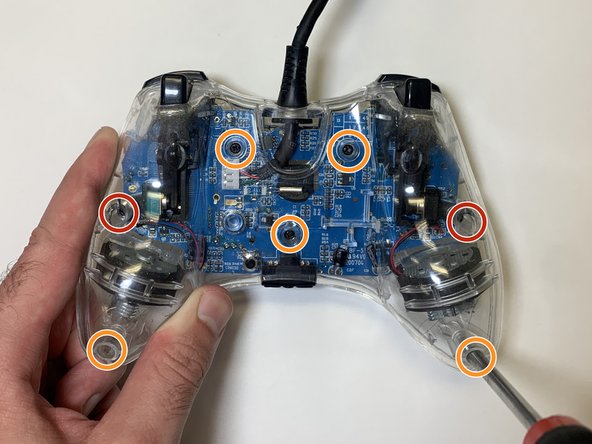
  1. PDP Afterglow Wired Xbox 360 Controller Joysticks Replacement, Joysticks: étape 1, image 1 de 1
    • Remove the two 11 mm screws from the back of the controller using a Phillips #0 screwdriver.

    • Remove the five 8 mm screws from the back of the controller using a Phillips #0 screwdriver.

  2. PDP Afterglow Wired Xbox 360 Controller Joysticks Replacement: étape 2, image 1 de 1
    • Remove the back cover from the controller and set it aside.

  3. PDP Afterglow Wired Xbox 360 Controller Joysticks Replacement: étape 3, image 1 de 1
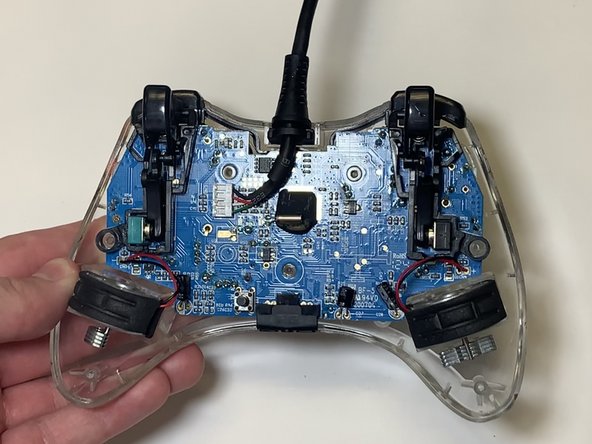
    • Remove the circuit board from the front casing.

    • Be cautious of disconnecting the vibration motors which are attached by thin wires.

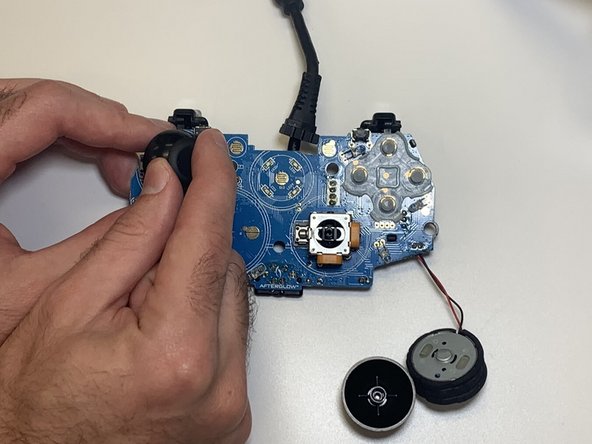
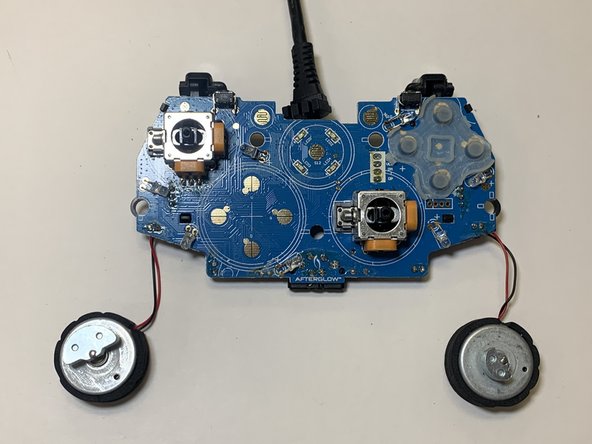
  4. PDP Afterglow Wired Xbox 360 Controller Joysticks Replacement: étape 4, image 1 de 3 PDP Afterglow Wired Xbox 360 Controller Joysticks Replacement: étape 4, image 2 de 3 PDP Afterglow Wired Xbox 360 Controller Joysticks Replacement: étape 4, image 3 de 3
    • Wiggle and pull the joystick until it comes off of the circuit board.

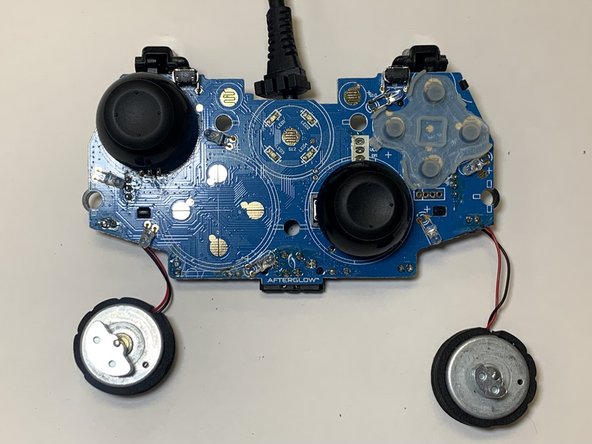
  5. PDP Afterglow Wired Xbox 360 Controller Joysticks Replacement: étape 5, image 1 de 2 PDP Afterglow Wired Xbox 360 Controller Joysticks Replacement: étape 5, image 2 de 2
    • Place the new joystick into position and press until the joystick makes a click.

  6. PDP Afterglow Wired Xbox 360 Controller Joysticks Replacement: étape 6, image 1 de 1
    • Place the circuit board and vibration motors back into the front casing.

  7. PDP Afterglow Wired Xbox 360 Controller Joysticks Replacement: étape 7, image 1 de 3 PDP Afterglow Wired Xbox 360 Controller Joysticks Replacement: étape 7, image 2 de 3 PDP Afterglow Wired Xbox 360 Controller Joysticks Replacement: étape 7, image 3 de 3
    • Place the back cover into position.

    • Reinsert the two 11 mm screws into the back of the controller using a Phillips #0 screwdriver.

    • Reinsert the five 8 mm screws into the back of the controller using a Phillips #0 screwdriver.

Ligne d'arrivée

Une autre personne a terminé cette réparation.

Dillon Earl Jones

Membre depuis le 09/28/21

149 Réputation

1 tutoriel rédigé

Équipe

0 commentaires

Ajouter un commentaire

Nombre de vues :

Dernières 24 heures : 6

7 derniers jours : 21

30 derniers jours : 78

Total : 2,633