Aller au contenu principal

Razer Blade Stealth 2016 Keyboard Replacement

Ce dont vous avez besoin
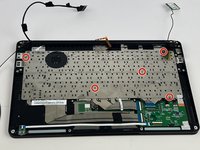
  1. Razer Blade Stealth 2016 Keyboard Replacement, Battery: étape 1, image 1 de 3 Razer Blade Stealth 2016 Keyboard Replacement, Battery: étape 1, image 2 de 3 Razer Blade Stealth 2016 Keyboard Replacement, Battery: étape 1, image 3 de 3
    • Use a Torx screwdriver to remove the eight 3 mm screws on the back case.

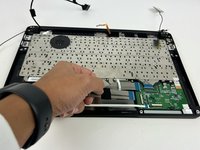
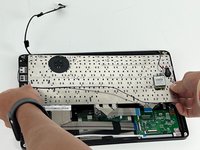
    • Remove the rear cover by prying up lightly starting in one of the corners.

  2. Razer Blade Stealth 2016 Keyboard Replacement: étape 2, image 1 de 2 Razer Blade Stealth 2016 Keyboard Replacement: étape 2, image 2 de 2
    • Use a Phillips screwdriver to remove the six screws securing the battery.

  3. Razer Blade Stealth 2016 Keyboard Replacement: étape 3, image 1 de 1
    • Unplug the battery connector from the motherboard.

    • Remove the battery from the device.

  4. Razer Blade Stealth 2016 Keyboard Replacement, Motherboard: étape 4, image 1 de 1
    • Remove the red and black cables that are attached to the motherboard.

  5. Razer Blade Stealth 2016 Keyboard Replacement: étape 5, image 1 de 1
    • Remove the four 3.4 mm screws around the black square using a T4 Torx screwdriver.

    • Remove the heatsink.

  6. Razer Blade Stealth 2016 Keyboard Replacement: étape 6, image 1 de 1
    • Remove the 3.4 mm screws to the cooling fans using a T4 Torx screwdriver.

    • Remove the cooling fans.

  7. Razer Blade Stealth 2016 Keyboard Replacement: étape 7, image 1 de 3 Razer Blade Stealth 2016 Keyboard Replacement: étape 7, image 2 de 3 Razer Blade Stealth 2016 Keyboard Replacement: étape 7, image 3 de 3
    • Remove the 3.4 mm screws on the perimeter of the motherboard using a T4 Torx screwdriver.

  8. Razer Blade Stealth 2016 Keyboard Replacement: étape 8, image 1 de 1
    • Remove the motherboard.

  9. Razer Blade Stealth 2016 Keyboard Replacement, Keyboard: étape 9, image 1 de 3 Razer Blade Stealth 2016 Keyboard Replacement, Keyboard: étape 9, image 2 de 3 Razer Blade Stealth 2016 Keyboard Replacement, Keyboard: étape 9, image 3 de 3
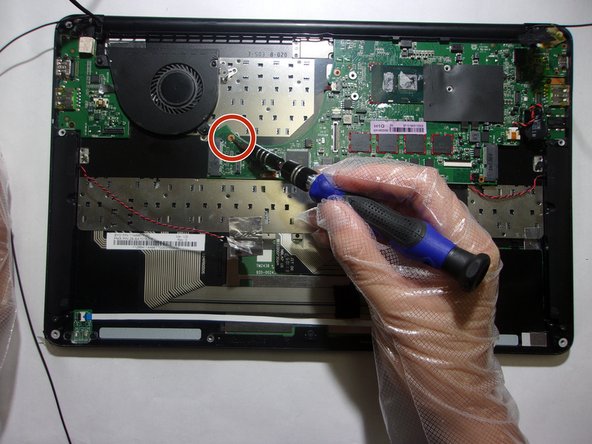
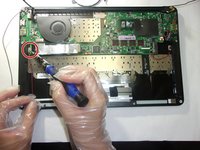
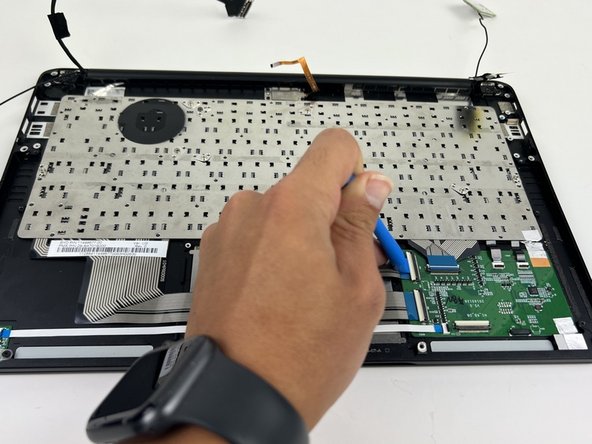
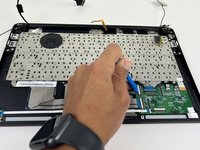
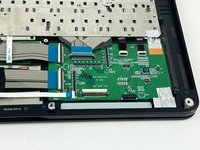
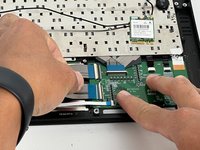
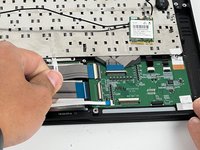
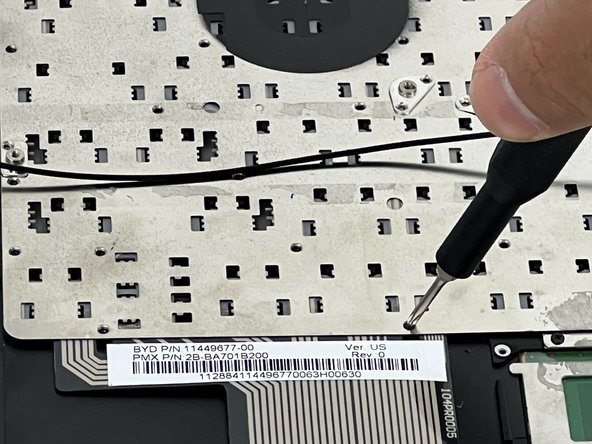
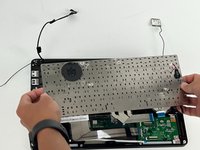
    • Flip all white tabs up to unlock three ZIF connectors using the opening tool.

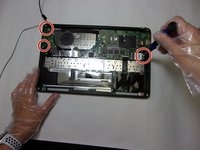
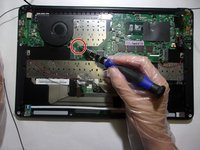
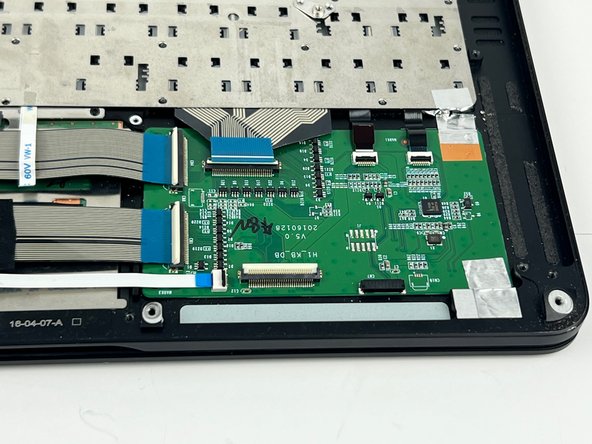
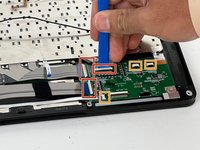
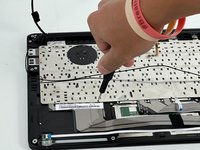
    • Flip all black tabs up to unlock the three ZIF connectors using the opening tool.

    • This is how the tabs look in the flipped up position.

  10. Razer Blade Stealth 2016 Keyboard Replacement: étape 10, image 1 de 3 Razer Blade Stealth 2016 Keyboard Replacement: étape 10, image 2 de 3 Razer Blade Stealth 2016 Keyboard Replacement: étape 10, image 3 de 3
    • Pull the cables out gently.

  11. Razer Blade Stealth 2016 Keyboard Replacement: étape 11, image 1 de 3 Razer Blade Stealth 2016 Keyboard Replacement: étape 11, image 2 de 3 Razer Blade Stealth 2016 Keyboard Replacement: étape 11, image 3 de 3
    • Remove fifty-five 3.4 mm keyboard screws with the T5 Torx screwdriver.

    • 5 screw locations are highlighted but locate all 55 screws and remove them.

  12. Razer Blade Stealth 2016 Keyboard Replacement: étape 12, image 1 de 3 Razer Blade Stealth 2016 Keyboard Replacement: étape 12, image 2 de 3 Razer Blade Stealth 2016 Keyboard Replacement: étape 12, image 3 de 3
    • Remove the keyboard from the laptop.

Conclusion

To reassemble your device, follow these instructions in reverse order.

0 commentaires

Ajouter un commentaire

Nombre de vues :

Dernières 24 heures : 1

7 derniers jours : 7

30 derniers jours : 40

Total : 836