Aller au contenu principal

RedOctane X-Plorer Whammy Bar Replacement

Ce dont vous avez besoin

  1. RedOctane X-Plorer Whammy Bar Replacement, Rear Case: étape 1, image 1 de 2 RedOctane X-Plorer Whammy Bar Replacement, Rear Case: étape 1, image 2 de 2
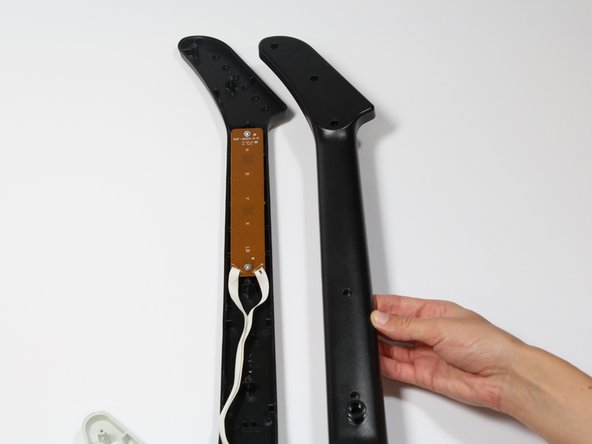
    • Remove the strap by pulling it off of the mounts located on the body and neck.

  2. RedOctane X-Plorer Whammy Bar Replacement: étape 2, image 1 de 3 RedOctane X-Plorer Whammy Bar Replacement: étape 2, image 2 de 3 RedOctane X-Plorer Whammy Bar Replacement: étape 2, image 3 de 3
    • Remove the nine 12mm Phillips #1 screws around the perimeter of the case with a screwdriver.

    • Remove the two 15mm Phillips #1 screws connecting the body panel to the neck panel with a screwdriver.

    • These screws can also be Torx on some models.

    • Pull off the rear case.

  3. RedOctane X-Plorer Whammy Bar Replacement: étape 3, image 1 de 3 RedOctane X-Plorer Whammy Bar Replacement: étape 3, image 2 de 3 RedOctane X-Plorer Whammy Bar Replacement: étape 3, image 3 de 3
    • Remove the five 12mm Phillips #1 screws along the neck with a screwdriver.

    • Pull off the top shell of the neck to expose the internal features.

  4. RedOctane X-Plorer Whammy Bar Replacement, Whammy Bar: étape 4, image 1 de 3 RedOctane X-Plorer Whammy Bar Replacement, Whammy Bar: étape 4, image 2 de 3 RedOctane X-Plorer Whammy Bar Replacement, Whammy Bar: étape 4, image 3 de 3
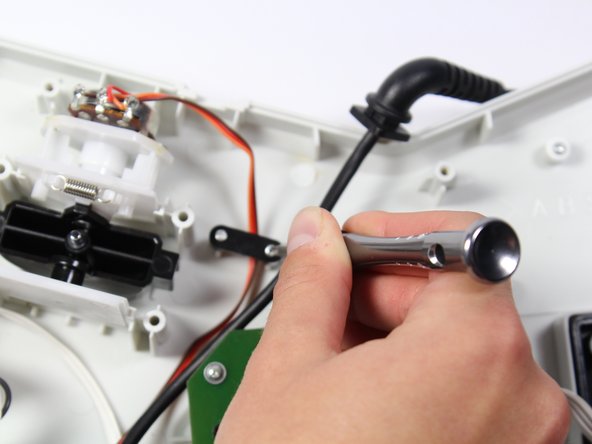
    • Remove the two 7mm Phillips #2 screws from the black wire retainer.

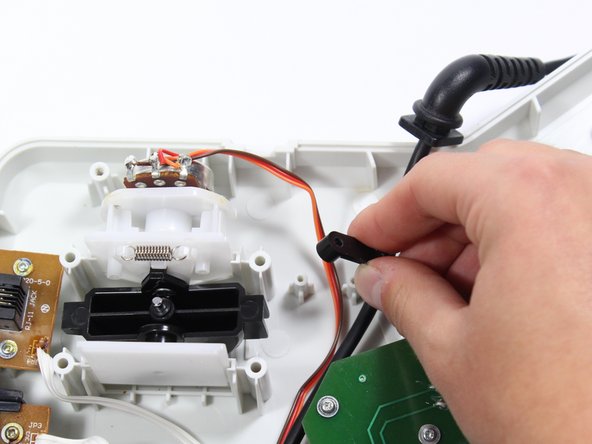
    • Pull off the black wire retainer.

  5. RedOctane X-Plorer Whammy Bar Replacement: étape 5, image 1 de 1
    • Reach one finger under the guitar to push the whammy bar and its attached components from the case.

  6. RedOctane X-Plorer Whammy Bar Replacement: étape 6, image 1 de 2 RedOctane X-Plorer Whammy Bar Replacement: étape 6, image 2 de 2
    • Remove both of the plastic side tabs by gently pulling them off.

  7. RedOctane X-Plorer Whammy Bar Replacement: étape 7, image 1 de 1
    • Remove the two plastic tabs from the whammy bar casing.

    • Keep the spring connected to the plastic tabs throughout this step.

  8. RedOctane X-Plorer Whammy Bar Replacement: étape 8, image 1 de 1
    • Using two hands, remove the spring from the plastic tabs.

Conclusion

To reassemble your device, follow these instructions in reverse order.

3 autres ont terminé cette réparation.

[deleted]

Membre depuis le 04/18/18

175 Réputation

1 tutoriel rédigé

0 commentaires

Ajouter un commentaire

Nombre de vues :

Dernières 24 heures : 2

7 derniers jours : 13

30 derniers jours : 82

Total : 3,528