Aller au contenu principal

Samsung SmartThings Hub Motherboard Replacement

Ce dont vous avez besoin

  1. Samsung SmartThings Hub Motherboard Replacement, Motherboard: étape 1, image 1 de 1
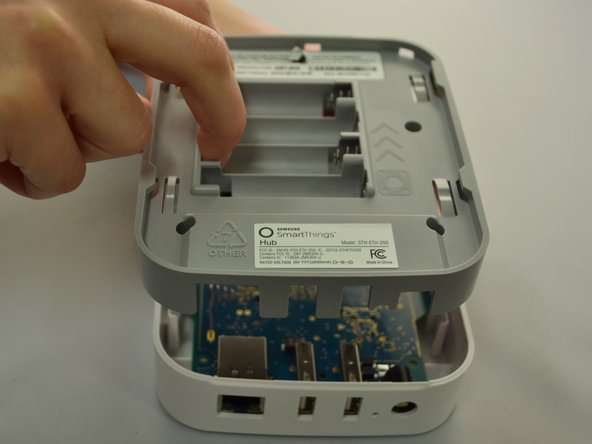
    • To open your device, gently slide the grey bottom cover in the direction of the arrow as shown.

  2. Samsung SmartThings Hub Motherboard Replacement: étape 2, image 1 de 3 Samsung SmartThings Hub Motherboard Replacement: étape 2, image 2 de 3 Samsung SmartThings Hub Motherboard Replacement: étape 2, image 3 de 3
    • Make sure the batteries are removed before attempting disassembly.

    • Using your Phillips #1 screwdriver, remove the four visible 12.5mm screws.

    • Next, either peel up the longer of the two stickers or punch a hole with the tip of your screwdriver to access the fifth 12.5mm screw.

  3. Samsung SmartThings Hub Motherboard Replacement: étape 3, image 1 de 3 Samsung SmartThings Hub Motherboard Replacement: étape 3, image 2 de 3 Samsung SmartThings Hub Motherboard Replacement: étape 3, image 3 de 3
    • Once all five screws are removed, split the casing apart by applying gentle upwards pressure against the positive terminals in the battery compartment.

  4. Samsung SmartThings Hub Motherboard Replacement: étape 4, image 1 de 2 Samsung SmartThings Hub Motherboard Replacement: étape 4, image 2 de 2
    • To remove the motherboard, grip the USB port and the Ethernet port. Lift up, then slide towards the front of the device to release the motherboard from the black retaining clip shown on the right.

  5. Samsung SmartThings Hub Motherboard Replacement: étape 5, image 1 de 1
    • Replace with new, known-good motherboard.

Conclusion

To reassemble your device, follow these instructions in reverse order.

4 autres ont terminé cette réparation.

Dylan Butler

Membre depuis le 09/28/17

290 Réputation

1 tutoriel rédigé

0 commentaires

Ajouter un commentaire

Nombre de vues :

Dernières 24 heures : 0

7 derniers jours : 1

30 derniers jours : 9

Total : 1,490