Aller au contenu principal

Sony NWZ-E473 Audio Jack Replacement

Ce dont vous avez besoin

  1. Sony NWZ-E473 Audio Jack Replacement, Back Panel: étape 1, image 1 de 1
    • Use a Phillips #00 screwdriver to unscrew the two 5 mm screws located on the bottom of the back of the device.

  2. Sony NWZ-E473 Audio Jack Replacement: étape 2, image 1 de 1
    • Use a plastic opening tool to loosen the bottom portion of device.

  3. Sony NWZ-E473 Audio Jack Replacement: étape 3, image 1 de 1
    • Use a plastic opening tool to loosen the top panel of the device.

  4. Sony NWZ-E473 Audio Jack Replacement: étape 4, image 1 de 1
    • Use a Phillips #00 screwdriver to remove the two 3 mm screws located on the portion under the top panel of the device.

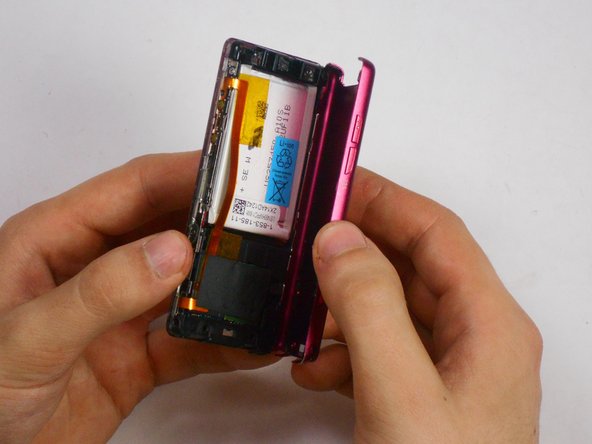
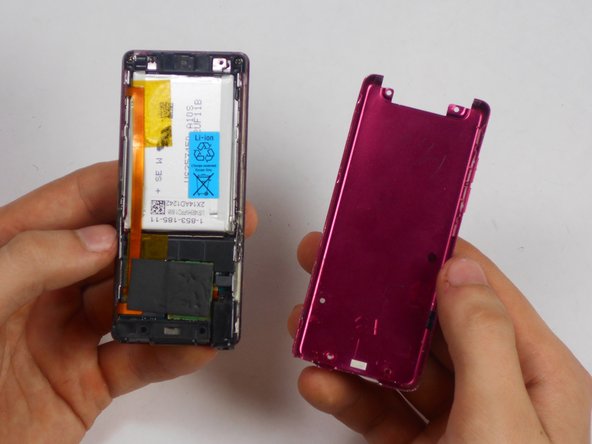
  5. Sony NWZ-E473 Audio Jack Replacement: étape 5, image 1 de 3 Sony NWZ-E473 Audio Jack Replacement: étape 5, image 2 de 3 Sony NWZ-E473 Audio Jack Replacement: étape 5, image 3 de 3
    • Remove the back plate from the device.

  6. Sony NWZ-E473 Audio Jack Replacement, Audio Jack: étape 6, image 1 de 1
    • Unscrew one 2.5 mm screw using a Phillips #00 screwdriver on bottom right portion of device located near audio jack.

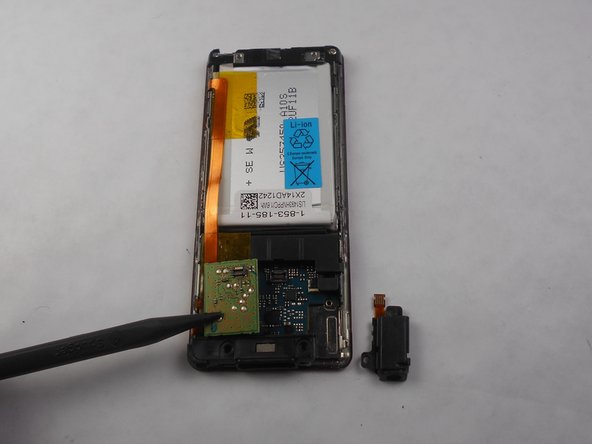
  7. Sony NWZ-E473 Audio Jack Replacement: étape 7, image 1 de 2 Sony NWZ-E473 Audio Jack Replacement: étape 7, image 2 de 2
    • Disconnect the headphone jack connection from the motherboard using any tool to remove black audio piece that needs to be replaced.

Conclusion

To reassemble your device, follow these instructions in reverse order.

Une autre personne a terminé cette réparation.

Chaz

Membre depuis le 01/16/15

119 Réputation

1 tutoriel rédigé

Équipe

USF Tampa, Team 17-6, Watkins Winter 2015 Membre de l'équipe USF Tampa, Team 17-6, Watkins Winter 2015

USFT-WATKINS-W15S17G6

4 membres

5 tutoriels rédigés

0 commentaires

Ajouter un commentaire

Nombre de vues :

Dernières 24 heures : 0

7 derniers jours : 0

30 derniers jours : 2

Total : 1,062