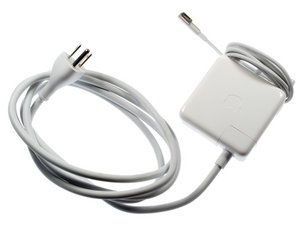
I am the proud owner of a 10lbs rabbit, which is to say I have the exact same problem. This time bunny did my girlfriend's macbook charger right at the base of the cord, the hardest spot to repair. I knew I was going to have to crack open the adapter block, but a cursory inspection reveals that Apple fuses the plastic casing quite robustly in lieu of screws or fasteners. Gah!
So, after experimenting with several other techniques recommended on other sites. (One of these involved a mallet and a flathead screwdriver, and it apparently woke my neighbor up at 2AM...Sorry, dude. Will have to leave a note.)
Anyway that's when a better idea dawned on me. I was trying to slowly slice through the plastic seam that keeps the powerblock sealed with a box cutter and a fresh razor. This wasn't working very well. But, I DO have a gas stove in the kitchen. After heating the edge of the razor blade to discoloration, it will slice right through the seam for about 4 seconds before you have to reapply heat. No need to worry about cutting through internal connections, because the internals are heavily shielded all around with a copper heat barrier. Just work slowly. The neater the cut, the cleaner it will look after you reassemble.
When the seam starts to give under light pressure, pry the block open gently to break the glue bonding. Try not to lose any of the small plastic or stainless pieces that form the cord-keeper assembly.
Then you can slice off the rubber grommet, retaining as much of the grey and black wires as possible. These will protrude through the hole in the power block after the repair job. Strip and solder. You'll notice the AC cord is coaxial. strip back enough of the shield (ground) to get a good connection. On mine, grey goes to the inner wire. Black is ground. Tin all four lead ends with solder, then fuse together with the iron. Wrap electrical tape or use liquid electrical tape if you have it to keep the wires from shorting. Use your favorite glue or tape to refasten the plastic case.
Spend the $60 you just saved on a good fire extinguisher, you warranty-voiding rebel, you.
PS- With a bit of care it is possible to make this look like a decent repair job. My girlfriend's charger happens to look like a bag of smashed *^^. But You will have the benefit of my experiments-gone-wrong.
Cheers.
Cette réponse est-elle utile ?
A voté
Annuler
Indice
3
Annuler
Faites défiler ce fil pour trouver l'endroit approprié pour y placer ce commentaire. Cliquez ensuite sur « Ajouter commentaire à cette contribution » pour le déplacer.