Introduction
Here at iFixit, we promote only the healthiest of lifestyles. We eat our vegetables at least once per week, and we never eat pizza two days in a row (unless it's leftovers, of course). One might go so far as to call us health freaks. We would not argue.
But we are iFixit, so of course we're sacrificing our fitness ambitions for science. We ripped into Fitbit's newest pedometer/heart rate monitor/sleep tracker wristband. What kind of a diet helped this thing fit into its tiny jacket? We're about to find out.
Check out Instagram if you're interested in getting a behind-the-scenes look at iFixit. Food, gnomes, and fancy filters not your thing? Get a healthy dose of fighting eWaste on Twitter and Facebook.
Ce dont vous avez besoin
-
-
So many goodies in one package! The Fitbit Flex comes with the following:
-
Two adjustable wristbands: one large, one small
-
Wireless sync dongle
-
Charging cable
-
The Flex tracker sports some cool tech specs, too.
-
Bluetooth 4.0 syncing
-
Memory to store 30 days of data
-
5-day battery life
-
-
-
With less effort than peeling an orange, we peel the Fitbit Flex tracker out of the flexible wrist strap.
-
Although it seems like a small consideration, we appreciate how easy it is to separate the electronics from the wrist strap—the component most likely to wear out.
-
-
-
Normally we would compare the device to other similar devices. Unfortunately, we don't really have much to compare the Flex to. How about a half dollar?
-
The Flex may be slightly larger than a half dollar (though smaller than half a dollar bill), but it will cost you 200 of them.
-
The back of the Flex reveals the model number, FB401, and provides a nice insertion arrow. It's not quite disassembly information, but it's something, right?
-
-
-
-
Our first extraction: the light guides for the LEDs that pass for a display on this slim, dare we say emaciated, unit.
-
Next out is the Bluetooth antenna, used for communicating with devices and the accompanying dongle.
-
To those of you following along at home: you don't need to chop up your PCB.
-
P.S. Don't follow along at home.
-
-
-
Pulling components out through the top of the Flex worked for a little while, but it's time to get to the good stuff.
-
Using our handy rotary tool, we cut through the plastic casing of the Flex tracker.
-
Well hello there, Rico Suave! Peeling back the Flex's stylish plastic jacket reveals the components we've been looking for.
-
-
-
The main board slides right away from the contact pins. Now we can get to the juicy bits.
-
Small and encased in a thin sheet of metal tape, the battery is soldered to the motherboard. By this point, a replaceable battery is the least of our worries.
-
We're getting some good vibrations from the prominent vibrator that functions as an alarm.
-
-
-
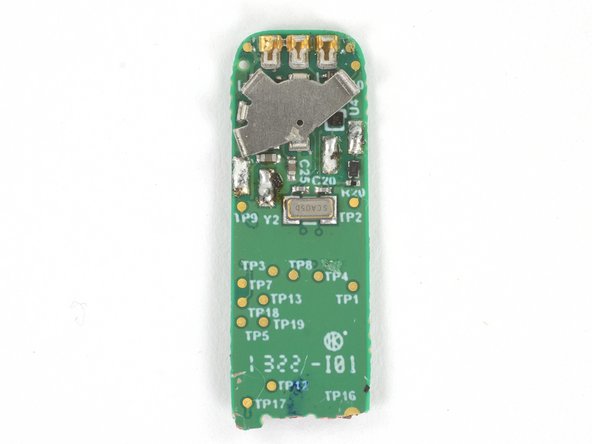
Enough loligagging, let's cut to the chase. This diminutive USB board houses all of the hardware needed to communicate with the Flex — and your computer:
-
Texas Instruments CC2540F128 2.4 GHz Bluetooth Low Energy SoC
-
On the contact side:
-
BLE Antenna
-
USB connection contacts
-
-
-
Fitbit Flex Repairability Score: 2 out of 10 (10 is easiest to repair)
-
Solid waterproofing, no moving parts, and lightweight construction make the Flex a very durable device, with the potential to last a long time.
-
The wrist strap is similarly constructed and can be easily replaced.
-
It's impossible to open the device without destroying it or at least compromising the waterproofing, making internal repairs infeasible.
-
The Flex's inaccessible (and non-replaceable) battery limits the life of the device.
-


24 commentaires
i also lost the cable charger, anybody know the 3 pin (positive negative) for fitbit. Any universal charger I can use?
look at the enlarged image... Left Pin is connected to the housing of the vibrator - this tells me its GND or Neg, center pin has a much thinner track on the PCB i would call it Data, right pin therefore looks like VCC+.
Sarah -
i also lost the cable charger, anybody know the 3 pin (positive negative) for fitbit. Any universal charger I can use and how?
Have you found out? Wish ifixit tore down the motherboard.
Peter -