Cette version peut contenir des modifications incorrectes. Passez au dernier aperçu vérifié.
Ce dont vous avez besoin
-
Cette étape n’est pas traduite. Aidez à la traduire
-
Use compressed air to clear any debris from the area around the ignition coils on top of the engine.
-
-
Cette étape n’est pas traduite. Aidez à la traduire
-
Remove the ignition coil electrical connector by first depressing the plastic tab on top of the connector.
-
Pull the connector straight away from the ignition coil to detach it.
-
Repeat this procedure for the remaining three ignition coils.
-
-
Cette étape n’est pas traduite. Aidez à la traduire
-
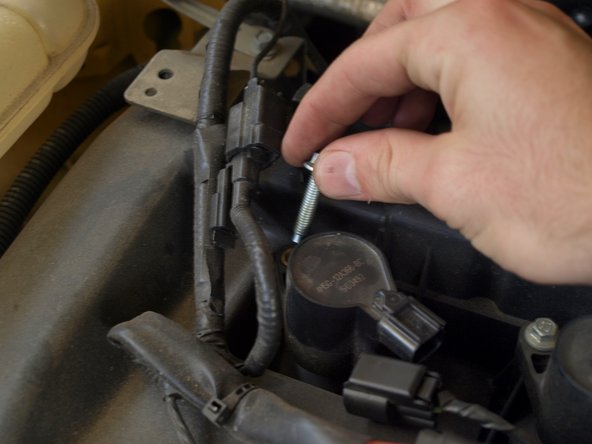
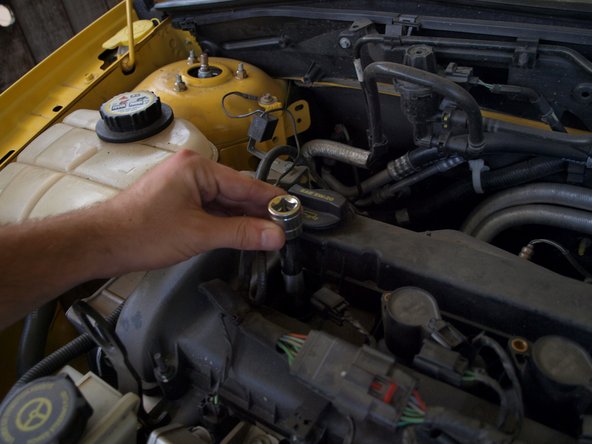
Use an 8 mm deep socket to loosen the four ignition coil mounting bolts.
-
Once the bolts are loose, they can be removed by hand.
-
-
-
Cette étape n’est pas traduite. Aidez à la traduire
-
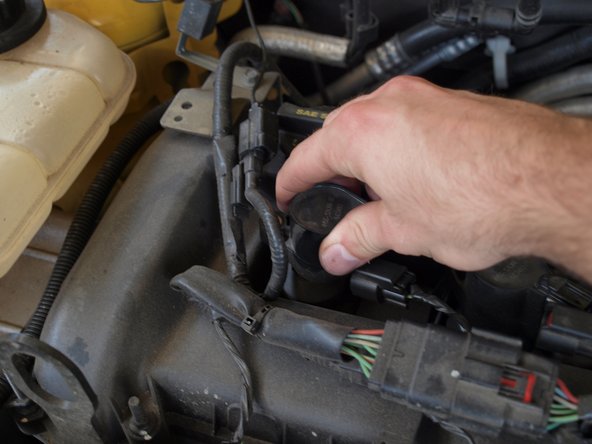
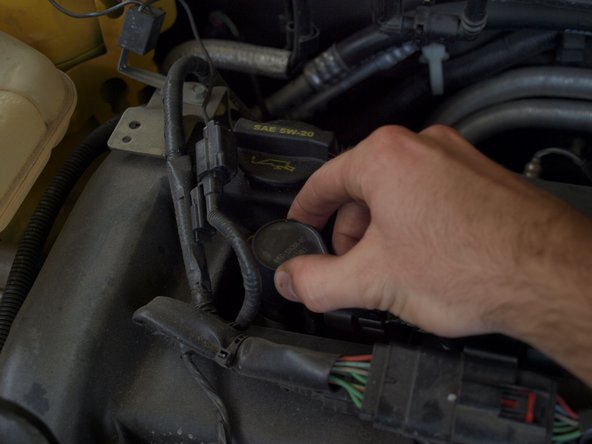
Twist the ignition coil and spark plug boot while lifting it straight up to remove it from the engine.
-
-
Cette étape n’est pas traduite. Aidez à la traduire
-
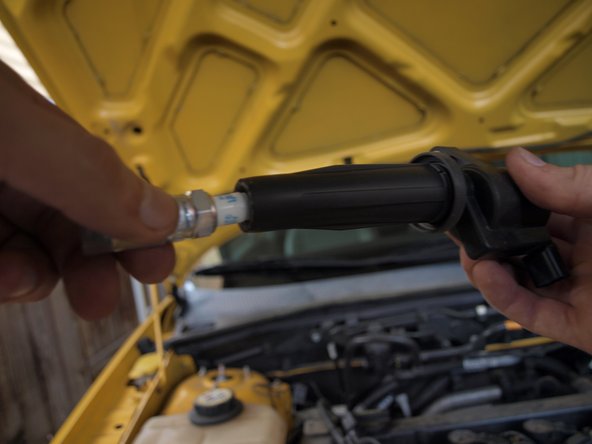
Use a ratcheting socket wrench with an extender and a 5/8" spark plug socket to remove the existing spark plug from the cylinder head. Make sure that the spark plug is completely seated in the rubber end of the socket before loosening it.
-
-
Cette étape n’est pas traduite. Aidez à la traduire
-
Apply dielectric grease to the ribbed portion of the insulator.
-
Gently place the spark plug boot over the ribs and twist the two pieces back and forth to even out the layer of dielectric grease.
-
-
Cette étape n’est pas traduite. Aidez à la traduire
-
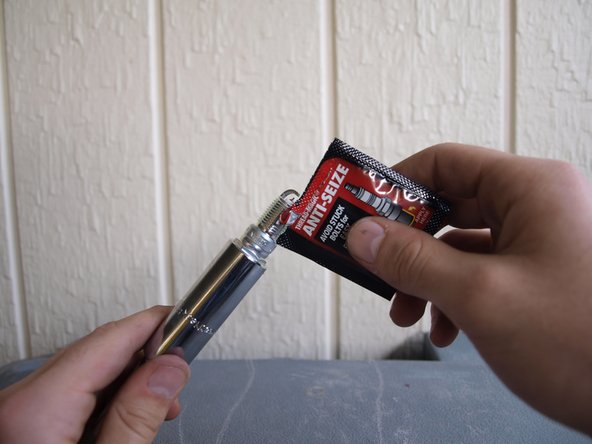
Place the new spark plug firmly in the spark plug socket so that the threaded end sticks out.
-
Apply an even layer of anti-seize compound to the threads of the spark plug.
-
-
Cette étape n’est pas traduite. Aidez à la traduire
-
Place the new spark plug into the cylinder head and tighten it by hand as much as you can.
-
Tighten the spark plugs to 11 ft-lbs with a torque wrench.
-
-
Cette étape n’est pas traduite. Aidez à la traduire
-
Place the ignition coil and dust boot back over the spark plug by pushing down and twisting it into place.
-
Reconnect the ignition coil electrical connector by snapping it back into place.
-


Annulation : je n'ai pas terminé ce tutoriel.
28 autres ont terminé cette réparation.

11 commentaires
Awesome guide. My Focus is exactly the same, Screaming Yellow! But can you put in a guide to change the air filter too?
I found out that standard-issue air filters for the ‘05-’07 Focus are lifetime 150k-mile filters, and shouldn’t need regular replacement. My parents’ Aerostar also had such a filter, so it may be a regular design feature in Ford vehicles. There’s a little gauge next to the filter housing: if the yellow line is still in the green, then there’s adequate airflow. If it’s in the red region, there’s a problem. I do not know if the car engine has to be on or not, but best check it in both states to be sure.
but what if i did what you had shown. an it works for the couple of days an then it starts to bang each time you put it in gears . its like it lose power then it comes back on.. have a ford focus 4cyl 2.0 engine
My focus st does not have power as I have just changed the spark plugs and I used the NGK ones . Are they the correct ones or can u recommend plugs to use .
Regards
Pat
I have 2007 model Ford focus st and the problem I have started when I changed my spark plugs and now there is no power and can only ďrive oņ 40km per hour.
Please advice if the problem is the plugs as I used NGK or any other problem
Regards
Pat