Aller au contenu principal

2007-2011 Toyota Yaris Drip Rail Replacement

Ce dont vous avez besoin

  1. 2007-2011 Toyota Yaris Drip Rail Replacement, Drip Rail: étape 1, image 1 de 3 2007-2011 Toyota Yaris Drip Rail Replacement, Drip Rail: étape 1, image 2 de 3 2007-2011 Toyota Yaris Drip Rail Replacement, Drip Rail: étape 1, image 3 de 3
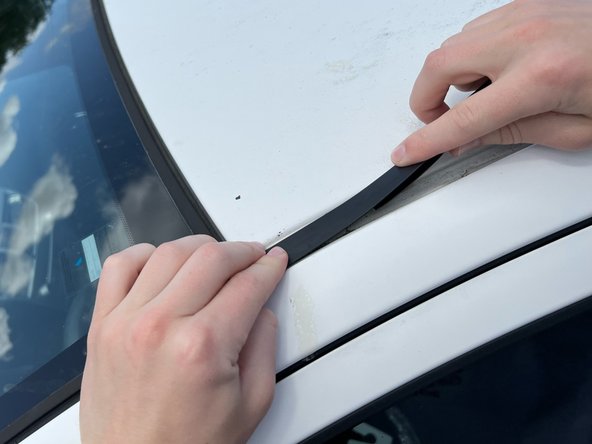
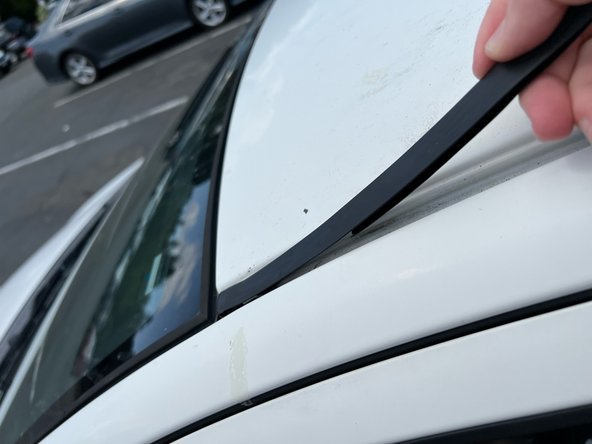
    • Peel back the old molding from where it is beginning to come off until you reach the end of the rail.

  2. 2007-2011 Toyota Yaris Drip Rail Replacement: étape 2, image 1 de 3 2007-2011 Toyota Yaris Drip Rail Replacement: étape 2, image 2 de 3 2007-2011 Toyota Yaris Drip Rail Replacement: étape 2, image 3 de 3
    • Use a heavy duty spudger to disconnect the end of the drip rail.

    • It may be connected at the end pretty tightly so it could take some work to remove.

    • Completely remove the piece from the end.

  3. 2007-2011 Toyota Yaris Drip Rail Replacement: étape 3, image 1 de 3 2007-2011 Toyota Yaris Drip Rail Replacement: étape 3, image 2 de 3 2007-2011 Toyota Yaris Drip Rail Replacement: étape 3, image 3 de 3
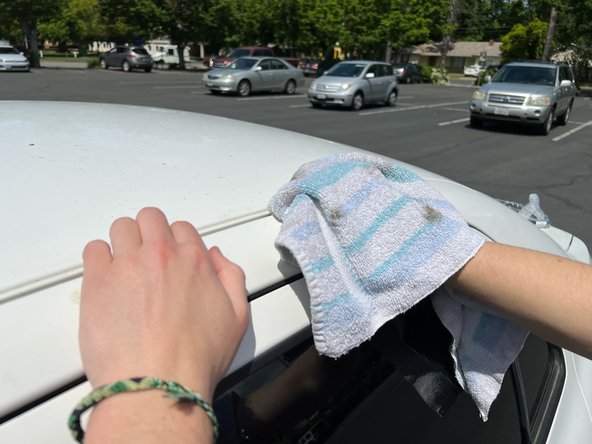
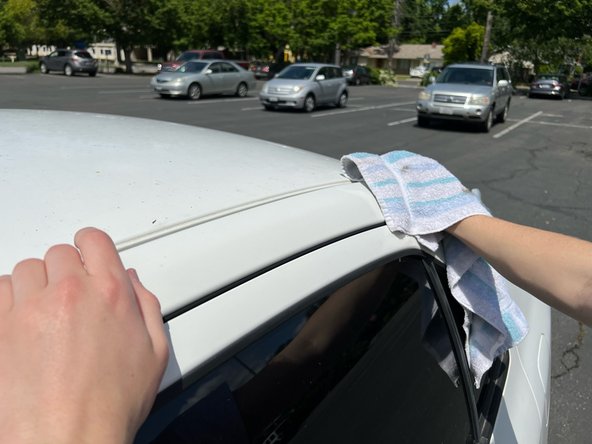
    • Take a rag and clean out any dirt and debris that built up under the old molding.

  4. 2007-2011 Toyota Yaris Drip Rail Replacement: étape 4, image 1 de 3 2007-2011 Toyota Yaris Drip Rail Replacement: étape 4, image 2 de 3 2007-2011 Toyota Yaris Drip Rail Replacement: étape 4, image 3 de 3
    • Slide the end of the new piece into the designated spot and press firmly to ensure it's connected securely.

    • Lightly tug at it to make it is secure and won't come off.

    • Do the same to the opposite end of the drip rail.

    • The molding for the left and right drip rails are different parts.

  5. 2007-2011 Toyota Yaris Drip Rail Replacement: étape 5, image 1 de 3 2007-2011 Toyota Yaris Drip Rail Replacement: étape 5, image 2 de 3 2007-2011 Toyota Yaris Drip Rail Replacement: étape 5, image 3 de 3
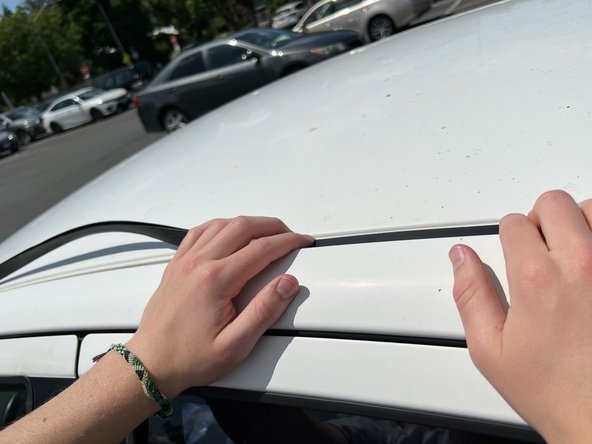
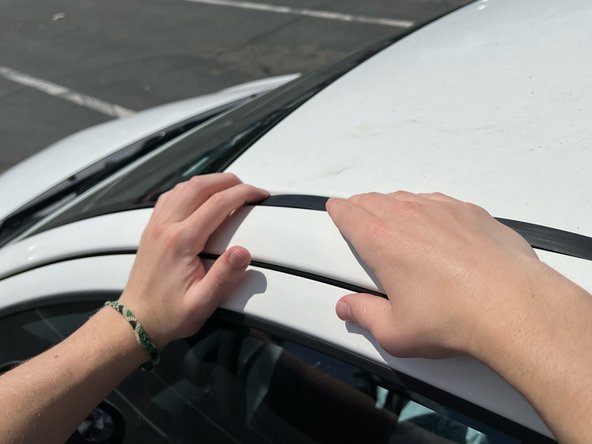
    • Firmly press the drip rail into its place starting at one end and moving down the car.

    • Check to make sure the new drip rail is thoroughly sealed to the car.

Conclusion

To reassemble your device, follow these instructions in reverse order.

Isabel Sagheb

Membre depuis le 04/19/23

121 Réputation

1 tutoriel rédigé

Équipe

UC Davis, Team 2-2, Morris Spring 2023 Membre de l'équipe UC Davis, Team 2-2, Morris Spring 2023

UCD-MORRIS-S23S2G2

3 membres

1 tutoriel rédigé

0 commentaires

Ajouter un commentaire

Nombre de vues :

Dernières 24 heures : 0

7 derniers jours : 14

30 derniers jours : 58

Total : 639