Aller au contenu principal

2009 Subaru Impreza WRX Rear Door Panel Replacement

Ce dont vous avez besoin

  1. 2009 Subaru Impreza WRX Rear Door Panel Replacement, Rear Door Panel: étape 1, image 1 de 1
    • Pry off the plastic tab inside the rear door handle.

  2. 2009 Subaru Impreza WRX Rear Door Panel Replacement: étape 2, image 1 de 1
    • Use the Phillips screwdriver to unscrew the 8x3/4" Phillips screw inside the door handle.

  3. 2009 Subaru Impreza WRX Rear Door Panel Replacement: étape 3, image 1 de 1
    • Use a flathead screwdriver to pry up the plastic tab inside the rear door armrest.

  4. 2009 Subaru Impreza WRX Rear Door Panel Replacement: étape 4, image 1 de 1
    • Use the Phillips screwdriver to unscrew the 8x3/4" Phillips screw inside the armrest.

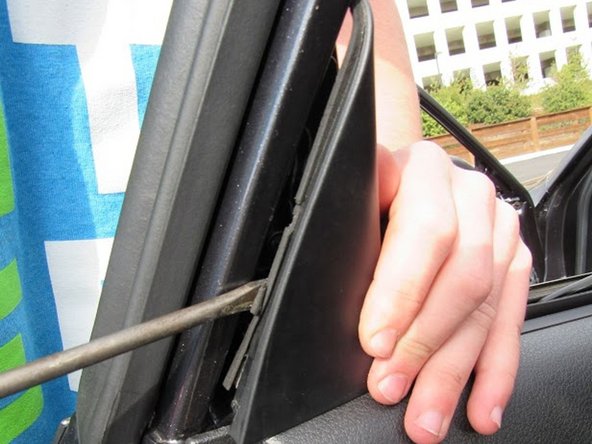
  5. 2009 Subaru Impreza WRX Rear Door Panel Replacement: étape 5, image 1 de 2 2009 Subaru Impreza WRX Rear Door Panel Replacement: étape 5, image 2 de 2
    • Use flathead to pry off the upper panel located at the top of the rear door panel.

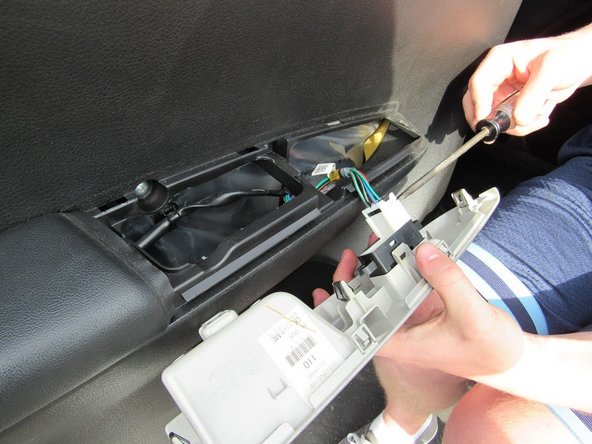
  6. 2009 Subaru Impreza WRX Rear Door Panel Replacement: étape 6, image 1 de 2 2009 Subaru Impreza WRX Rear Door Panel Replacement: étape 6, image 2 de 2
    • Use the flathead screwdriver to pry off and remove the panel over the door handle.

  7. 2009 Subaru Impreza WRX Rear Door Panel Replacement: étape 7, image 1 de 1
    • Remove the bundle of wires from the panel by pressing the tabs on the sides of the large white plastic connector.

  8. 2009 Subaru Impreza WRX Rear Door Panel Replacement: étape 8, image 1 de 1
    • Use the Phillips screwdriver to unscrew the 8x3/4" screws behind the door handle panel that was just removed.

  9. 2009 Subaru Impreza WRX Rear Door Panel Replacement: étape 9, image 1 de 1
    • Use the flathead screwdriver to pry off the door panel, starting from the outside edge of the door.

  10. 2009 Subaru Impreza WRX Rear Door Panel Replacement: étape 10, image 1 de 1
    • Use your hands to pull off and remove the door panel from the frame.

  11. 2009 Subaru Impreza WRX Rear Door Panel Replacement: étape 11, image 1 de 1
    • Using your hands, remove the two remaining wires connecting the door panel to the frame.

    • The door panel is now completely removed from the frame.

Conclusion

To reassemble your device, follow these instructions in reverse order.

Joseph Coplon

Membre depuis le 04/20/15

101 Réputation

1 tutoriel rédigé

Équipe

Cal Poly, Team 8-3, Regan Spring 2015 Membre de l'équipe Cal Poly, Team 8-3, Regan Spring 2015

CPSU-REGAN-S15S8G3

5 membres

5 tutoriels rédigés

0 commentaires

Ajouter un commentaire

Nombre de vues :

Dernières 24 heures : 0

7 derniers jours : 4

30 derniers jours : 11

Total : 2,433