Aller au contenu principal

2018 Honda Civic LX Engine Air Filter Replacement

Ce dont vous avez besoin

  1. 2018 Honda Civic LX Engine Air Filter Replacement, Engine Air Filter: étape 1, image 1 de 3 2018 Honda Civic LX Engine Air Filter Replacement, Engine Air Filter: étape 1, image 2 de 3 2018 Honda Civic LX Engine Air Filter Replacement, Engine Air Filter: étape 1, image 3 de 3
    • Locate the hood release latch under the dash on the driver’s side.

    • Pull on the release latch towards you to release the hood.

  2. 2018 Honda Civic LX Engine Air Filter Replacement: étape 2, image 1 de 3 2018 Honda Civic LX Engine Air Filter Replacement: étape 2, image 2 de 3 2018 Honda Civic LX Engine Air Filter Replacement: étape 2, image 3 de 3
    • Locate the tab found on the front of your vehicle.

    • Sliding your hand under your hood, feel for the latch and release the tab.

    • Lift the hood once the tab is released.

  3. 2018 Honda Civic LX Engine Air Filter Replacement: étape 3, image 1 de 3 2018 Honda Civic LX Engine Air Filter Replacement: étape 3, image 2 de 3 2018 Honda Civic LX Engine Air Filter Replacement: étape 3, image 3 de 3
    • Hold your hood up with one hand and locate the hood support rod.

    • Pull the hood support rod off the clip and insert the tip into the hole on the top left part of your inner hood.

    • The hood should rest on the support rod on its own; you can now remove the hand that was initially supporting the hood.

  4. 2018 Honda Civic LX Engine Air Filter Replacement: étape 4, image 1 de 3 2018 Honda Civic LX Engine Air Filter Replacement: étape 4, image 2 de 3 2018 Honda Civic LX Engine Air Filter Replacement: étape 4, image 3 de 3
    • Now, look at your engine and towards the bottom right to locate the air box.

    • This plastic box contains your air filter, so we must get inside!

    • Locate the clips that hold the air box in place.

  5. 2018 Honda Civic LX Engine Air Filter Replacement: étape 5, image 1 de 3 2018 Honda Civic LX Engine Air Filter Replacement: étape 5, image 2 de 3 2018 Honda Civic LX Engine Air Filter Replacement: étape 5, image 3 de 3
    • Unlatch the left and right-hand side snaps holding your box in place.

    • A simple flick downward should be enough to unclip the snaps.

  6. 2018 Honda Civic LX Engine Air Filter Replacement: étape 6, image 1 de 3 2018 Honda Civic LX Engine Air Filter Replacement: étape 6, image 2 de 3 2018 Honda Civic LX Engine Air Filter Replacement: étape 6, image 3 de 3
    • Now, lift the unlatched air box with an upward pull.

  7. 2018 Honda Civic LX Engine Air Filter Replacement: étape 7, image 1 de 3 2018 Honda Civic LX Engine Air Filter Replacement: étape 7, image 2 de 3 2018 Honda Civic LX Engine Air Filter Replacement: étape 7, image 3 de 3
    • Locate your old air filter found inside the air box.

    • Remove the old, dirty filter from the housing.

  8. 2018 Honda Civic LX Engine Air Filter Replacement: étape 8, image 1 de 3 2018 Honda Civic LX Engine Air Filter Replacement: étape 8, image 2 de 3 2018 Honda Civic LX Engine Air Filter Replacement: étape 8, image 3 de 3
    Outil utilisé dans cette étape :
    Microfiber Cleaning Cloths
    $3.99
    J'achète
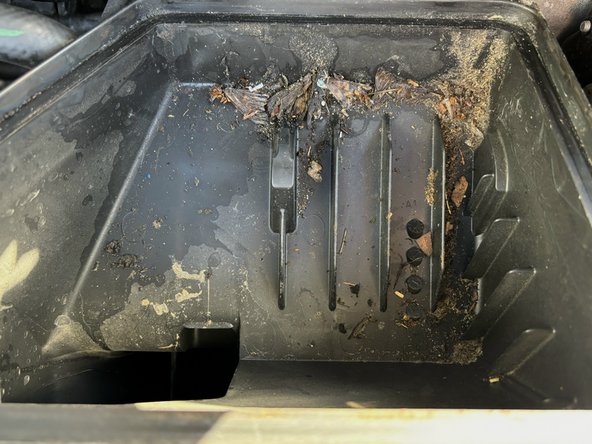
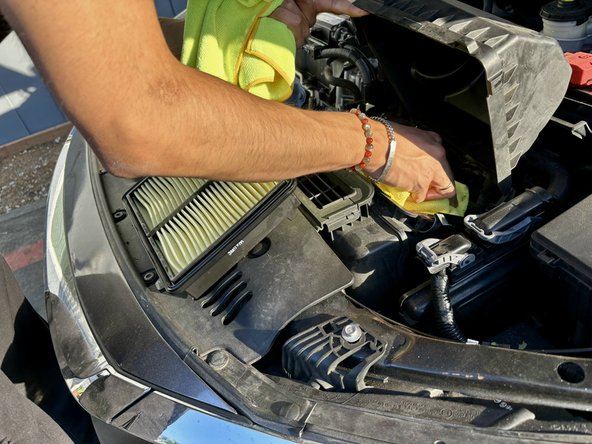
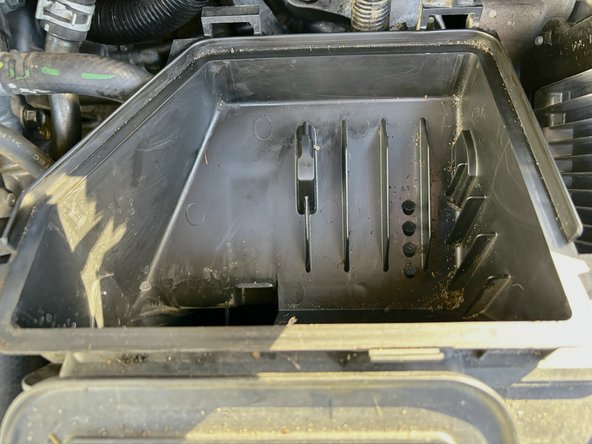
    • Your now empty air box will contain dirt and debris that we remove using a microfiber towel.

  9. 2018 Honda Civic LX Engine Air Filter Replacement: étape 9, image 1 de 3 2018 Honda Civic LX Engine Air Filter Replacement: étape 9, image 2 de 3 2018 Honda Civic LX Engine Air Filter Replacement: étape 9, image 3 de 3
    • Replace the old filter with our new air filter.

    • The angled edge of your filter should be on the top left-hand side, and the ridge should be on the top when putting it in the air box.

  10. 2018 Honda Civic LX Engine Air Filter Replacement: étape 10, image 1 de 3 2018 Honda Civic LX Engine Air Filter Replacement: étape 10, image 2 de 3 2018 Honda Civic LX Engine Air Filter Replacement: étape 10, image 3 de 3
    • Locate the plastic teeth on the left and right of the air housing.

    • Line these teeth up with the notches in the back and push them in.

  11. 2018 Honda Civic LX Engine Air Filter Replacement: étape 11, image 1 de 3 2018 Honda Civic LX Engine Air Filter Replacement: étape 11, image 2 de 3 2018 Honda Civic LX Engine Air Filter Replacement: étape 11, image 3 de 3
    • Push the air box's lid down and clip the previously unlatched snaps back to secure your air box.

  12. 2018 Honda Civic LX Engine Air Filter Replacement: étape 12, image 1 de 3 2018 Honda Civic LX Engine Air Filter Replacement: étape 12, image 2 de 3 2018 Honda Civic LX Engine Air Filter Replacement: étape 12, image 3 de 3
    • Hold your hood up with one hand. Using your other hand, remove the hood support and latch the support onto the clip you previously took it off of.

  13. 2018 Honda Civic LX Engine Air Filter Replacement: étape 13, image 1 de 1
    • Now you're all set to close up your hood!

Conclusion

By the end of this guide, you should have been able to replace your 2018 Honda Civic LX engine air filter successfully.

Fili Zavala

Membre depuis le 10/24/23

267 Réputation

1 tutoriel rédigé

Équipe

CSU Los Angeles, Team 3-94, Briggs Fall 2023 Membre de l'équipe CSU Los Angeles, Team 3-94, Briggs Fall 2023

CSULA-BRIGGS-F23S3G94

1 membre

1 tutoriel rédigé

0 commentaires

Ajouter un commentaire

Nombre de vues :

Dernières 24 heures : 2

7 derniers jours : 12

30 derniers jours : 38

Total : 192