Aller au contenu principal

2019 Honda Civic Spark Plugs Replacement

Ce dont vous avez besoin

  1. 2019 Honda Civic Spark Plugs Replacement, Spark Plugs: étape 1, image 1 de 2 2019 Honda Civic Spark Plugs Replacement, Spark Plugs: étape 1, image 2 de 2
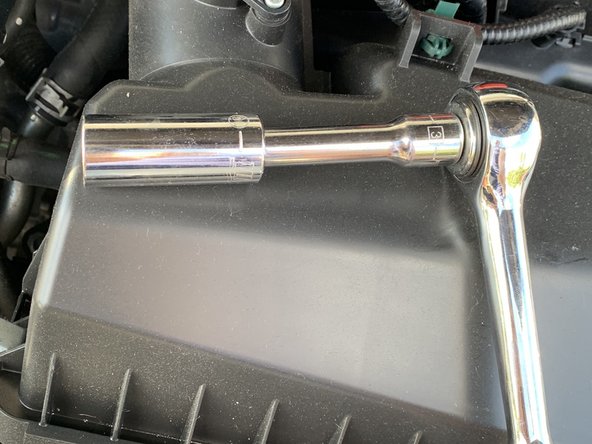
    • Use a wrench to remove the bolts on the top of the engine cover.

    • Remove the engine cover.

  2. 2019 Honda Civic Spark Plugs Replacement: étape 2, image 1 de 3 2019 Honda Civic Spark Plugs Replacement: étape 2, image 2 de 3 2019 Honda Civic Spark Plugs Replacement: étape 2, image 3 de 3
    • Detach the clamps of the wire holder to disconnect it.

    • Put a screwdriver under the small panel on the wire connector and lift the panel.

    • Separate the cable from the wire connector.

  3. 2019 Honda Civic Spark Plugs Replacement: étape 3, image 1 de 2 2019 Honda Civic Spark Plugs Replacement: étape 3, image 2 de 2
    • Use the wrench to remove the bolt that is placed beside the wire connector.

    • Simply pull out the connector.

  4. 2019 Honda Civic Spark Plugs Replacement: étape 4, image 1 de 3 2019 Honda Civic Spark Plugs Replacement: étape 4, image 2 de 3 2019 Honda Civic Spark Plugs Replacement: étape 4, image 3 de 3
    • Make sure the spark plug area is dry before removing the spark plug.

    • Attach the socket to the socket wrench.

    • Put the socket inside the cylinder head and twist the socket wrench to remove the spark plug.

  5. 2019 Honda Civic Spark Plugs Replacement: étape 5, image 1 de 1
    • Inspect the new spark plug to ensure that it is completely dry.

  6. 2019 Honda Civic Spark Plugs Replacement: étape 6, image 1 de 2 2019 Honda Civic Spark Plugs Replacement: étape 6, image 2 de 2
    • Remove the old spark plug and attach the new spark plug to the socket.

    • Place the socket back in the cylinder head and twist the socket wrench to install the spark plug.

  7. 2019 Honda Civic Spark Plugs Replacement: étape 7, image 1 de 1
    • Connect the wire back to the spark plug.

  8. 2019 Honda Civic Spark Plugs Replacement: étape 8, image 1 de 1
    • Place the engine cover over the engine and reinstall the bolts using the wrench.

Ligne d'arrivée

3 autres ont terminé cette réparation.

Bouttia Oshrieh

Membre depuis le 07/07/20

238 Réputation

1 tutoriel rédigé

Équipe

York University, Team S1-G19, Allen Summer 2020 Membre de l'équipe York University, Team S1-G19, Allen Summer 2020

YORK-ALLEN-SU20S1G19

1 membre

1 tutoriel rédigé

Un commentaire

Very informative.

Anwar Kazmi - Réponse

Ajouter un commentaire

Nombre de vues :

Dernières 24 heures : 4

7 derniers jours : 53

30 derniers jours : 192

Total : 8,338