Aller au contenu principal

8BitDo Ultimate Wired Motherboard Replacement

Ce dont vous avez besoin

  1. 8BitDo Ultimate Wired Motherboard Replacement, Motherboard: étape 1, image 1 de 3 8BitDo Ultimate Wired Motherboard Replacement, Motherboard: étape 1, image 2 de 3 8BitDo Ultimate Wired Motherboard Replacement, Motherboard: étape 1, image 3 de 3
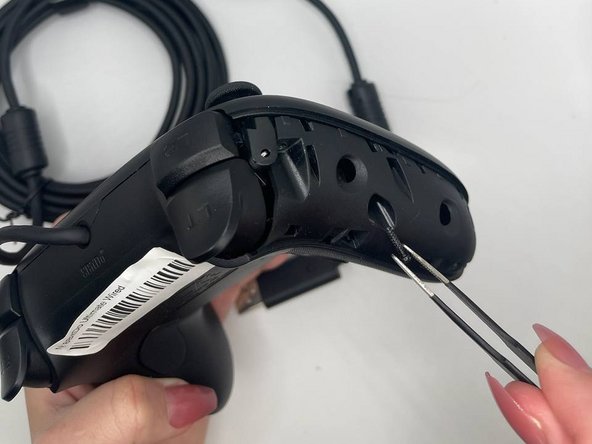
    • Orient the controller such that the back of the controller is facing you.

    • Insert an opening tool into the small opening on the back of the grip, and gently pry the grip cover away until it pops free.

  2. 8BitDo Ultimate Wired Motherboard Replacement: étape 2, image 1 de 3 8BitDo Ultimate Wired Motherboard Replacement: étape 2, image 2 de 3 8BitDo Ultimate Wired Motherboard Replacement: étape 2, image 3 de 3
    • Pry the other grip panel off using the same method.

  3. 8BitDo Ultimate Wired Motherboard Replacement: étape 3, image 1 de 3 8BitDo Ultimate Wired Motherboard Replacement: étape 3, image 2 de 3 8BitDo Ultimate Wired Motherboard Replacement: étape 3, image 3 de 3
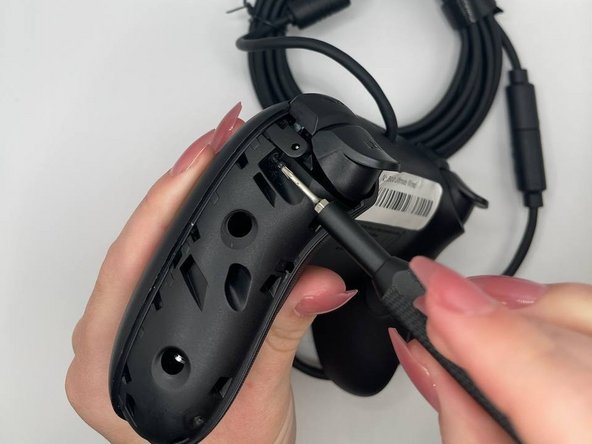
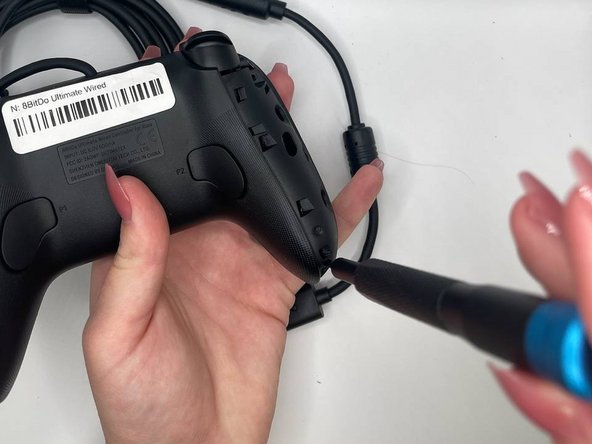
    • Use the TR6 Torx Security screwdriver to remove the top left 10.44 mm torx screw on the backside.

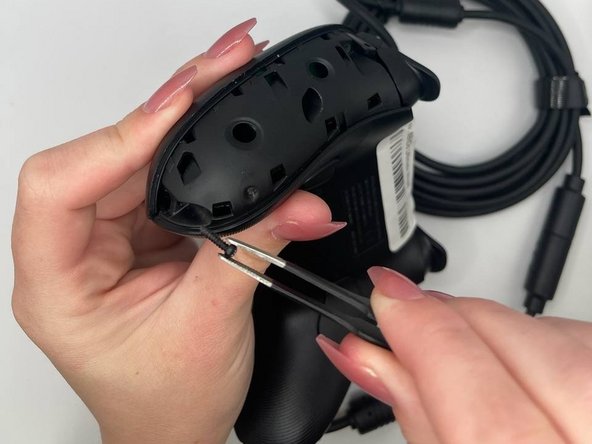
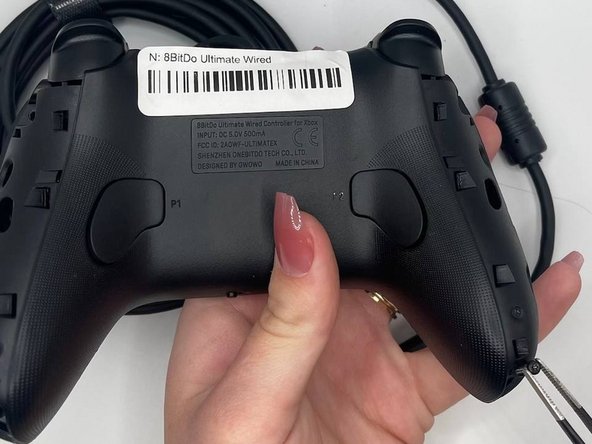
    • Use tweezers to remove the screws (optional).

  4. 8BitDo Ultimate Wired Motherboard Replacement: étape 4, image 1 de 3 8BitDo Ultimate Wired Motherboard Replacement: étape 4, image 2 de 3 8BitDo Ultimate Wired Motherboard Replacement: étape 4, image 3 de 3
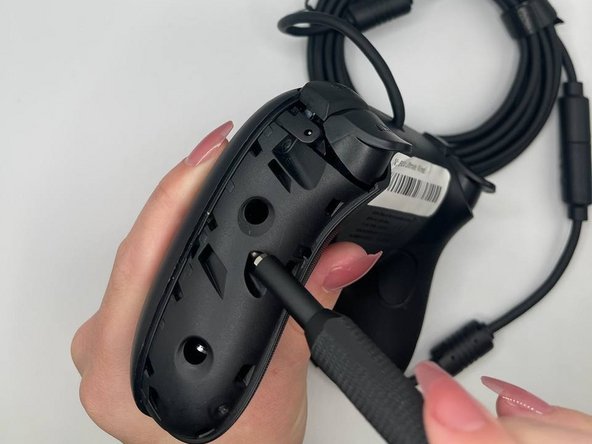
    • Use the TR6 Torx Security screwdriver to remove the middle left 10.44 mm Torx screw on the backside.

  5. 8BitDo Ultimate Wired Motherboard Replacement: étape 5, image 1 de 3 8BitDo Ultimate Wired Motherboard Replacement: étape 5, image 2 de 3 8BitDo Ultimate Wired Motherboard Replacement: étape 5, image 3 de 3
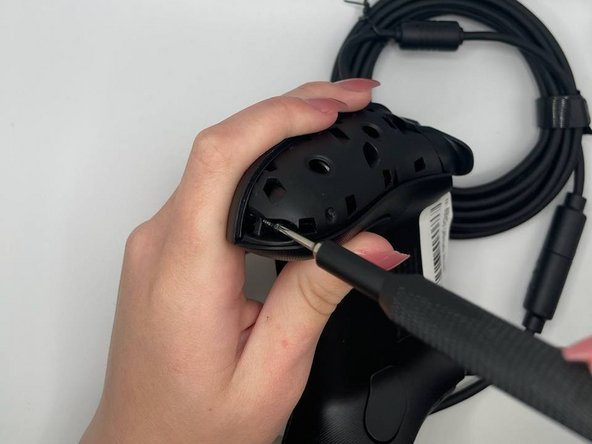
    • Use the TR6 Torx Security screwdriver to remove the bottom left 10.44 mm Torx screw on the backside.

  6. 8BitDo Ultimate Wired Motherboard Replacement: étape 6, image 1 de 3 8BitDo Ultimate Wired Motherboard Replacement: étape 6, image 2 de 3 8BitDo Ultimate Wired Motherboard Replacement: étape 6, image 3 de 3
    • Use the TR6 Torx Security screwdriver to remove the top right 10.44 mm Torx screw on the backside.

  7. 8BitDo Ultimate Wired Motherboard Replacement: étape 7, image 1 de 3 8BitDo Ultimate Wired Motherboard Replacement: étape 7, image 2 de 3 8BitDo Ultimate Wired Motherboard Replacement: étape 7, image 3 de 3
    • Use the TR6 Torx Security screwdriver to remove the middle right 10.44 mm Torx screw on the backside.

  8. 8BitDo Ultimate Wired Motherboard Replacement: étape 8, image 1 de 3 8BitDo Ultimate Wired Motherboard Replacement: étape 8, image 2 de 3 8BitDo Ultimate Wired Motherboard Replacement: étape 8, image 3 de 3
    • Use the TR6 Torx Security screwdriver to unscrew the bottom right 10.44 mm Torx screw on the backside.

  9. 8BitDo Ultimate Wired Motherboard Replacement: étape 9, image 1 de 2 8BitDo Ultimate Wired Motherboard Replacement: étape 9, image 2 de 2
    • Orient the controller such that the back of the controller is facing you.

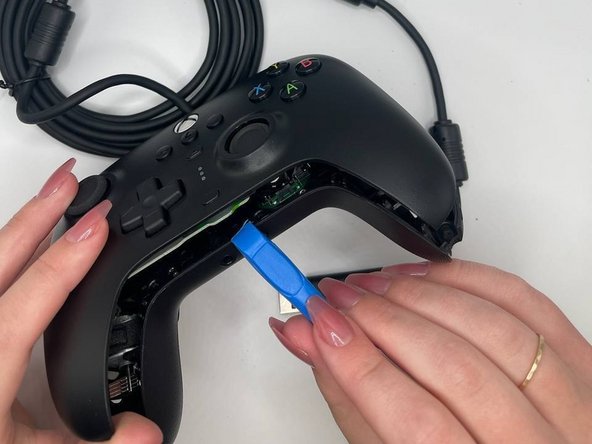
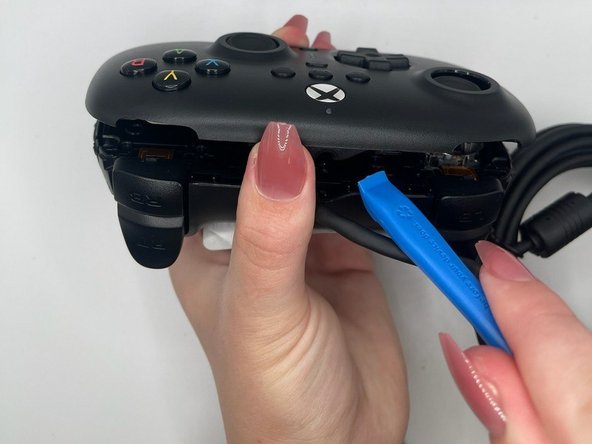
    • Insert an opening tool into the small opening between the front and back panels, and gently pry the back panel away to open the bottom clamps of the top panel of the controller.

  10. 8BitDo Ultimate Wired Motherboard Replacement: étape 10, image 1 de 2 8BitDo Ultimate Wired Motherboard Replacement: étape 10, image 2 de 2
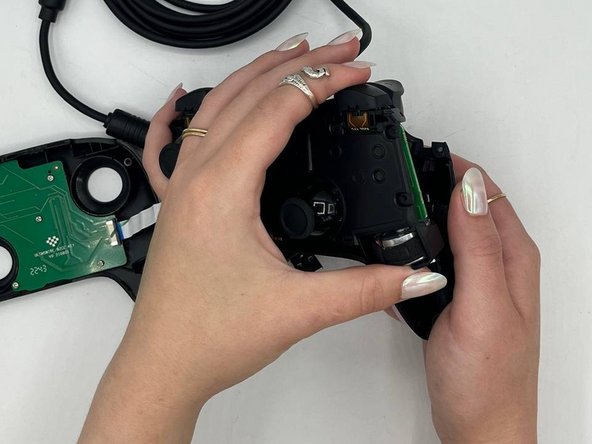
    • Insert an opening tool into the small opening between the front and back panel (top view) and pry away to remove the top half.

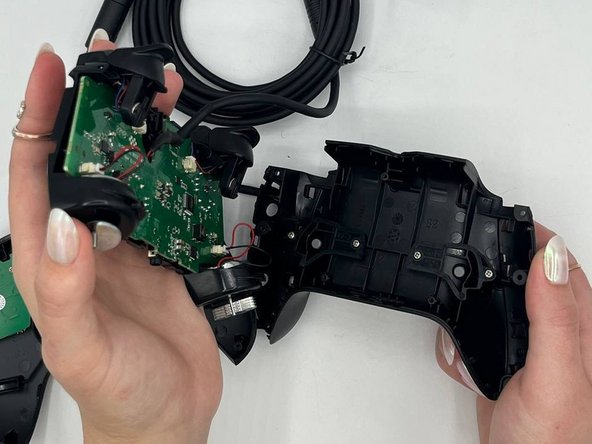
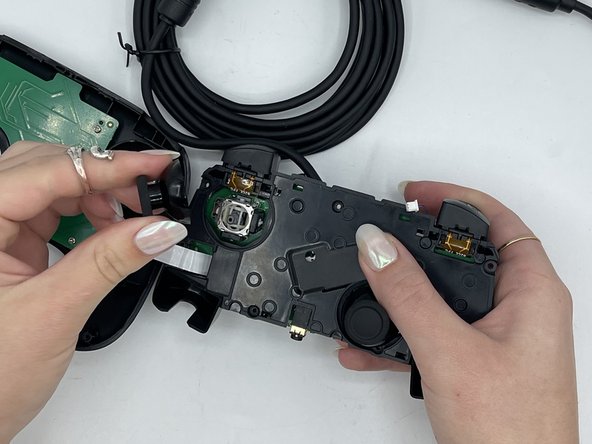
    • A ribbon cable connects the front and back portions of the controller.

  11. 8BitDo Ultimate Wired Motherboard Replacement: étape 11, image 1 de 3 8BitDo Ultimate Wired Motherboard Replacement: étape 11, image 2 de 3 8BitDo Ultimate Wired Motherboard Replacement: étape 11, image 3 de 3
    • Pull the midframe with an adequate amount of force.

  12. 8BitDo Ultimate Wired Motherboard Replacement: étape 12, image 1 de 3 8BitDo Ultimate Wired Motherboard Replacement: étape 12, image 2 de 3 8BitDo Ultimate Wired Motherboard Replacement: étape 12, image 3 de 3
    • Gently pull the vibration motor connector out of its socket.

  13. 8BitDo Ultimate Wired Motherboard Replacement: étape 13, image 1 de 2 8BitDo Ultimate Wired Motherboard Replacement: étape 13, image 2 de 2
    • Pull the weight out of the housing with adequate force.

  14. 8BitDo Ultimate Wired Motherboard Replacement: étape 14, image 1 de 3 8BitDo Ultimate Wired Motherboard Replacement: étape 14, image 2 de 3 8BitDo Ultimate Wired Motherboard Replacement: étape 14, image 3 de 3
    • Use tweezers to gently unplug the bumper on the right hand side.

  15. 8BitDo Ultimate Wired Motherboard Replacement: étape 15, image 1 de 3 8BitDo Ultimate Wired Motherboard Replacement: étape 15, image 2 de 3 8BitDo Ultimate Wired Motherboard Replacement: étape 15, image 3 de 3
    • Use tweezers to gently unplug the bumpers on the left hand side.

  16. 8BitDo Ultimate Wired Motherboard Replacement: étape 16, image 1 de 3 8BitDo Ultimate Wired Motherboard Replacement: étape 16, image 2 de 3 8BitDo Ultimate Wired Motherboard Replacement: étape 16, image 3 de 3
    • Use your fingers to remove the joystick cover on the left hand side with adequate force.

  17. 8BitDo Ultimate Wired Motherboard Replacement: étape 17, image 1 de 3 8BitDo Ultimate Wired Motherboard Replacement: étape 17, image 2 de 3 8BitDo Ultimate Wired Motherboard Replacement: étape 17, image 3 de 3
    • Use your fingers to remove the joystick cover on the right hand side with adequate force.

  18. 8BitDo Ultimate Wired Motherboard Replacement: étape 18, image 1 de 3 8BitDo Ultimate Wired Motherboard Replacement: étape 18, image 2 de 3 8BitDo Ultimate Wired Motherboard Replacement: étape 18, image 3 de 3
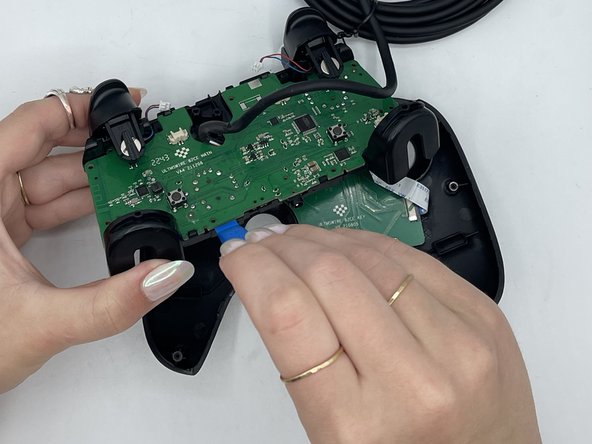
    • Use an opening tool to pry the motherboard apart from the structure of the controller

  19. 8BitDo Ultimate Wired Motherboard Replacement: étape 19, image 1 de 3 8BitDo Ultimate Wired Motherboard Replacement: étape 19, image 2 de 3 8BitDo Ultimate Wired Motherboard Replacement: étape 19, image 3 de 3
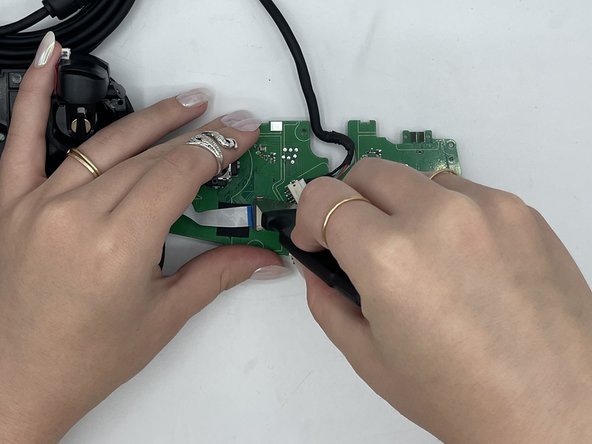
    • Use a Jimmy to open the small metal bracket (right) on the front side of the motherboard.

  20. 8BitDo Ultimate Wired Motherboard Replacement: étape 20, image 1 de 3 8BitDo Ultimate Wired Motherboard Replacement: étape 20, image 2 de 3 8BitDo Ultimate Wired Motherboard Replacement: étape 20, image 3 de 3
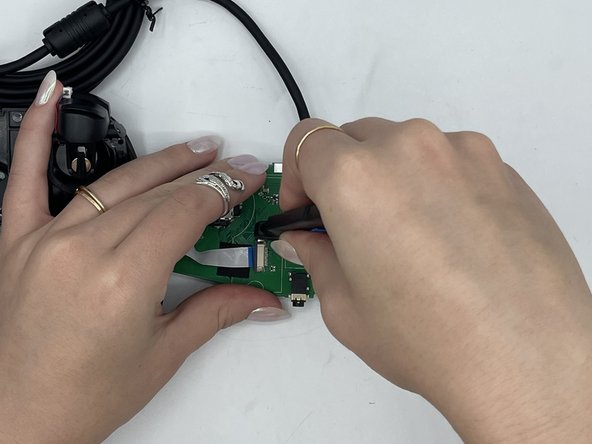
    • Use a Jimmy to open the small metal bracket (left) on the front side of the motherboard.

  21. 8BitDo Ultimate Wired Motherboard Replacement: étape 21, image 1 de 3 8BitDo Ultimate Wired Motherboard Replacement: étape 21, image 2 de 3 8BitDo Ultimate Wired Motherboard Replacement: étape 21, image 3 de 3
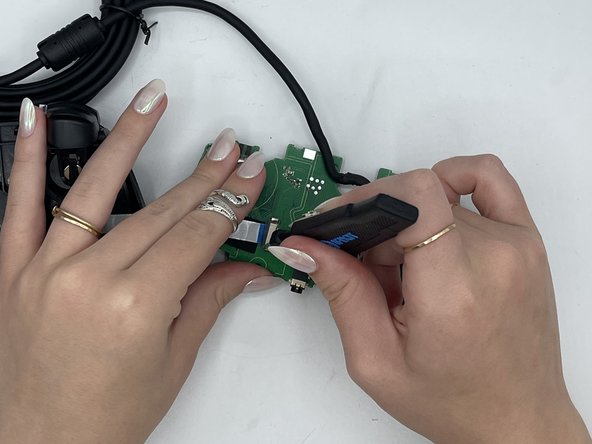
    • Use tweezers to remove the white strip from the black bracket.

  22. 8BitDo Ultimate Wired Motherboard Replacement: étape 22, image 1 de 3 8BitDo Ultimate Wired Motherboard Replacement: étape 22, image 2 de 3 8BitDo Ultimate Wired Motherboard Replacement: étape 22, image 3 de 3
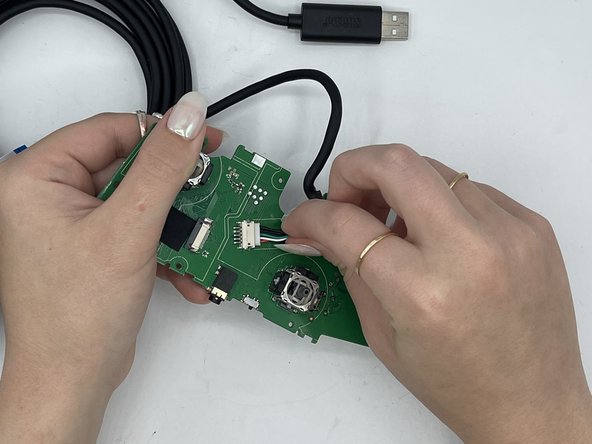
    • Use your fingers to gently remove the power cord.

Conclusion

To reassemble your device, follow these instructions in reverse order.

Une autre personne a terminé cette réparation.

Sebrina Abubeker

Membre depuis le 02/08/24

627 Réputation

2 tutoriels rédigés

Équipe

0 commentaires

Ajouter un commentaire

Nombre de vues :

Dernières 24 heures : 2

7 derniers jours : 10

30 derniers jours : 39

Total : 87