Aller au contenu principal

APS Tech 101629 External Casing Replacement

Ce dont vous avez besoin

  1. APS Tech 101629 External Casing Replacement, External Casing: étape 1, image 1 de 3 APS Tech 101629 External Casing Replacement, External Casing: étape 1, image 2 de 3 APS Tech 101629 External Casing Replacement, External Casing: étape 1, image 3 de 3
    • Pry all four of the plastic feet off the bottom of the enclosure using the iPod opening tool.

  2. APS Tech 101629 External Casing Replacement: étape 2, image 1 de 2 APS Tech 101629 External Casing Replacement: étape 2, image 2 de 2
    • Unscrew the four screws previously covered by the feet with a Phillips #1 screwdriver.

  3. APS Tech 101629 External Casing Replacement: étape 3, image 1 de 2 APS Tech 101629 External Casing Replacement: étape 3, image 2 de 2
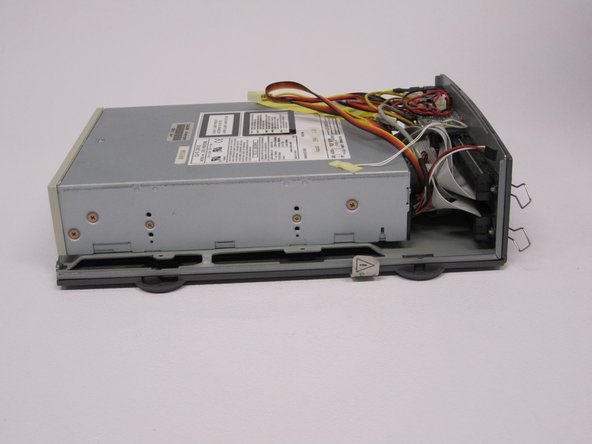
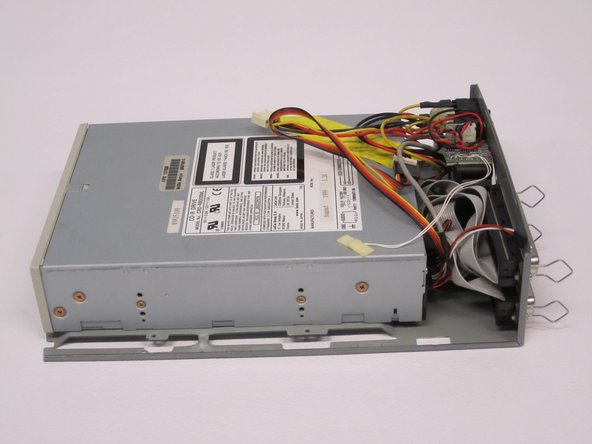
    • Flip the device right side up.

    • Gently slide the casing upwards and off the hard drive.

  4. APS Tech 101629 External Casing Replacement: étape 4, image 1 de 1
    • Flip device upside down again.

    • Gently pry the bottom gray casing away from the device.

  5. APS Tech 101629 External Casing Replacement: étape 5, image 1 de 2 APS Tech 101629 External Casing Replacement: étape 5, image 2 de 2
    • Rotate so the back of the device is facing you.

    • Gently pry the back casing away.

    • When the back casing is removed, the fan will become loose.

Conclusion

To reassemble your device, follow these instructions in reverse order.

Une autre personne a terminé cette réparation.

Patrick Meyer

Membre depuis le 04/10/11

83 Réputation

3 tutoriels rédigés

Équipe

Cal Poly, Team 24-60, Amido Spring 2011 Membre de l'équipe Cal Poly, Team 24-60, Amido Spring 2011

CPSU-AMIDO-S11S24G60

5 membres

12 tutoriels rédigés

0 commentaires

Ajouter un commentaire

Nombre de vues :

Dernières 24 heures : 0

7 derniers jours : 1

30 derniers jours : 3

Total : 694