Aller au contenu principal

ASUS Q536F Fan Replacement

Ce dont vous avez besoin

  1. ASUS Q536F Fan Replacement, Back Panel: étape 1, image 1 de 2 ASUS Q536F Fan Replacement, Back Panel: étape 1, image 2 de 2
    • Remove ten 2 mm screws using a Phillips #0 screwdriver.

    • Remove the screw in the center using a T4 Torx screwdriver.

    • Use an iFixit opening tool to pry open the back panel.

    • It's normal to hear some cracking, but proceed with caution.

  2. ASUS Q536F Fan Replacement, Fan: étape 2, image 1 de 2 ASUS Q536F Fan Replacement, Fan: étape 2, image 2 de 2
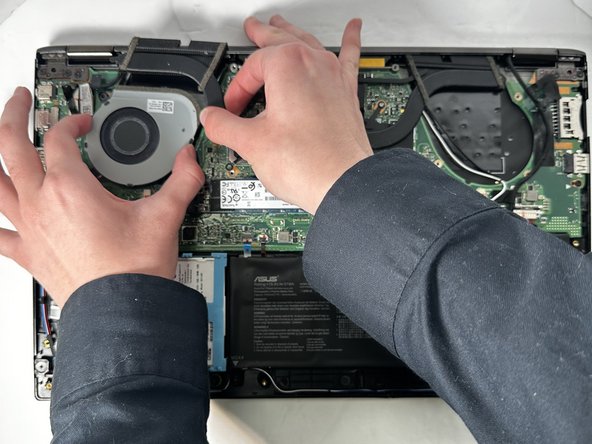
    • Use a Phillips #0 screwdriver to remove the six 2 mm fan screws.

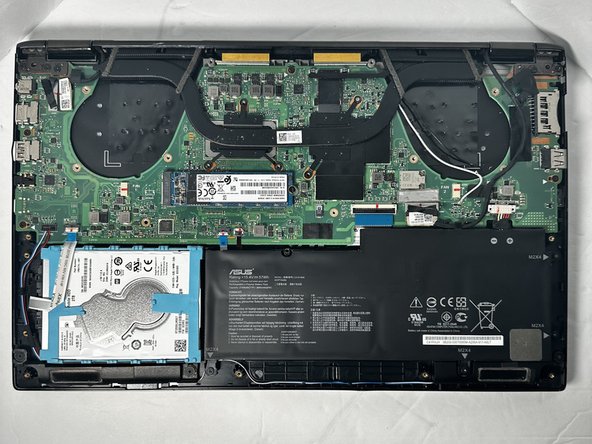
    • Use a Phillips #0 screwdriver to remove the five 2 mm heatsink screws.

    • Warped Screw

    • Heatsink shown has warped screw, so unable to remove

  3. ASUS Q536F Fan Replacement: étape 3, image 1 de 1
    Outil utilisé dans cette étape :
    Tweezers
    $4.99
    J'achète
    • Disconnect white and black antennae cables.

    • Using tweezers for this would be helpful.

  4. ASUS Q536F Fan Replacement: étape 4, image 1 de 2 ASUS Q536F Fan Replacement: étape 4, image 2 de 2
    • Disconnect fan cables pulling outwards as shown.

  5. ASUS Q536F Fan Replacement: étape 5, image 1 de 3 ASUS Q536F Fan Replacement: étape 5, image 2 de 3 ASUS Q536F Fan Replacement: étape 5, image 3 de 3
    • Carefully lift heatsink upward using a Ifixit opening tool or Fingers pull fan out from under the heat sink.

    • The fan can be removed without removing the heatsink, although it may be easier to remove.

Conclusion

To reassemble your device, follow these instructions in reverse order.

Adra Ledward

Membre depuis le 09/07/23

557 Réputation

5 tutoriels rédigés

Équipe

Gateway, Team 88-8, Gonzalez Fall 2023 Membre de l'équipe Gateway, Team 88-8, Gonzalez Fall 2023

GCC-GONZALEZ-F23S88G8

5 membres

6 tutoriels rédigés

0 commentaires

Ajouter un commentaire

Nombre de vues :

Dernières 24 heures : 0

7 derniers jours : 0

30 derniers jours : 16

Total : 97