Introduction
Are you experiencing garbled, choppy phone calls or no audio at all on your landline? Use this guide to restore your phone line’s audio quality for your ATT CL2940 Handset Speaker.
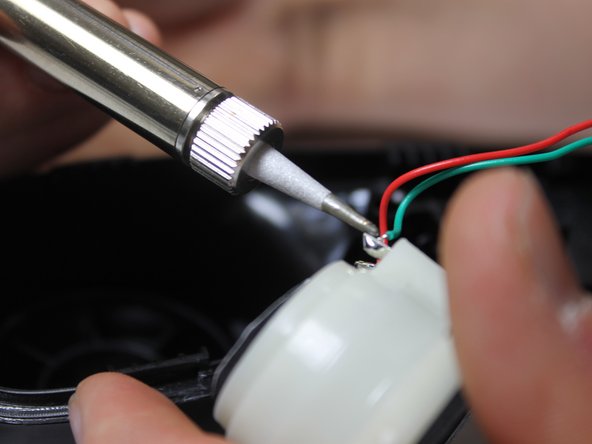
Before we proceed with the replacement, it is crucial to prioritize one’s safety. Soldering and desoldering involve high temperatures, causing potential health risks to you or those around you.
If you are new to soldering and desoldering electronic connections, please follow our Soldering Guide before beginning the handset speaker replacement.
Ce dont vous avez besoin
-
-
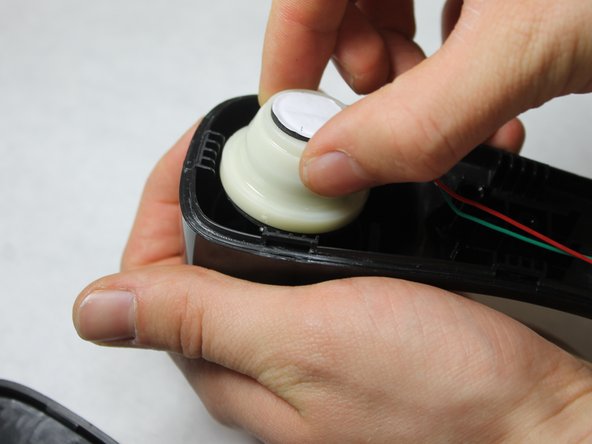
Separate the two sections of the handset by pushing them apart with the tip of the metal spudger or opening tool.
-
-


To reassemble your device, follow these instructions in reverse order.
To reassemble your device, follow these instructions in reverse order.
Annulation : je n'ai pas terminé ce tutoriel.
Une autre personne a terminé cette réparation.
Équipe

IUPUI, Team 1-1, Harley Spring 2016 Membre de l'équipe IUPUI, Team 1-1, Harley Spring 2016
IUPUI-HARLEY-S16S1G1
4 membres
13 tutoriels rédigés