Aller au contenu principal

Acer Aspire E1-510P-4637 Hard Drive Replacement

Ce dont vous avez besoin

  1. Acer Aspire E1-510P-4637 Hard Drive Replacement, Battery: étape 1, image 1 de 1
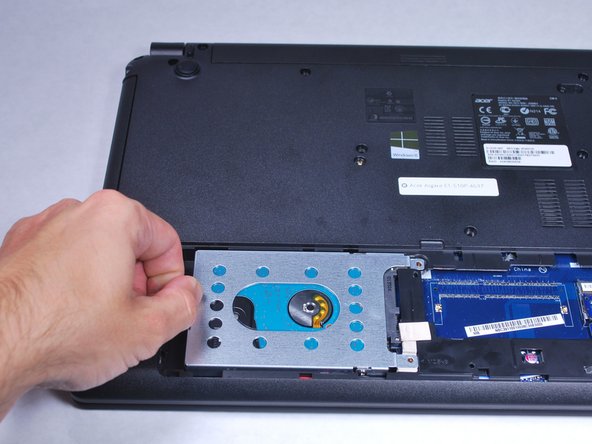
    • To release the battery, depress the battery release with a nylon spudger. Hold the latch down and slide it over.

  2. Acer Aspire E1-510P-4637 Hard Drive Replacement: étape 2, image 1 de 1
    • Firmly grab hold of the battery and slide it out of the laptop.

  3. Acer Aspire E1-510P-4637 Hard Drive Replacement, Hard Drive: étape 3, image 1 de 1
    • Remove the M2.5x8 screw with a PH1 screwdriver.

  4. Acer Aspire E1-510P-4637 Hard Drive Replacement: étape 4, image 1 de 1
    • Use the plastic opening tool to pop off the small back cover.

  5. Acer Aspire E1-510P-4637 Hard Drive Replacement: étape 5, image 1 de 1
    • Use a PH0 Phillips screwdriver to remove the screw securing the hard drive.

  6. Acer Aspire E1-510P-4637 Hard Drive Replacement: étape 6, image 1 de 2 Acer Aspire E1-510P-4637 Hard Drive Replacement: étape 6, image 2 de 2
    • Use a nylon spudger to slightly pry up the hard drive near the screw holes.

  7. Acer Aspire E1-510P-4637 Hard Drive Replacement: étape 7, image 1 de 3 Acer Aspire E1-510P-4637 Hard Drive Replacement: étape 7, image 2 de 3 Acer Aspire E1-510P-4637 Hard Drive Replacement: étape 7, image 3 de 3
    • Grab hold of the plastic tab and pull the hard drive away from the connectors. This will release the hard drive.

    • The hard drive connector is fragile. Handle with care.

Conclusion

To reassemble your device, follow these instructions in reverse order.

3 autres ont terminé cette réparation.

Caleb lindsay

Membre depuis le 04/11/16

778 Réputation

6 tutoriels rédigés

Équipe

Cal Poly, Team 34-15, Maness Spring 2016 Membre de l'équipe Cal Poly, Team 34-15, Maness Spring 2016

CPSU-MANESS-S16S34G15

4 membres

6 tutoriels rédigés

0 commentaires

Ajouter un commentaire

Nombre de vues :

Dernières 24 heures : 1

7 derniers jours : 1

30 derniers jours : 11

Total : 1,929