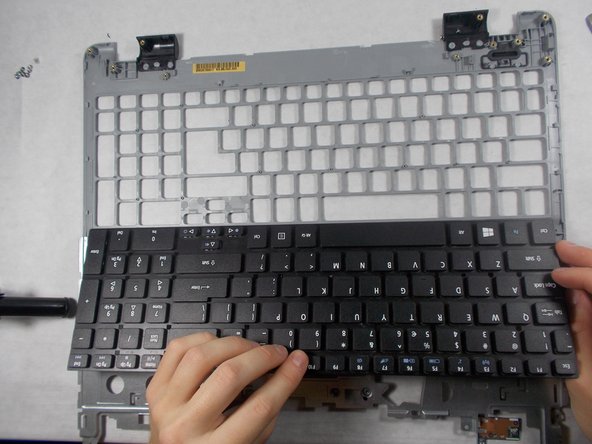
Aller au contenu principal

Acer Aspire E5-571-58CG Keyboard Replacement

Ce dont vous avez besoin

  1. Acer Aspire E5-571-58CG Keyboard Replacement, Battery: étape 1, image 1 de 2 Acer Aspire E5-571-58CG Keyboard Replacement, Battery: étape 1, image 2 de 2
    • Make sure the laptop is powered off.

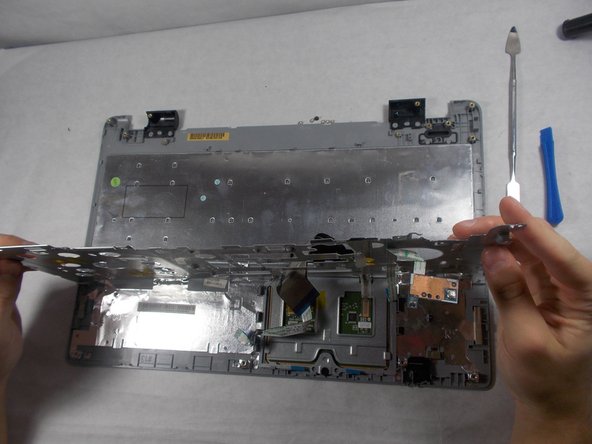
    • Flip the laptop over and locate the battery release switch.

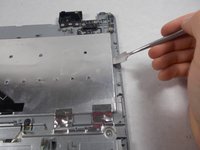
    • Insert the pointed end of the spudger into the battery release switch.

    • Push the battery release switch to the right.

  2. Acer Aspire E5-571-58CG Keyboard Replacement: étape 2, image 1 de 3 Acer Aspire E5-571-58CG Keyboard Replacement: étape 2, image 2 de 3 Acer Aspire E5-571-58CG Keyboard Replacement: étape 2, image 3 de 3
    • While the battery release switch is pushed to the right, carefully slide the battery out of its socket.

  3. Acer Aspire E5-571-58CG Keyboard Replacement, Keyboard: étape 3, image 1 de 3 Acer Aspire E5-571-58CG Keyboard Replacement, Keyboard: étape 3, image 2 de 3 Acer Aspire E5-571-58CG Keyboard Replacement, Keyboard: étape 3, image 3 de 3
    • Make sure laptop is upright.

    • Pry the keyboard cover off with the plastic opening tool.

  4. Acer Aspire E5-571-58CG Keyboard Replacement: étape 4, image 1 de 3 Acer Aspire E5-571-58CG Keyboard Replacement: étape 4, image 2 de 3 Acer Aspire E5-571-58CG Keyboard Replacement: étape 4, image 3 de 3
    • Flip the keyboard cover upside down.

    • Use the JIS #000 screw bit to remove the marked M1.4 x 2 mm screws from the back of the metal panel.

  5. Acer Aspire E5-571-58CG Keyboard Replacement: étape 5, image 1 de 3 Acer Aspire E5-571-58CG Keyboard Replacement: étape 5, image 2 de 3 Acer Aspire E5-571-58CG Keyboard Replacement: étape 5, image 3 de 3
    • Push the metal panel forward to unlock it from plastic holders on both sides.

    • Lift the metal panel up and peel it back to expose the keyboard component.

  6. Acer Aspire E5-571-58CG Keyboard Replacement: étape 6, image 1 de 3 Acer Aspire E5-571-58CG Keyboard Replacement: étape 6, image 2 de 3 Acer Aspire E5-571-58CG Keyboard Replacement: étape 6, image 3 de 3
    • Use the metal spudger to lift the keyboard component out of the metal panel.

Conclusion

To reassemble your device, follow these instructions in reverse order.

Matthew Barboza

Membre depuis le 10/19/18

159 Réputation

1 tutoriel rédigé

Équipe

UMass Dartmouth, Team S7-G7, Valliere Fall 2018 Membre de l'équipe UMass Dartmouth, Team S7-G7, Valliere Fall 2018

UMASSD-VALLIERE-F18S7G7

5 membres

5 tutoriels rédigés

0 commentaires

Ajouter un commentaire

Nombre de vues :

Dernières 24 heures : 2

7 derniers jours : 6

30 derniers jours : 12

Total : 461