Aller au contenu principal

Acer Aspire One 751h-1948 Hard Drive Replacement

Ce dont vous avez besoin

  1. Acer Aspire One 751h-1948 Hard Drive Replacement, Battery: étape 1, image 1 de 1
    • Close the laptop and flip it over to view the back of the laptop.

  2. Acer Aspire One 751h-1948 Hard Drive Replacement: étape 2, image 1 de 3 Acer Aspire One 751h-1948 Hard Drive Replacement: étape 2, image 2 de 3 Acer Aspire One 751h-1948 Hard Drive Replacement: étape 2, image 3 de 3
    • Unlock the right side of the battery by sliding the battery lock to the right. Then slide the left lock to the left and remove the battery.

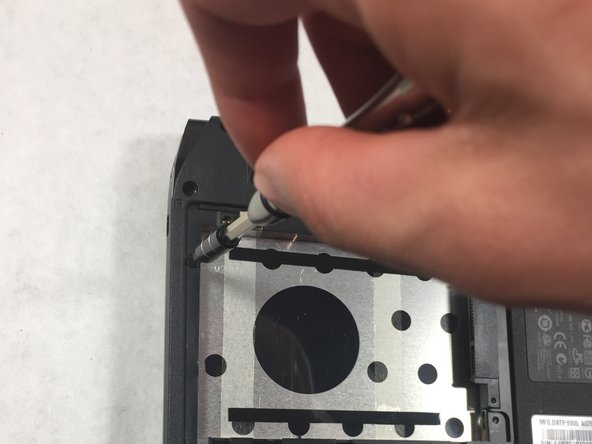
  3. Acer Aspire One 751h-1948 Hard Drive Replacement, Hard Drive: étape 3, image 1 de 1
    • Unscrew the Phillips 0# (M2 L2.5 mm) screw and remove the cover panel.

    • These screws will not come out all the way.

  4. Acer Aspire One 751h-1948 Hard Drive Replacement: étape 4, image 1 de 3 Acer Aspire One 751h-1948 Hard Drive Replacement: étape 4, image 2 de 3 Acer Aspire One 751h-1948 Hard Drive Replacement: étape 4, image 3 de 3
    • Remove the hard drive by sliding it to the left and pull it out.

  5. Acer Aspire One 751h-1948 Hard Drive Replacement: étape 5, image 1 de 2 Acer Aspire One 751h-1948 Hard Drive Replacement: étape 5, image 2 de 2
    • Unscrew the Phillips #0 (M2-L2.5 mm) screws.

Conclusion

To reassemble your device, follow these instructions in reverse order.

Équipe

UMass Dartmouth, Team S8-G2, Catania Spring 2017 Membre de l'équipe UMass Dartmouth, Team S8-G2, Catania Spring 2017

UMASSD-CATANIA-S17S8G2

3 membres

8 tutoriels rédigés

0 commentaires

Ajouter un commentaire

Nombre de vues :

Dernières 24 heures : 1

7 derniers jours : 2

30 derniers jours : 4

Total : 313