Aller au contenu principal

Acer Chromebook C710-2833 SD Card Reader Replacement

Ce dont vous avez besoin

  1. Acer Chromebook C710-2833 SD Card Reader Replacement, SD Card Reader: étape 1, image 1 de 1
    • Flip your Chromebook over so the bottom is facing up.

  2. Acer Chromebook C710-2833 SD Card Reader Replacement: étape 2, image 1 de 2 Acer Chromebook C710-2833 SD Card Reader Replacement: étape 2, image 2 de 2
    • Remove the 6 mm Phillips #00 screw that holds the back cover on.

    • Carefully lift the cover off.

    • Place the cover and screw safely to the side for now.

  3. Acer Chromebook C710-2833 SD Card Reader Replacement: étape 3, image 1 de 1
    • Using the spudger or your finger, slide the battery release slider and hold in place as shown.

    • When reassembling, holding of the slider is not needed.

  4. Acer Chromebook C710-2833 SD Card Reader Replacement: étape 4, image 1 de 1
    • While holding the slider, pull out the old battery.

    • When reassembling, holding of the slider is not needed.

  5. Acer Chromebook C710-2833 SD Card Reader Replacement: étape 5, image 1 de 3 Acer Chromebook C710-2833 SD Card Reader Replacement: étape 5, image 2 de 3 Acer Chromebook C710-2833 SD Card Reader Replacement: étape 5, image 3 de 3
    • Remove the two 3 mm Phillips #00 screws located on the WiFi card.

    • Pop the wires off the WiFi card.

    • Tilt the WiFi card up and remove it by pulling.

  6. Acer Chromebook C710-2833 SD Card Reader Replacement: étape 6, image 1 de 1
    • Remove the fifteen 6 mm Phillips #00 screws holding on the plastic backing panel.

    • Remove the five 3 mm Phillips #00 screws holding on the plastic backing panel.

  7. Acer Chromebook C710-2833 SD Card Reader Replacement: étape 7, image 1 de 3 Acer Chromebook C710-2833 SD Card Reader Replacement: étape 7, image 2 de 3 Acer Chromebook C710-2833 SD Card Reader Replacement: étape 7, image 3 de 3
    • Use the opening tool to pull the tabs back for the ribbon cable of the Solid State Drive.

    • Gently pull the ribbon cable out.

    • Remove the Solid State Drive.

  8. Acer Chromebook C710-2833 SD Card Reader Replacement: étape 8, image 1 de 2 Acer Chromebook C710-2833 SD Card Reader Replacement: étape 8, image 2 de 2
    Outil utilisé dans cette étape :
    Tweezers
    $3.99
    J'achète
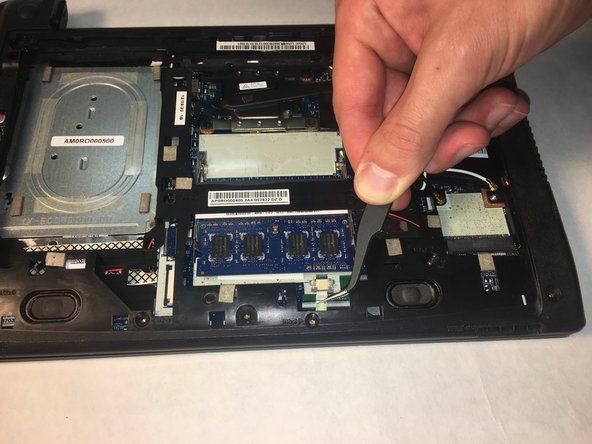
    • Use the opening tool to pull the tabs back for the ribbon cable located under the RAM board.

    • Gently pull the ribbon cable out from under the RAM board using the angled tweezers.

  9. Acer Chromebook C710-2833 SD Card Reader Replacement: étape 9, image 1 de 2 Acer Chromebook C710-2833 SD Card Reader Replacement: étape 9, image 2 de 2
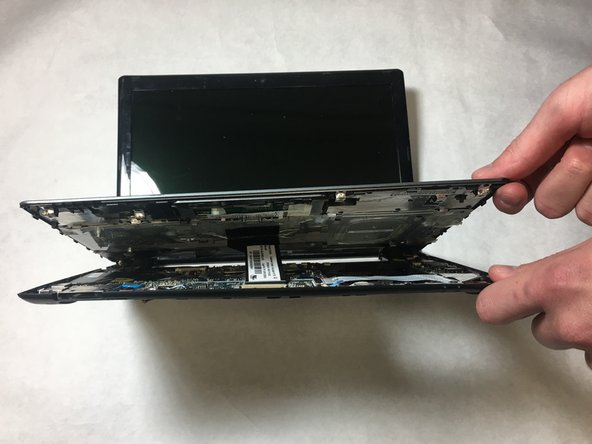
    • Use the opening tool to pry apart the seam around the outer perimeter of the back casing.

    • Pry apart the back casing from the keyboard housing.

  10. Acer Chromebook C710-2833 SD Card Reader Replacement: étape 10, image 1 de 2 Acer Chromebook C710-2833 SD Card Reader Replacement: étape 10, image 2 de 2
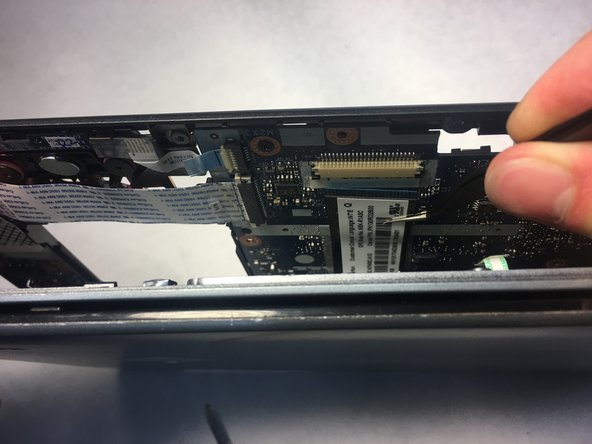
    • Use the opening tool to pull back the tabs on the ribbon cable still connecting the keyboard and the back panel.

    • Use the angled tweezers to gently remove the ribbon cable.

  11. Acer Chromebook C710-2833 SD Card Reader Replacement: étape 11, image 1 de 1
    • Lift the keyboard off of the back casing.

  12. Acer Chromebook C710-2833 SD Card Reader Replacement: étape 12, image 1 de 1
    • Use a soldering iron to de-solder the nodes shown on the SD Card Reader. There will be 11 nodes above (see the wide red rectangle), and one node on each side (see two red squares).

    • Remove and replace the SD Card Reader.

Conclusion

To reassemble your device, follow these instructions in reverse order.

Chase Wilderman

Membre depuis le 10/31/18

205 Réputation

1 tutoriel rédigé

Équipe

IUPUI, Team S1-G6, Harley Fall 2018 Membre de l'équipe IUPUI, Team S1-G6, Harley Fall 2018

IUPUI-HARLEY-F18S1G6

3 membres

4 tutoriels rédigés

0 commentaires

Ajouter un commentaire

Nombre de vues :

Dernières 24 heures : 1

7 derniers jours : 4

30 derniers jours : 12

Total : 997