Aller au contenu principal

Acer E5-571-54FL CPU Replacement

Ce dont vous avez besoin

  1. Acer E5-571-54FL CPU Replacement, Battery: étape 1, image 1 de 1
    • Make sure the laptop is shut down.

    • Flip the laptop upside down. Rotate it so the battery faces you.

  2. Acer E5-571-54FL CPU Replacement: étape 2, image 1 de 1
    • Place the pointed end of a spudger into the battery lock. Slide the battery lock to the left using the spudger. A "click" sound will accompany the release of the battery.

  3. Acer E5-571-54FL CPU Replacement: étape 3, image 1 de 1
    • Pull the battery towards you to remove it from the laptop.

  4. Acer E5-571-54FL CPU Replacement, Keyboard: étape 4, image 1 de 1
    • Remove all eighteen 8 mm screws with a Phillips #0 screwdriver.

  5. Acer E5-571-54FL CPU Replacement: étape 5, image 1 de 3 Acer E5-571-54FL CPU Replacement: étape 5, image 2 de 3 Acer E5-571-54FL CPU Replacement: étape 5, image 3 de 3
    • Carefully pry apart the clips holding the keyboard in place by moving a metal spudger along the seam.

    • Be careful not to break the plastic clips. Do not remove the keyboard until told to do so.

  6. Acer E5-571-54FL CPU Replacement: étape 6, image 1 de 2 Acer E5-571-54FL CPU Replacement: étape 6, image 2 de 2
    • Carefully flip up the white hinge. Then, detach the three ZIF ribbons connected to the motherboard.

    • Remove the panel with the keyboard and the touchpad.

  7. Acer E5-571-54FL CPU Replacement, Cooling Fan: étape 7, image 1 de 3 Acer E5-571-54FL CPU Replacement, Cooling Fan: étape 7, image 2 de 3 Acer E5-571-54FL CPU Replacement, Cooling Fan: étape 7, image 3 de 3
    • Locate the CPU cooling fan in the upper left corner of the laptop.

    • Using a #0 Phillips screwdriver, remove the two 4.5 mm screws that secure the fan to the case.

  8. Acer E5-571-54FL CPU Replacement: étape 8, image 1 de 3 Acer E5-571-54FL CPU Replacement: étape 8, image 2 de 3 Acer E5-571-54FL CPU Replacement: étape 8, image 3 de 3
    • Place the tips of the ESD safe pointed tweezers between the plug and the socket of the fan connection.

    • Gently push the tweezers to the left to disconnect the fan plug.

    • Move the fan connector and its wires to free them from the motherboard and the WiFi card.

  9. Acer E5-571-54FL CPU Replacement: étape 9, image 1 de 2 Acer E5-571-54FL CPU Replacement: étape 9, image 2 de 2
    • Lift the curved end of the fan by about 30 degrees.

    • Use your hand to lift the fan up and to the right until it is clear of the case.

    • If you feel resistance, check if the fan connector and wires are stuck under the motherboard or under the WiFi card. If the connector or wires are stuck, gently free them.

  10. Acer E5-571-54FL CPU Replacement, WiFi Card: étape 10, image 1 de 2 Acer E5-571-54FL CPU Replacement, WiFi Card: étape 10, image 2 de 2
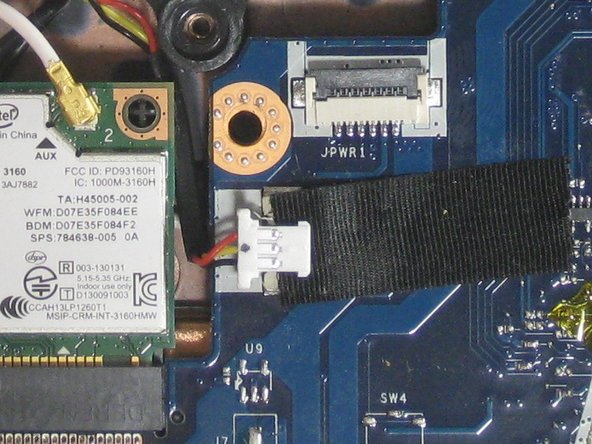
    • Locate the WiFi card. It is just below the fan and has a white coaxial cable and a black coaxial cable attached to it.

    • Grab the section of the white coaxial cable behind the brass connection using ESD safe blunt nose metal tweezers.

    • Carefully lift the white coaxial cable up and forward to disconnect the it from the WiFi card.

    • Repeat the previous two bullet points to disconnect the black coaxial cable from the WiFi card.

  11. Acer E5-571-54FL CPU Replacement: étape 11, image 1 de 1
    • Use a #0 Phillips screwdriver to remove the 3 mm screw from the upper left corner of the WiFi card.

    • The edge of WiFi card will lift up as the screw is removed.

  12. Acer E5-571-54FL CPU Replacement: étape 12, image 1 de 2 Acer E5-571-54FL CPU Replacement: étape 12, image 2 de 2
    • Grab the upper left corner of the WiFi card with your fingers.

    • Gently pull the WiFi card away from the socket.

  13. Acer E5-571-54FL CPU Replacement, Hard drive: étape 13, image 1 de 2 Acer E5-571-54FL CPU Replacement, Hard drive: étape 13, image 2 de 2
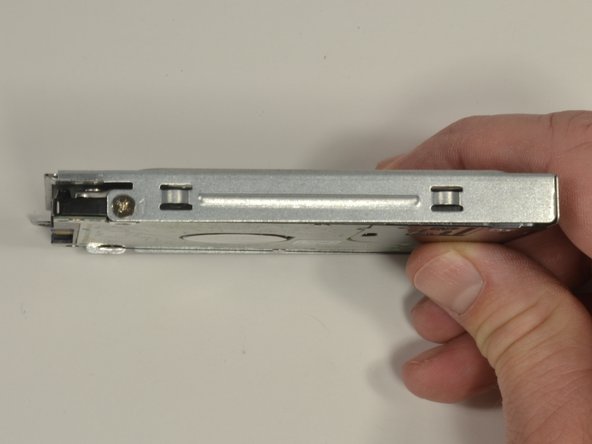
    • Locate the hard drive and its carriage at the lower right corner of the laptop.

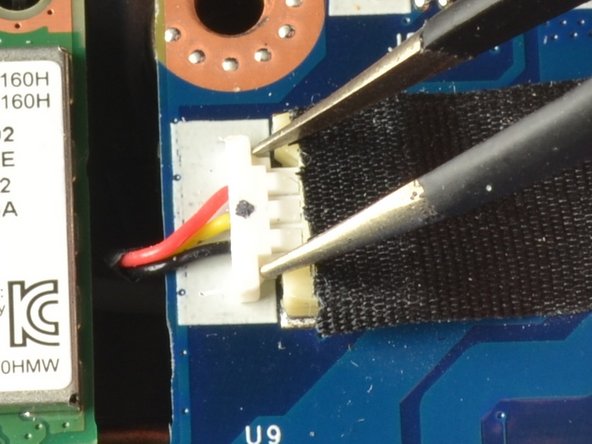
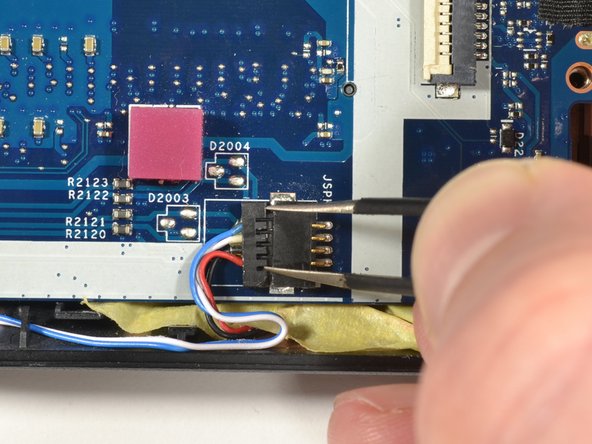
    • Release the USB port ribbon cable by using the plastic opening tool to carefully lift up the black locking tab of the ZIF connector.

    • Move the USB port ribbon cable to the side.

  14. Acer E5-571-54FL CPU Replacement: étape 14, image 1 de 2 Acer E5-571-54FL CPU Replacement: étape 14, image 2 de 2
    • Use a #0 Phillips screwdriver to remove the two 4mm screws securing the hard drive carriage in place.

  15. Acer E5-571-54FL CPU Replacement: étape 15, image 1 de 1
    • Hold the right side of the laptop in place with your right hand.

    • Put the fingers of your left hand along the top edge of the hard drive carriage.

    • Push the hard drive carriage towards your right hand to disconnect it from the motherboard.

    • This procedure may require more force then other procedures.

  16. Acer E5-571-54FL CPU Replacement: étape 16, image 1 de 2 Acer E5-571-54FL CPU Replacement: étape 16, image 2 de 2
    • Lift up the hard drive carriage on the edge closest to your body to remove it.

    • If doing the motherboard replacement guide, skip the next step.

  17. Acer E5-571-54FL CPU Replacement: étape 17, image 1 de 3 Acer E5-571-54FL CPU Replacement: étape 17, image 2 de 3 Acer E5-571-54FL CPU Replacement: étape 17, image 3 de 3
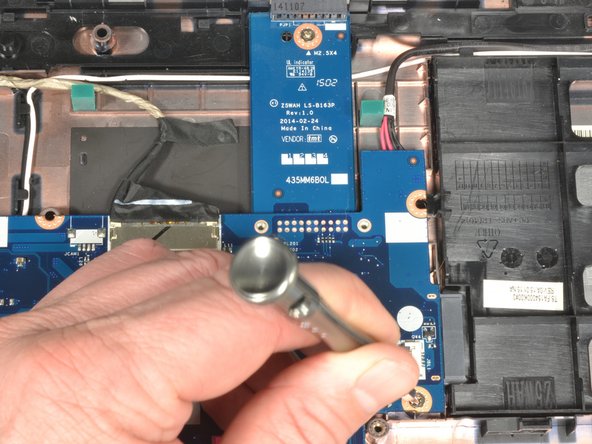
    • Locate the two 3 mm Phillips screws holding the hard drive into the carriage. There is one screw on each side of the carriage.

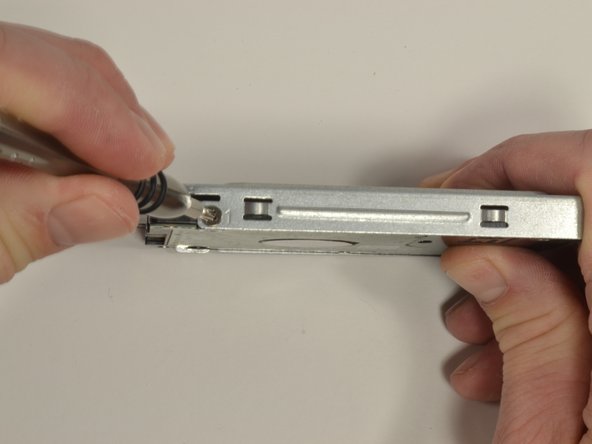
    • Hold the hard drive carriage with your non-dominant hand along one side. Ensure one of the Phillips screws is visible.

    • Using a #0 Phillips screwdriver, remove the 3 mm screw to release the side of the hard drive from the carriage.

    • Repeat the two previous bullet marks to remove the second 3 mm Phillips screw. This should also free the hard drive from the carriage.

  18. Acer E5-571-54FL CPU Replacement, Motherboard: étape 18, image 1 de 2 Acer E5-571-54FL CPU Replacement, Motherboard: étape 18, image 2 de 2
    • Use a #0 Phillips screwdriver to remove the two pictured 4 mm screws.

  19. Acer E5-571-54FL CPU Replacement: étape 19, image 1 de 2 Acer E5-571-54FL CPU Replacement: étape 19, image 2 de 2
    • Locate the three wire speaker connection. It is centered at the edge of the motherboard closest to your body.

    • Place the tips of the ESD safe pointed tweezers between the plug and the socket of the speaker connection.

    • Gently push left to disconnect the speaker plug.

  20. Acer E5-571-54FL CPU Replacement: étape 20, image 1 de 2 Acer E5-571-54FL CPU Replacement: étape 20, image 2 de 2
    • Locate the screen connection. It is centered on the side of the motherboard furthest from your body.

    • Place your fingernails on each side of the screen connection plug. Gently push away from your body to disconnect the plug.

  21. Acer E5-571-54FL CPU Replacement: étape 21, image 1 de 1
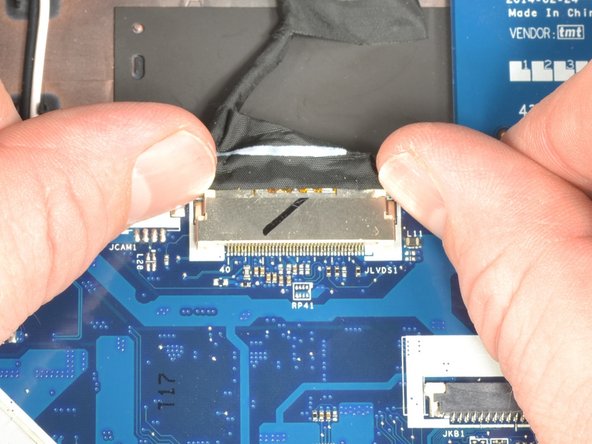
    • Carefully lift up on the right edge of the motherboard near the hard drive connector.

    • With minimal force, pull the motherboard to the right freeing the ports on the left from the case.

    • Put down the right side and allow the motherboard to rest in the case.

    • There is still one connection to be removed which lies underneath the motherboard.

    • Lift the left side of the motherboard up and turn it over so the ports are now facing right.

  22. Acer E5-571-54FL CPU Replacement: étape 22, image 1 de 1
    • Grip the edge of the motherboard closest to your body with your non-dominant hand.

    • Grip the power connection wires with your dominant hand and gently pull away from your body to disconnect.

  23. Acer E5-571-54FL CPU Replacement: étape 23, image 1 de 1
    • Lift the motherboard out of the case.

  24. Acer E5-571-54FL CPU Replacement, CPU: étape 24, image 1 de 1
    • Shut down the laptop.

    • Flip the laptop upside down. Rotate the laptop so the battery faces you.

  25. Acer E5-571-54FL CPU Replacement: étape 25, image 1 de 2 Acer E5-571-54FL CPU Replacement: étape 25, image 2 de 2
    • Place the pointed end of a spudger into the battery lock. Slide the battery lock to the left using the spudger until you hear the battery release. Pull the battery towards you to remove it from the laptop.

  26. Acer E5-571-54FL CPU Replacement: étape 26, image 1 de 2 Acer E5-571-54FL CPU Replacement: étape 26, image 2 de 2
    • Insert wisdom here.

  27. Acer E5-571-54FL CPU Replacement: étape 27, image 1 de 2 Acer E5-571-54FL CPU Replacement: étape 27, image 2 de 2
    • Unscrew the outer 6 mm screws located on both the top and the bottom sides of the fan. Detach the power cable by pulling it out. Remove the cooling fan.

  28. Acer E5-571-54FL CPU Replacement: étape 28, image 1 de 3 Acer E5-571-54FL CPU Replacement: étape 28, image 2 de 3 Acer E5-571-54FL CPU Replacement: étape 28, image 3 de 3
    • Locate the hard drive. Unscrew the two 4 mm Phillips head screws that connect the hard drive to the motherboard. Carefully detach the ZIF ribbon. Remove the hard drive.

  29. Acer E5-571-54FL CPU Replacement: étape 29, image 1 de 1
    • Unscrew any remaining screws holding down the motherboard. Then, remove the motherboard.

  30. Acer E5-571-54FL CPU Replacement: étape 30, image 1 de 3 Acer E5-571-54FL CPU Replacement: étape 30, image 2 de 3 Acer E5-571-54FL CPU Replacement: étape 30, image 3 de 3
    • Disconnect the WiFi card by gently unplugging both wires connected to it.

Conclusion

Congratulations! You have successfully completed the process of replacing the CPU in your Acer E5-571-54FL laptop. This guide provides step-by-step instructions, guiding you through the disassembly of various components such as the battery, keyboard, cooling fan, WiFi card, hard drive, and motherboard. Carefully following each step ensures a smooth disassembly process.

Remember to exercise caution and use the appropriate tools to avoid damage during the procedure. If you encounter any resistance or difficulties, double-check the connections and components to ensure everything is properly disconnected. Take your time, and do not hesitate to refer back to specific steps if needed.

To reassemble your device, simply follow the instructions in reverse order. Start by reconnecting the motherboard, securing it with screws, and reconnecting any detached components. Be sure to tighten all screws securely but avoid over-tightening. Finally, reattach the battery and power on your Acer E5-571-54FL.

If you find this guide helpful, consider providing feedback or sharing your experience. If you encounter any challenges or have suggestions for improvement, feel free to contribute to the community. Thank you for using this guide, and best of luck with your newly replaced CPU!

Jennifer Hancock

Membre depuis le 09/19/19

325 Réputation

3 tutoriels rédigés

Équipe

Un commentaire

... But this doesn't tell you how to replace the CPU!!

Robin Cowley - Réponse

Ajouter un commentaire

Nombre de vues :

Dernières 24 heures : 2

7 derniers jours : 6

30 derniers jours : 15

Total : 678