Aller au contenu principal

Acer Iconia One 7 Rear-Facing Camera Replacement

Ce dont vous avez besoin

  1. Acer Iconia One 7 Rear-Facing Camera Replacement, Rear-Facing Camera: étape 1, image 1 de 1
    • Begin at any side of the tablet.

    • With a plastic opening tool, begin taking apart the back cover from the tablet by working along the edges.

    • Prying the lid open can be difficult, use caution in order to safely remove.

    • Turn off device before this step.

  2. Acer Iconia One 7 Rear-Facing Camera Replacement: étape 2, image 1 de 1
    • Using a plastic opening tool, separate the back cover from the main device.

    • Open each side continuously to ensure all sides have been separated.

  3. Acer Iconia One 7 Rear-Facing Camera Replacement: étape 3, image 1 de 1
    • Turn the tablet over to locate the camera on the top left.

    • Besides the parts that are mentioned in the instruction, try not to agitate other fragile components inside the device.

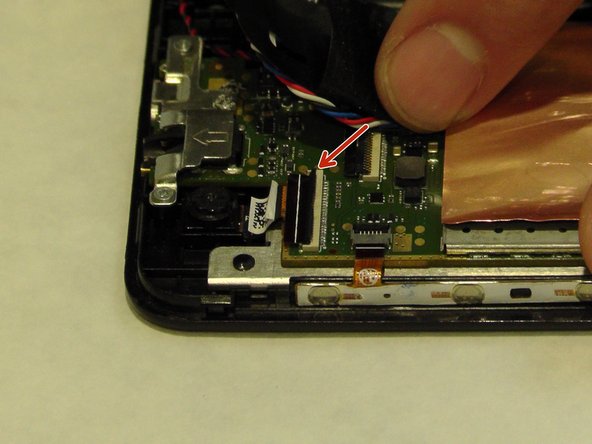
  4. Acer Iconia One 7 Rear-Facing Camera Replacement: étape 4, image 1 de 2 Acer Iconia One 7 Rear-Facing Camera Replacement: étape 4, image 2 de 2
    • Peel black tape.

    • Detach clip from motherboard.

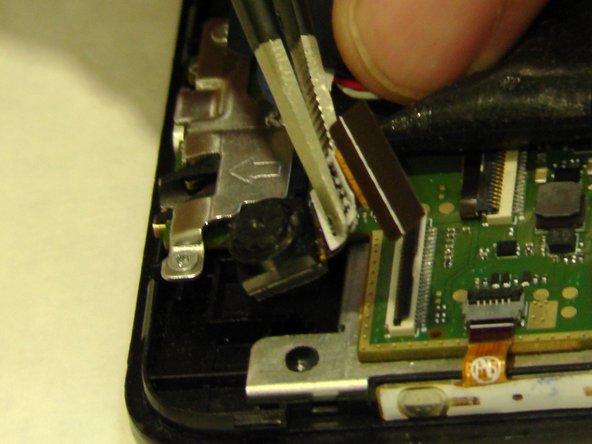
  5. Acer Iconia One 7 Rear-Facing Camera Replacement: étape 5, image 1 de 2 Acer Iconia One 7 Rear-Facing Camera Replacement: étape 5, image 2 de 2
    • Take out film object using tweezers.

    • Using tweezers take out camera.

Conclusion

To reassemble your device, follow these instructions in reverse order.

Michael

Membre depuis le 09/03/15

519 Réputation

4 tutoriels rédigés

Équipe

USF Tampa, Team 8-5, Eyestone Fall 2015 Membre de l'équipe USF Tampa, Team 8-5, Eyestone Fall 2015

USFT-EYESTONE-F15S8G5

3 membres

5 tutoriels rédigés

Un commentaire

How to get new camera if the original camera is damaged

Prakash Hasabnis - Réponse

Ajouter un commentaire

Nombre de vues :

Dernières 24 heures : 0

7 derniers jours : 1

30 derniers jours : 1

Total : 415