Cette version peut contenir des modifications incorrectes. Passez au dernier aperçu vérifié.
Ce dont vous avez besoin
-
Cette étape n’est pas traduite. Aidez à la traduire
-
With the plastic opening tool pry open the grey plastic siding on both sides of the tablet.
-
-
Cette étape n’est pas traduite. Aidez à la traduire
-
Using a Phillips #00 screwdriver remove the 4.0 mm screws on the sides of the tablet.
-
-
Cette étape n’est pas traduite. Aidez à la traduire
-
Once the 4 screws have been removed use the plastic opening tool to pry open the device on the side of the device.
-
After prying open the case with the plastic opening tool carefully remove the case from the device and place the device face down on its screen.
-
-
Cette étape n’est pas traduite. Aidez à la traduire
-
Using a Phillips #00 screwdriver remove the 4.0 mm screws holding the battery in place.
-
-
Cette étape n’est pas traduite. Aidez à la traduire
-
Lift the battery out of the device, and disconnect the cable attached to the motherboard by pulling it out to the side not lifting it up.
-
-
Cette étape n’est pas traduite. Aidez à la traduire
-
Using the plastic opening tool gently lift up the charging component out of its slot in the case.
-
-
-
Cette étape n’est pas traduite. Aidez à la traduire
-
Continue to lift up the cord until it is free from the case and only attached to the motherboard.
-
-
Cette étape n’est pas traduite. Aidez à la traduire
-
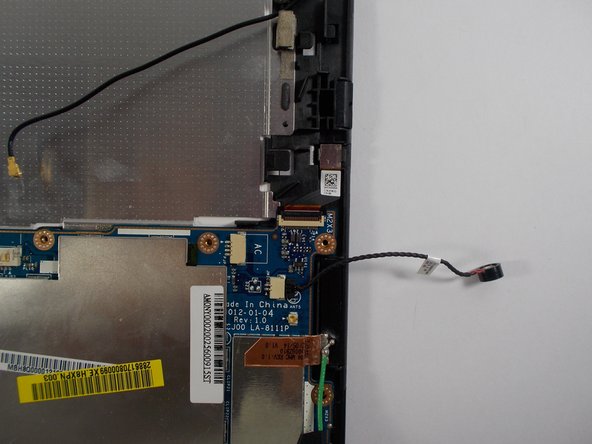
Disconnect the power component from the motherboard by pulling it out horizontally. Do not pull up on the cord only pull out
-
-
Cette étape n’est pas traduite. Aidez à la traduire
-
Lift up on the microphone cable to lift the microphone component away from the case.
-
-
Cette étape n’est pas traduite. Aidez à la traduire
-
Once the microphone has been lifted away from the case, disconnect the microphone cable from the motherboard by pulling the cable out horizontally. Do not lift up to remove.
-
-
Cette étape n’est pas traduite. Aidez à la traduire
-
After removing the battery use a Phillips head #00 screwdriver to remove the 3.0 mm screws holding the dual speakers in place.
-
-
Cette étape n’est pas traduite. Aidez à la traduire
-
Once the screws are removed, lift up on the speakers to remove them from the case.
-
-
Cette étape n’est pas traduite. Aidez à la traduire
-
Once you have removed the speakers from the case, disconnect the speakers from the motherboard by pulling the cable out horizontally. Do not pull up on the cable.
-
-
Cette étape n’est pas traduite. Aidez à la traduire
-
Using the plastic opening tool unplug the green cable by placing the tool under where the cable meets the plug and lifting up.
-
After unplugging the green cable remove the black tape that secures the green cable to motherboard.
-
-
Cette étape n’est pas traduite. Aidez à la traduire
-
Using the plastic opening tool unplug the black cable by placing the tool under where the cable meets the plug and lift up.
-
-
Cette étape n’est pas traduite. Aidez à la traduire
-
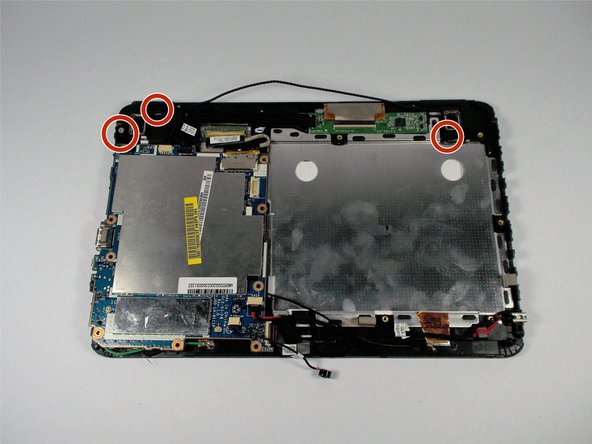
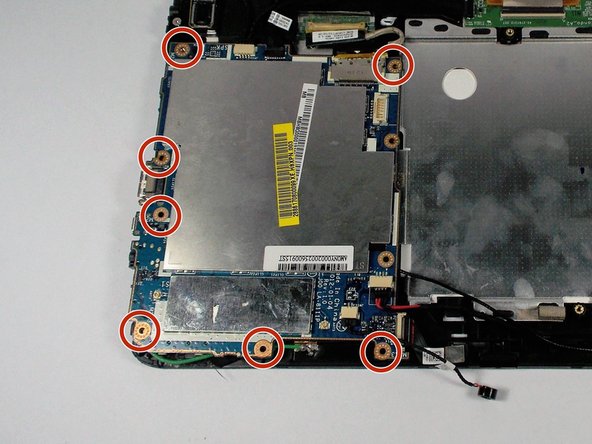
Once all cables have been disconnected from the motherboard, remove the seven remaining 3.0 mm screws with a Phillips head screwdriver size #00.
-
After the screws have been removed lift up on the motherboard to remove it from the case.
-
-
Cette étape n’est pas traduite. Aidez à la traduire
-
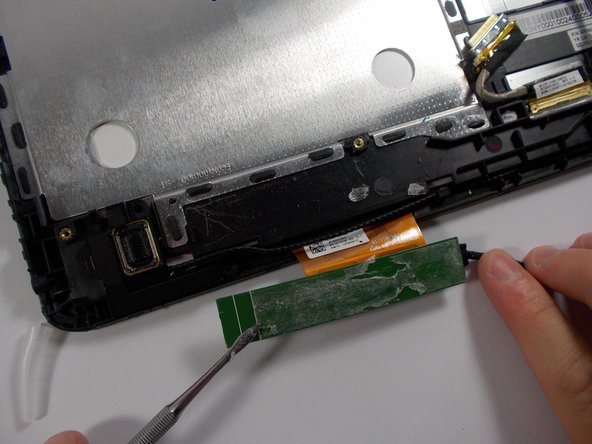
Using the pointed tip of the nylon spudger, pry the unit board off the case
-
-
Cette étape n’est pas traduite. Aidez à la traduire
-
Flip the device over, so that the screen is face up.
-
Using the metal spudgers pry apart and separate the screen from the device.
-


Annulation : je n'ai pas terminé ce tutoriel.
4 autres ont terminé cette réparation.
Équipe

UMass Dartmouth, Team 5-5, Landers Spring 2016 Membre de l'équipe UMass Dartmouth, Team 5-5, Landers Spring 2016
UMASSD-LANDERS-S16S5G5
3 membres
6 tutoriels rédigés
2 commentaires
Looking forward to fixing this tablet a friend had given up on then gave to me. So funny how easily ppl give up!Thank you for this spectacular set of directions. Looks like it will be the one that works for the tablet I have.
how can i tell if there is any water damage?