Aller au contenu principal

Akaso EK7000 4K Microphone Replacement

Ce dont vous avez besoin

  1. Akaso EK7000 4K Microphone Replacement, Battery: étape 1, image 1 de 2 Akaso EK7000 4K Microphone Replacement, Battery: étape 1, image 2 de 2
    • Locate the battery cover at the bottom of the camera. Use your fingers to gently pry open the battery cover.

  2. Akaso EK7000 4K Microphone Replacement: étape 2, image 1 de 2 Akaso EK7000 4K Microphone Replacement: étape 2, image 2 de 2
    • Locate the small plastic flap attached to the battery. Pull the battery out towards you.

  3. Akaso EK7000 4K Microphone Replacement, Front Panel: étape 3, image 1 de 2 Akaso EK7000 4K Microphone Replacement, Front Panel: étape 3, image 2 de 2
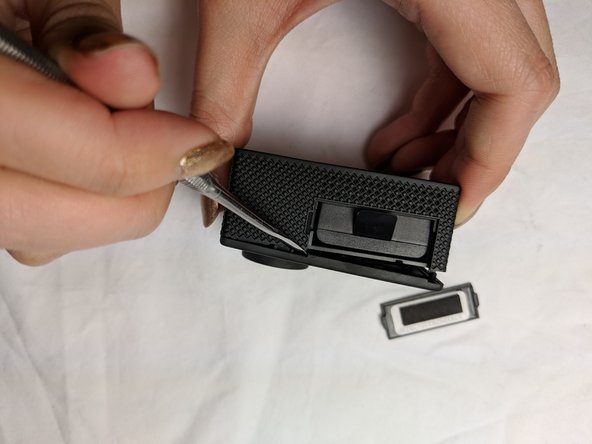
    • Using the metal spudger, gently pry open the front panel from the exposed battery cartridge.

  4. Akaso EK7000 4K Microphone Replacement: étape 4, image 1 de 2 Akaso EK7000 4K Microphone Replacement: étape 4, image 2 de 2
    • Remove the rest of front panel with your fingers or with assistance from the spudger.

  5. Akaso EK7000 4K Microphone Replacement, Microphone: étape 5, image 1 de 2 Akaso EK7000 4K Microphone Replacement, Microphone: étape 5, image 2 de 2
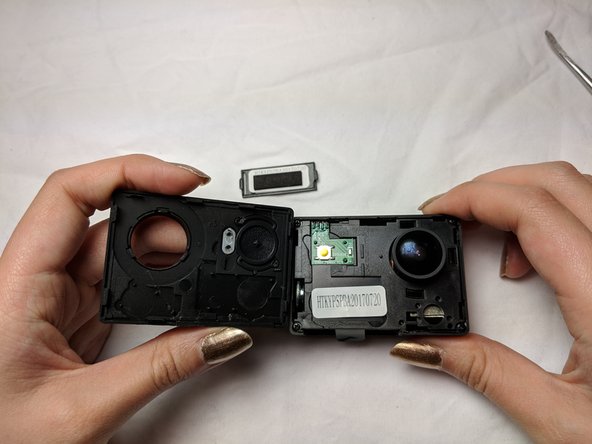
    • After removing the front panel, make sure that the battery is also removed from the camera battery cartridge to continue.

  6. Akaso EK7000 4K Microphone Replacement: étape 6, image 1 de 2 Akaso EK7000 4K Microphone Replacement: étape 6, image 2 de 2
    • When observing the camera plate under the front panel, notice that there are four screws holding the camera plate in place.

    • Use a Phillips #000 screwdriver to remove all four screws.

  7. Akaso EK7000 4K Microphone Replacement: étape 7, image 1 de 2 Akaso EK7000 4K Microphone Replacement: étape 7, image 2 de 2
    • Insert a thumb into the battery cartridge and gently push up. Be careful as not to pull apart or break any of the wiring that connects the front plate to the LED screen. The microphone will be on the left bottom corner of the front panel.

    • Gently pull out the microphone. Now you can re-adjust or replace the microphone.

Conclusion

To reassemble your device, follow these instructions in reverse order.

Une autre personne a terminé cette réparation.

Katrina Shi

Membre depuis le 02/06/19

166 Réputation

1 tutoriel rédigé

Équipe

UC Davis, Team S20-G2, Lore Winter 2019 Membre de l'équipe UC Davis, Team S20-G2, Lore Winter 2019

UCD-LORE-W19S20G2

3 membres

4 tutoriels rédigés

0 commentaires

Ajouter un commentaire

Nombre de vues :

Dernières 24 heures : 1

7 derniers jours : 5

30 derniers jours : 33

Total : 2,732