Aller au contenu principal

Alienware M17-R1 Screen Lock Assembly Replacement

Ce dont vous avez besoin

  1. Alienware M17-R1 Screen Lock Assembly Replacement, Screen Lock Assembly: étape 1, image 1 de 1
    • Open the screen until it is flat.

    • Ensure that the surface you are working on can support both the screen and the base of the laptop.

  2. Alienware M17-R1 Screen Lock Assembly Replacement: étape 2, image 1 de 2 Alienware M17-R1 Screen Lock Assembly Replacement: étape 2, image 2 de 2
    • Remove the eight 7 mm screws around the edge of the screen using a Phillips #1 screwdriver.

    • Support the screen from the bottom to make it easier to remove the screws.

  3. Alienware M17-R1 Screen Lock Assembly Replacement: étape 3, image 1 de 2 Alienware M17-R1 Screen Lock Assembly Replacement: étape 3, image 2 de 2
    • Insert the plastic opening tool and gently slide it around the edge of the screen to lift the face of the screen away from its base.

    • Be careful not to break the face of the screen when lifting it.

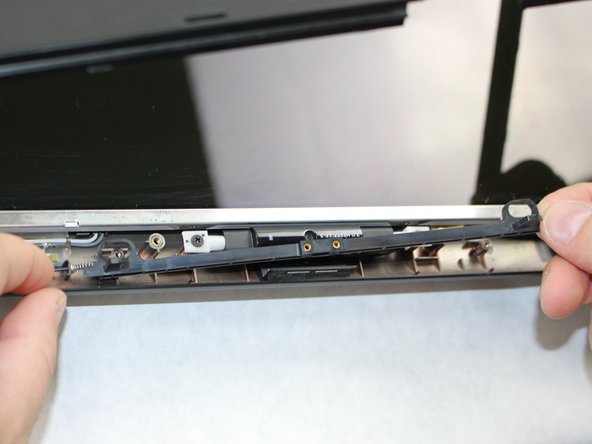
  4. Alienware M17-R1 Screen Lock Assembly Replacement: étape 4, image 1 de 3 Alienware M17-R1 Screen Lock Assembly Replacement: étape 4, image 2 de 3 Alienware M17-R1 Screen Lock Assembly Replacement: étape 4, image 3 de 3
    • Remove the two 3 mm Phillips #1 screws using a Phillips #1 screwdriver.

    • Pull the assembly grip away to remove it.

    • Remove the two 5 mm screws using a Phillips #1 screwdriver.

  5. Alienware M17-R1 Screen Lock Assembly Replacement: étape 5, image 1 de 2 Alienware M17-R1 Screen Lock Assembly Replacement: étape 5, image 2 de 2
    • Push in the assembly towards the spring.

    • Gently lift the slider from the side opposite to the spring and pull the slider away from the spring.

    • The spring is loosely secured to the slider and may fall off and become lost when removing the slider.

  6. Alienware M17-R1 Screen Lock Assembly Replacement: étape 6, image 1 de 2 Alienware M17-R1 Screen Lock Assembly Replacement: étape 6, image 2 de 2
    • If the spring is defective, slide it off the end of the assembly and replace it.

Conclusion

To reassemble your device, follow these instructions in reverse order.

William Davis

Membre depuis le 10/09/18

323 Réputation

2 tutoriels rédigés

Équipe

Sam Houston State, Team S15-G2, Blackburne Fall 2018 Membre de l'équipe Sam Houston State, Team S15-G2, Blackburne Fall 2018

SHSU-BLACKBURNE-F18S15G2

4 membres

5 tutoriels rédigés

0 commentaires

Ajouter un commentaire

Nombre de vues :

Dernières 24 heures : 0

7 derniers jours : 2

30 derniers jours : 6

Total : 401