Aller au contenu principal

Aluratek ADMPF310F Screen Replacement

Ce dont vous avez besoin

  1. Aluratek ADMPF310F Screen Replacement, Screen: étape 1, image 1 de 3 Aluratek ADMPF310F Screen Replacement, Screen: étape 1, image 2 de 3 Aluratek ADMPF310F Screen Replacement, Screen: étape 1, image 3 de 3
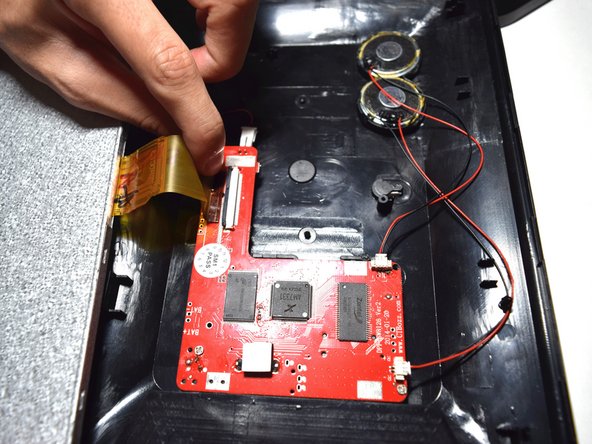
    • Using the plastic opening tool, pry off the clips all around the frame. You will hear a popping sound for every clip

    • Be sure not to pry to hard because you could crack or break the plastic facing of the device.

  2. Aluratek ADMPF310F Screen Replacement: étape 2, image 1 de 1
    • Lift screen out of place so you can access the plugs that connect it.

    • Be careful not to pull the screen to far away when placing to the side, many fragile wires are connected.

  3. Aluratek ADMPF310F Screen Replacement: étape 3, image 1 de 2 Aluratek ADMPF310F Screen Replacement: étape 3, image 2 de 2
    • Using the plastic spudger tool lift the plastic zif(zero instertion force) connector clip up.

    • Pull the ribbon cable away from the motherboard.

    • Be careful as this clip is very frail.

  4. Aluratek ADMPF310F Screen Replacement: étape 4, image 1 de 1
    • Disconnect the red and black cable connecting the screen to the motherboard by just pulling it out.

Conclusion

To reassemble your device, follow these instructions in reverse order.

Chris Belair

Membre depuis le 10/20/16

333 Réputation

2 tutoriels rédigés

Équipe

UMass Dartmouth, Team 5-1, Martin Fall 2016 Membre de l'équipe UMass Dartmouth, Team 5-1, Martin Fall 2016

UMASSD-MARTIN-F16S5G1

3 membres

5 tutoriels rédigés

0 commentaires

Ajouter un commentaire

Nombre de vues :

Dernières 24 heures : 0

7 derniers jours : 4

30 derniers jours : 8

Total : 440