Aller au contenu principal

Apple Cinema Display M8149 LCD Control Board Replacement

Ce dont vous avez besoin

  1. Apple Cinema Display M8149 LCD Control Board Replacement, Control Boards: étape 1, image 1 de 3 Apple Cinema Display M8149 LCD Control Board Replacement, Control Boards: étape 1, image 2 de 3 Apple Cinema Display M8149 LCD Control Board Replacement, Control Boards: étape 1, image 3 de 3
    • Before starting, make sure the display is unplugged.

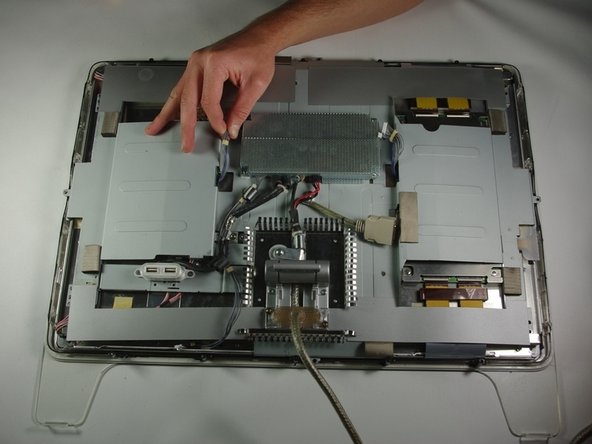
    • Place the Cinema Display so that it is lying on its face and the feet are pointed away from you.

    • Remove the three screws (9.52 x 4.43mm) that connect the back foot to the hinge using the Hex Key.

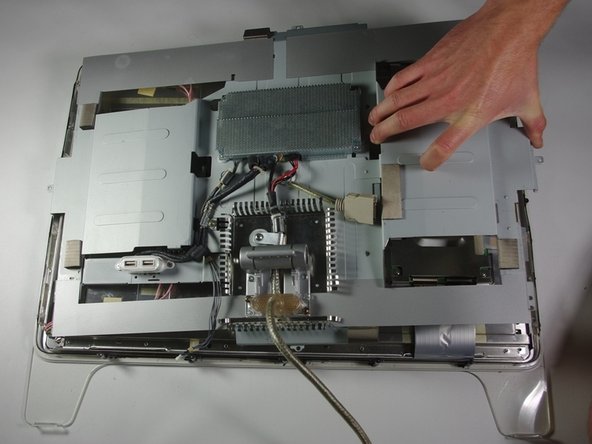
    • Remove the back foot from the hinge mount by grabbing the foot and pulling upwards.

  2. Apple Cinema Display M8149 LCD Control Board Replacement: étape 2, image 1 de 3 Apple Cinema Display M8149 LCD Control Board Replacement: étape 2, image 2 de 3 Apple Cinema Display M8149 LCD Control Board Replacement: étape 2, image 3 de 3
    • Remove the eighteen (5.25 x 4.43 mm) screws around the edge of the backplate using the Hex key.

    • Disconnect the small white connector leading to the display's Power button.

    • Gently lift the backplate off of the display. Completely remove the backplate and set it aside.

  3. Apple Cinema Display M8149 LCD Control Board Replacement: étape 3, image 1 de 2 Apple Cinema Display M8149 LCD Control Board Replacement: étape 3, image 2 de 2
    • Use a Phillips #2 screwdriver to remove the four (9.52 x 3.43 mm) screws on the outer rim of the metal cover.

    • Next, remove the four cover (11.91 x 2.89 mm) screws located at the corners of the metal cover using the Phillips #2 screwdriver.

  4. Apple Cinema Display M8149 LCD Control Board Replacement: étape 4, image 1 de 3 Apple Cinema Display M8149 LCD Control Board Replacement: étape 4, image 2 de 3 Apple Cinema Display M8149 LCD Control Board Replacement: étape 4, image 3 de 3
    • Unplug the large brown plug in the center-right, that connects the control board to the rest of the display.

    • Unplug the blue and gray plug on the right side of the control board. Repeat with the left side.

  5. Apple Cinema Display M8149 LCD Control Board Replacement: étape 5, image 1 de 2 Apple Cinema Display M8149 LCD Control Board Replacement: étape 5, image 2 de 2
    • Gently lift the large metal cover which spans across the back of the whole display.

  6. Apple Cinema Display M8149 LCD Control Board Replacement, LCD Control Board: étape 6, image 1 de 3 Apple Cinema Display M8149 LCD Control Board Replacement, LCD Control Board: étape 6, image 2 de 3 Apple Cinema Display M8149 LCD Control Board Replacement, LCD Control Board: étape 6, image 3 de 3
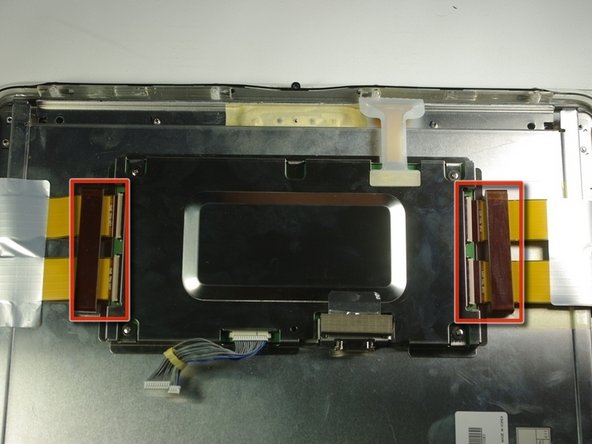
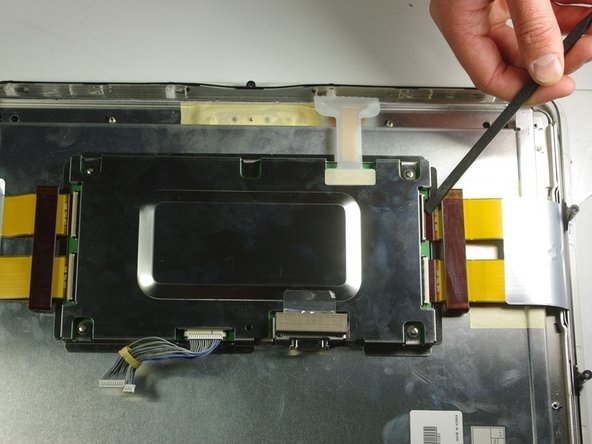
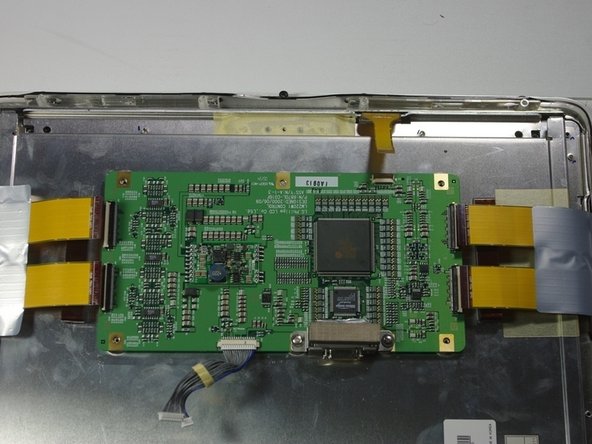
    • Locate the control board on the right side. Carefully remove the two orange tape plugs on either side of the control board using the spudger.

  7. Apple Cinema Display M8149 LCD Control Board Replacement: étape 7, image 1 de 3 Apple Cinema Display M8149 LCD Control Board Replacement: étape 7, image 2 de 3 Apple Cinema Display M8149 LCD Control Board Replacement: étape 7, image 3 de 3
    • Remove the tapes from the previous step by pulling them out from the metal box with your hand.

    • Locate the white plastic cover at the top of the box on the tape plug. Peel back the plastic cover.

    • Unplug the orange tape plug on the right of the unit using the spudger.

  8. Apple Cinema Display M8149 LCD Control Board Replacement: étape 8, image 1 de 3 Apple Cinema Display M8149 LCD Control Board Replacement: étape 8, image 2 de 3 Apple Cinema Display M8149 LCD Control Board Replacement: étape 8, image 3 de 3
    • Locate the four screws (4.79x2.33mm) on the four corners of the metal box. Remove the screws using the PH 2 screwdriver.

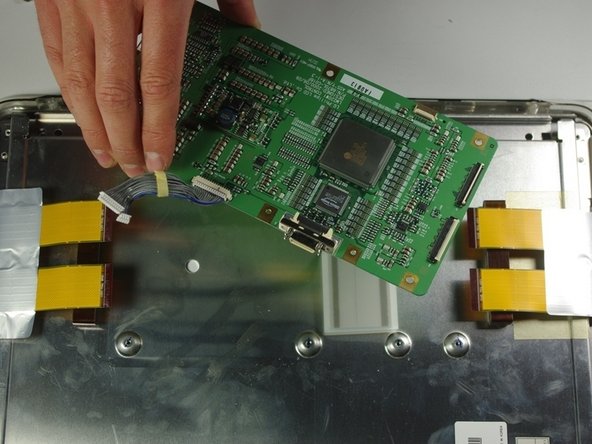
    • Lift away the metal cover with your hand to reveal the circuit board.

    • Unscrew the two terminal screws (4.79x2.34mm) located at the bottom of the circuit board, by using the PH 2 screwdriver.

  9. Apple Cinema Display M8149 LCD Control Board Replacement: étape 9, image 1 de 2 Apple Cinema Display M8149 LCD Control Board Replacement: étape 9, image 2 de 2
    • From where you removed the screws in the previous step, remove the cover of the terminal.

    • Gently lift and remove the circuit board from the right side of the unit.

    • Replace the circuit board and follow these steps in reverse to put it back together again.

Conclusion

To reassemble your device, follow these instructions in reverse order.

Une autre personne a terminé cette réparation.

Brett Murphy

Membre depuis le 04/01/11

197 Réputation

3 tutoriels rédigés

Équipe

Cal Poly, Team 10-41, Forte Spring 2011 Membre de l'équipe Cal Poly, Team 10-41, Forte Spring 2011

CPSU-FORTE-S11S10G41

5 membres

12 tutoriels rédigés

0 commentaires

Ajouter un commentaire

Nombre de vues :

Dernières 24 heures : 0

7 derniers jours : 4

30 derniers jours : 8

Total : 4,657