Aller au contenu principal

Apple Magic Keyboard 2 A2450 Motherboard Replacement

Ce dont vous avez besoin

  1. Apple Magic Keyboard 2 A2450 Motherboard Replacement, Lower Case: étape 1, image 1 de 3 Apple Magic Keyboard 2 A2450 Motherboard Replacement, Lower Case: étape 1, image 2 de 3 Apple Magic Keyboard 2 A2450 Motherboard Replacement, Lower Case: étape 1, image 3 de 3
    • Apply heat around the perimeter of the lower case to loosen the adhesive that secures the lower case to the chassis.

    • The plastic should be a bit too warm to touch comfortably, but not hot.

    • Insert an opening pick in the gap between the lower case and chassis.

    • After ensuring that the adhesive is warm, slide the pick around the perimeter to sever the adhesive.

    • As you sever the adhesive, insert additional opening picks at each corner to prevent the adhesive from readhering.

    • Remove the lower case.

  2. Apple Magic Keyboard 2 A2450 Motherboard Replacement, Motherboard: étape 2, image 1 de 3 Apple Magic Keyboard 2 A2450 Motherboard Replacement, Motherboard: étape 2, image 2 de 3 Apple Magic Keyboard 2 A2450 Motherboard Replacement, Motherboard: étape 2, image 3 de 3
    • Use a T3 Torx screwdriver head to remove all twelve 5 mm that secure the midframe.

    • Use tweezers to disconnect the battery motherboard connection.

    • Remove the midframe.

  3. Apple Magic Keyboard 2 A2450 Motherboard Replacement: étape 3, image 1 de 3 Apple Magic Keyboard 2 A2450 Motherboard Replacement: étape 3, image 2 de 3 Apple Magic Keyboard 2 A2450 Motherboard Replacement: étape 3, image 3 de 3
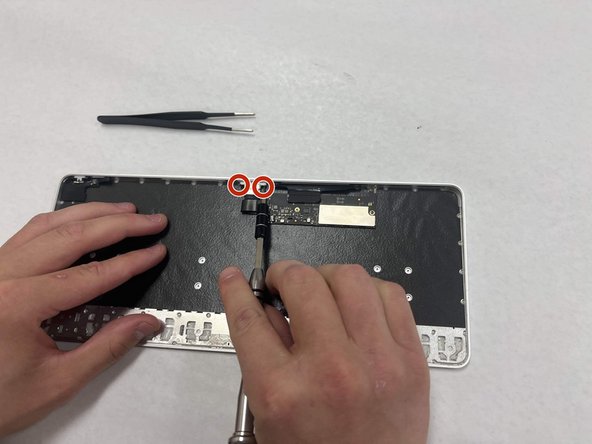
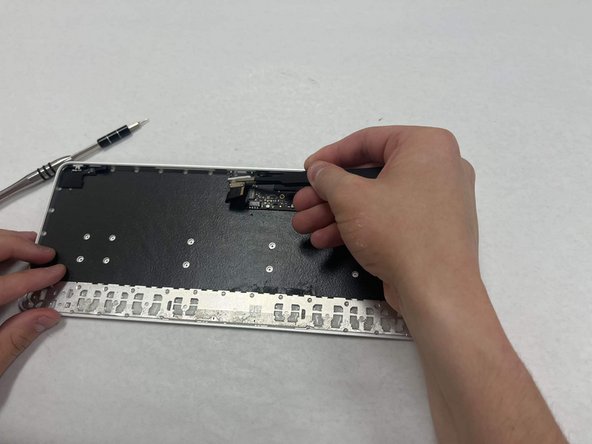
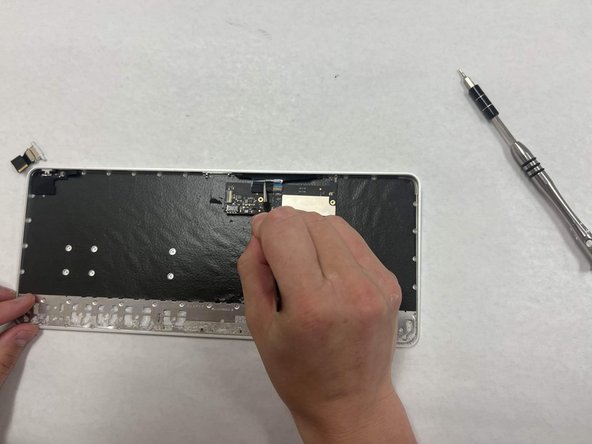
    • Use a T3 Torx screwdriver to remove the two 5 mm screws that secure the lightning port.

    • Use tweezers to remove the Lighting port from the motherboard.

  4. Apple Magic Keyboard 2 A2450 Motherboard Replacement: étape 4, image 1 de 3 Apple Magic Keyboard 2 A2450 Motherboard Replacement: étape 4, image 2 de 3 Apple Magic Keyboard 2 A2450 Motherboard Replacement: étape 4, image 3 de 3
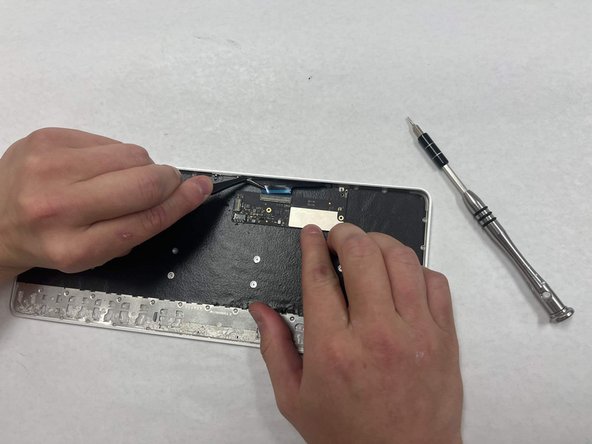
    • Use a T3 Torx screwdriver to remove the three 3 mm screws that secure the motherboard.

    • Remove the tape covering the ribbon cable on the top half of the motherboard.

    • Use a small pair of tweezers to gently unplug the ribbon cable and remove the motherboard from the keyboard.

Conclusion

To reassemble your device, follow these instructions in reverse order.

Une autre personne a terminé cette réparation.

Brayden Devenport

Membre depuis le 04/02/24

127 Réputation

1 tutoriel rédigé

Équipe

IUPUI, Team 3-2, Harley Spring 2024 Membre de l'équipe IUPUI, Team 3-2, Harley Spring 2024

IUPUI-HARLEY-S24S3G2

4 membres

3 tutoriels rédigés

0 commentaires

Ajouter un commentaire

Nombre de vues :

Dernières 24 heures : 0

7 derniers jours : 4

30 derniers jours : 25

Total : 72