Aller au contenu principal

Asus A52F XE2 Lower Case Replacement

Ce dont vous avez besoin

  1. Asus A52F XE2 Lower Case Replacement, Battery: étape 1, image 1 de 2 Asus A52F XE2 Lower Case Replacement, Battery: étape 1, image 2 de 2
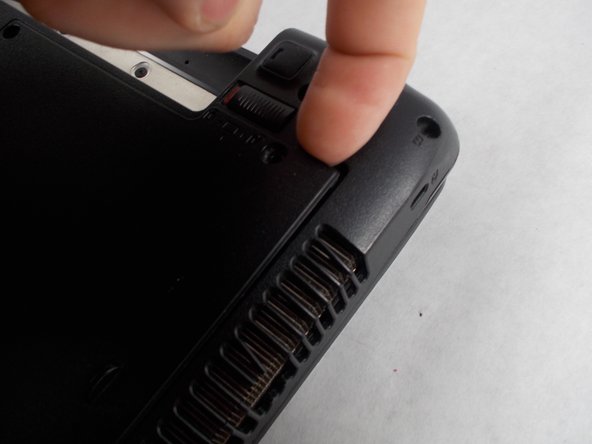
    • Place the laptop face down with the battery facing away from you.

    • Locate the two buttons next to the battery.

    • Slide the right slider to the unlocked (red) position.

  2. Asus A52F XE2 Lower Case Replacement: étape 2, image 1 de 2 Asus A52F XE2 Lower Case Replacement: étape 2, image 2 de 2
    • Hold the left button to the left.

    • Slide the battery with your other hand away from you and it should disconnect.

  3. Asus A52F XE2 Lower Case Replacement, Lower Case: étape 3, image 1 de 3 Asus A52F XE2 Lower Case Replacement, Lower Case: étape 3, image 2 de 3 Asus A52F XE2 Lower Case Replacement, Lower Case: étape 3, image 3 de 3
    • Remove the five Phillips # 0 screws from the back panel.

    • Using your finger or a plastic spudger start to carefully pry up the back planel.

  4. Asus A52F XE2 Lower Case Replacement: étape 4, image 1 de 2 Asus A52F XE2 Lower Case Replacement: étape 4, image 2 de 2
    • Slide the back panel away and remove the panel.

Conclusion

To reassemble your device, follow these instructions in reverse order.

Une autre personne a terminé cette réparation.

Michael Benson

Membre depuis le 03/08/17

149 Réputation

1 tutoriel rédigé

Équipe

UMass Dartmouth, Team S5-G1, Botvin Spring 2017 Membre de l'équipe UMass Dartmouth, Team S5-G1, Botvin Spring 2017

UMASSD-BOTVIN-S17S5G1

4 membres

7 tutoriels rédigés

0 commentaires

Ajouter un commentaire

Nombre de vues :

Dernières 24 heures : 1

7 derniers jours : 5

30 derniers jours : 8

Total : 400