Aller au contenu principal

Ce tutoriel a des changements plus récents. Passer à la dernière version non vérifiée.

Asus A53U-ES21 Optical Drive Replacement

Ce dont vous avez besoin

  1. Asus A53U-ES21 Optical Drive Replacement, Battery: étape 1, image 1 de 2 Asus A53U-ES21 Optical Drive Replacement, Battery: étape 1, image 2 de 2
    • Make sure the laptop is off.

    • Flip the laptop upside down so that the battery is facing you.

  2. Asus A53U-ES21 Optical Drive Replacement: étape 2, image 1 de 2 Asus A53U-ES21 Optical Drive Replacement: étape 2, image 2 de 2
    • Move the two sliders towards the outer edge of the laptop.

    • Pull the battery out with your left hand while holding the right slider.

  3. Asus A53U-ES21 Optical Drive Replacement, Optical Drive: étape 3, image 1 de 3 Asus A53U-ES21 Optical Drive Replacement, Optical Drive: étape 3, image 2 de 3 Asus A53U-ES21 Optical Drive Replacement, Optical Drive: étape 3, image 3 de 3
    • Remove the 5mm screw using a Phillips #1 screwdriver.

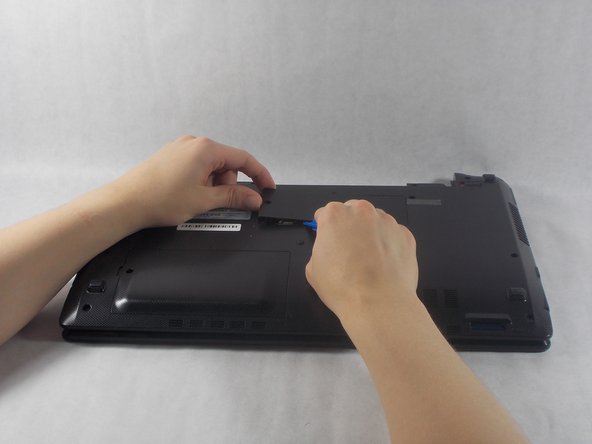
    • Use the iFixit opening tools to remove the RAM panel.

  4. Asus A53U-ES21 Optical Drive Replacement: étape 4, image 1 de 3 Asus A53U-ES21 Optical Drive Replacement: étape 4, image 2 de 3 Asus A53U-ES21 Optical Drive Replacement: étape 4, image 3 de 3
    • Remove the 7mm screw using a Phillips #1 screwdriver.

    • Pull the optical drive out from the side of the laptop.

Conclusion

To reassemble your device, follow these instructions in reverse order.

Chase Poirier

Membre depuis le 10/23/18

544 Réputation

5 tutoriels rédigés

Équipe

UMass Dartmouth, Team S1-G3, Simcock Fall 2018 Membre de l'équipe UMass Dartmouth, Team S1-G3, Simcock Fall 2018

UMASSD-SIMCOCK-F18S1G3

3 membres

7 tutoriels rédigés

0 commentaires

Ajouter un commentaire

Nombre de vues :

Dernières 24 heures : 0

7 derniers jours : 0

30 derniers jours : 1

Total : 267