Aller au contenu principal

Asus Chromebook C300MA-EDU Speaker Replacement

Ce dont vous avez besoin

  1. Asus Chromebook C300MA-EDU Speaker Replacement, Keyboard: étape 1, image 1 de 2 Asus Chromebook C300MA-EDU Speaker Replacement, Keyboard: étape 1, image 2 de 2
    • Flip the Chromebook onto its back, where there are eleven screws.

    • There are two variations of screws on the back panel:

    • Six 8.7mm screws.

    • Five 6.4mm screws.

    • Using your screwdriver with the J00 Phillips Head tip, remove the screws by turning them counter clockwise.

  2. Asus Chromebook C300MA-EDU Speaker Replacement: étape 2, image 1 de 2 Asus Chromebook C300MA-EDU Speaker Replacement: étape 2, image 2 de 2
    • Once the screws are removed, flip the Chromebook back over.

    • Gently remove the keyboard by starting to lift up on one corner with a plastic opening tool.

    • Follow around the brim of the keyboard until it pops off.

  3. Asus Chromebook C300MA-EDU Speaker Replacement: étape 3, image 1 de 3 Asus Chromebook C300MA-EDU Speaker Replacement: étape 3, image 2 de 3 Asus Chromebook C300MA-EDU Speaker Replacement: étape 3, image 3 de 3
    • Once you remove the keyboard, it will be connected to the CPU with two tabbed connections.

    • Release the connections from the tabs gently by flipping the white flaps up until disconnected.

    • You can now pull the ribbons out from the board and remove the keyboard.

  4. Asus Chromebook C300MA-EDU Speaker Replacement, Battery: étape 4, image 1 de 3 Asus Chromebook C300MA-EDU Speaker Replacement, Battery: étape 4, image 2 de 3 Asus Chromebook C300MA-EDU Speaker Replacement, Battery: étape 4, image 3 de 3
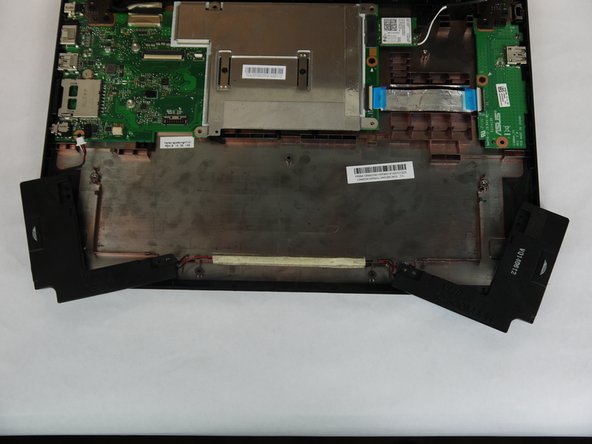
    • Once the keyboard is removed, the battery is located on the bottom portion of the shell.

    • The battery is held in with six 6.5mm screws on opposing sides.

  5. Asus Chromebook C300MA-EDU Speaker Replacement: étape 5, image 1 de 2 Asus Chromebook C300MA-EDU Speaker Replacement: étape 5, image 2 de 2
    • The battery is now held in with a tabbed connection to the CPU on the left side of the board. On the tabbed connection, there is a silver plate.

    • Gently push on the silver plate towards the screen until the plastic connection is free.

    • The tabbed connection should now slide out backwards.

  6. Asus Chromebook C300MA-EDU Speaker Replacement: étape 6, image 1 de 2 Asus Chromebook C300MA-EDU Speaker Replacement: étape 6, image 2 de 2
    • At this point, using the plastic removal tool, lift the battery out of the shell.

  7. Asus Chromebook C300MA-EDU Speaker Replacement, Speaker: étape 7, image 1 de 2 Asus Chromebook C300MA-EDU Speaker Replacement, Speaker: étape 7, image 2 de 2
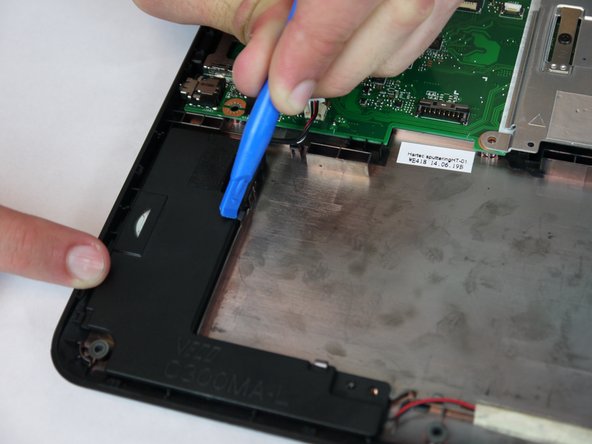
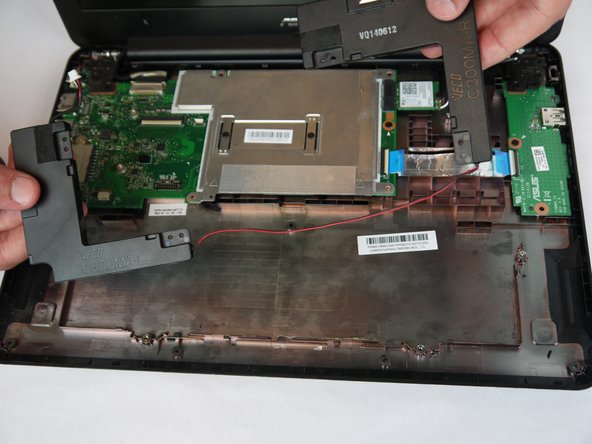
    • The speakers are connected to the CPU via a tabbed connection.

    • Using a smaller plastic spudger, gently pull backwards on the plastic clip until it comes loose.

  8. Asus Chromebook C300MA-EDU Speaker Replacement: étape 8, image 1 de 3 Asus Chromebook C300MA-EDU Speaker Replacement: étape 8, image 2 de 3 Asus Chromebook C300MA-EDU Speaker Replacement: étape 8, image 3 de 3
    • Next, the speaker is incorporated into two plastic clips which are in the shell of the Chromebook.

    • Using a smaller plastic spudger, gently pull upward on the plastic clips from the outer edge of the speaker unit.

  9. Asus Chromebook C300MA-EDU Speaker Replacement: étape 9, image 1 de 2 Asus Chromebook C300MA-EDU Speaker Replacement: étape 9, image 2 de 2
    • After taking off the speaker unit from both sides, remove the tape holding down the central wiring in the middle of the Chromebook’s shell.

    • Using a plastic opening tool or spudger, slide the tool underneath a corner of tape and run the tool until the tape is removed.

  10. Asus Chromebook C300MA-EDU Speaker Replacement: étape 10, image 1 de 2 Asus Chromebook C300MA-EDU Speaker Replacement: étape 10, image 2 de 2
    • Gently slide the wire out from its casing.

    • The speaker is now disconnected safely.

Conclusion

To reassemble your device, follow these instructions in reverse order.

Christopher Hart

Membre depuis le 09/28/17

501 Réputation

5 tutoriels rédigés

Équipe

USF Tampa, Team S2-G3, Nance Fall 2017 Membre de l'équipe USF Tampa, Team S2-G3, Nance Fall 2017

USFT-NANCE-F17S2G3

4 membres

10 tutoriels rédigés

0 commentaires

Ajouter un commentaire

Nombre de vues :

Dernières 24 heures : 0

7 derniers jours : 2

30 derniers jours : 2

Total : 161