Aller au contenu principal

Asus G75VW-BHI7N07 Optical Drive Assembly Replacement

Ce dont vous avez besoin

  1. Asus G75VW-BHI7N07 Optical Drive Assembly Replacement, Optical Drive: étape 1, image 1 de 3 Asus G75VW-BHI7N07 Optical Drive Assembly Replacement, Optical Drive: étape 1, image 2 de 3 Asus G75VW-BHI7N07 Optical Drive Assembly Replacement, Optical Drive: étape 1, image 3 de 3
    Outil utilisé dans cette étape :
    Tweezers
    $4.99
    J'achète
    • If you have power, press the eject button.

    • If you don't have power, use the opening tool to pry off the disk drive cover.

    • Press the Manual Eject button with the spudger and the disk drive should slide out. (Might need tweezers if it doesn't pop out immediately)

    • Once the disc drive pops out, flip the laptop over.

  2. Asus G75VW-BHI7N07 Optical Drive Assembly Replacement: étape 2, image 1 de 2 Asus G75VW-BHI7N07 Optical Drive Assembly Replacement: étape 2, image 2 de 2
    • Remove the 4 screws that hold down the metal plate with the J0 Phillips-head screwdriver.

    • Put the screws onto the magnetic pad, to avoid losing any.

    • Lift the metal plate off the optical drive with your fingers.

  3. Asus G75VW-BHI7N07 Optical Drive Assembly Replacement: étape 3, image 1 de 2 Asus G75VW-BHI7N07 Optical Drive Assembly Replacement: étape 3, image 2 de 2
    • Remove 3 screws of disc drive with the J0 Phillips-head screwdriver.

    • Pick up the disc drive assembly and pull it out.

  4. Asus G75VW-BHI7N07 Optical Drive Assembly Replacement: étape 4, image 1 de 3 Asus G75VW-BHI7N07 Optical Drive Assembly Replacement: étape 4, image 2 de 3 Asus G75VW-BHI7N07 Optical Drive Assembly Replacement: étape 4, image 3 de 3
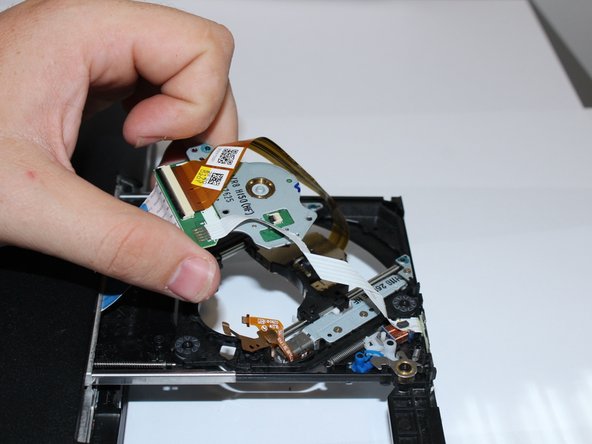
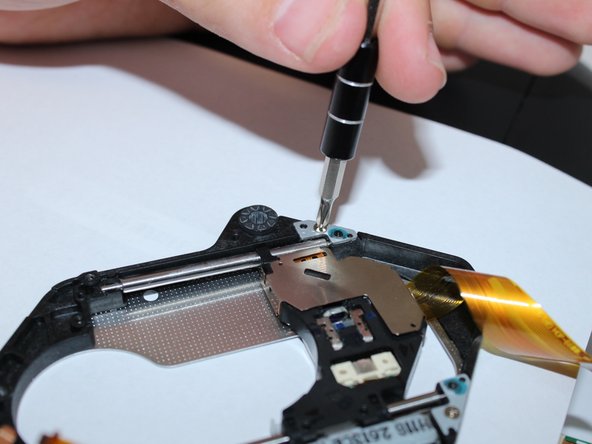
    • Remove optical assembly by hand.

    • Remove disc reader by removing 2 bolts from the top using the J0 Phillips-head screwdriver.

    • Lift the metal piece out.

    • Make sure no edges are sticking out when putting the metal plate back in place.

Conclusion

To reassemble your device, follow these instructions in reverse order.

Une autre personne a terminé cette réparation.

Joy

Membre depuis le 09/08/17

437 Réputation

4 tutoriels rédigés

Équipe

0 commentaires

Ajouter un commentaire

Nombre de vues :

Dernières 24 heures : 0

7 derniers jours : 1

30 derniers jours : 16

Total : 816