Aller au contenu principal

Asus Q504UA-BHI5T13 Display Assembly Replacement

Ce dont vous avez besoin

  1. Asus Q504UA-BHI5T13 Display Assembly Replacement, Back Panel: étape 1, image 1 de 1
    • Ensure that the laptop is off so you do not shock yourself.

  2. Asus Q504UA-BHI5T13 Display Assembly Replacement: étape 2, image 1 de 1
    • Use the T5 Torx screwdriver to remove the ten 1mm screws located around the back cover.

  3. Asus Q504UA-BHI5T13 Display Assembly Replacement: étape 3, image 1 de 1
    • Remove the two rubber pads nearest to you using the metal spudger.

  4. Asus Q504UA-BHI5T13 Display Assembly Replacement: étape 4, image 1 de 1
    • Use the Phillips #0 screwdriver to remove the two 4mm screws that are under the rubber pads.

  5. Asus Q504UA-BHI5T13 Display Assembly Replacement: étape 5, image 1 de 1
    • Insert any of the plastic opening tools into the seam to separate the back cover (it is recommended to start at the corner of the hinges). If you did it right, then the cover should pop off.

    • Be careful as you may damage the tabs.

  6. Asus Q504UA-BHI5T13 Display Assembly Replacement, Display Assembly: étape 6, image 1 de 1
    • Use the Phillips #0 screwdriver to remove the six 5.00 mm screws connected to the hinges of the display assembly.

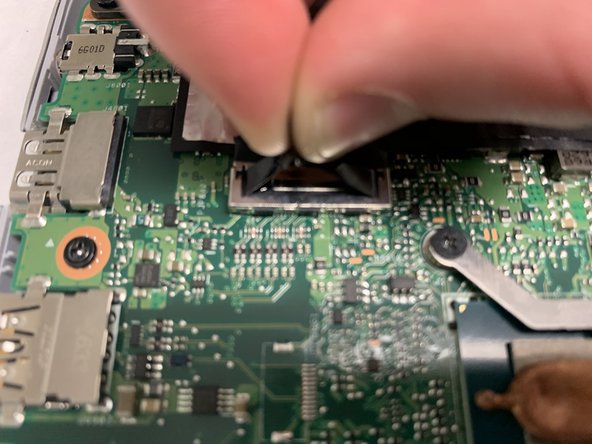
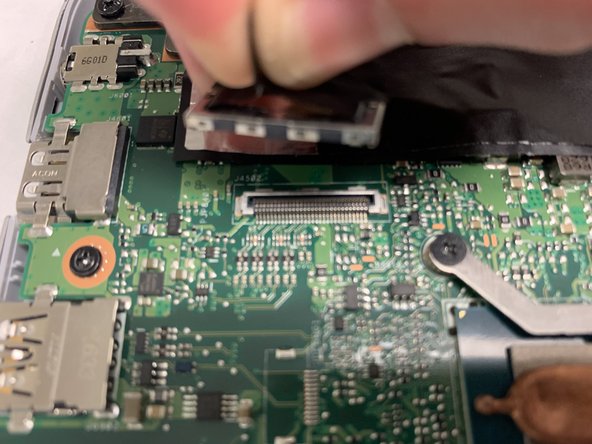
  7. Asus Q504UA-BHI5T13 Display Assembly Replacement: étape 7, image 1 de 3 Asus Q504UA-BHI5T13 Display Assembly Replacement: étape 7, image 2 de 3 Asus Q504UA-BHI5T13 Display Assembly Replacement: étape 7, image 3 de 3
    • Remove the two connectors with your hands, as shown.

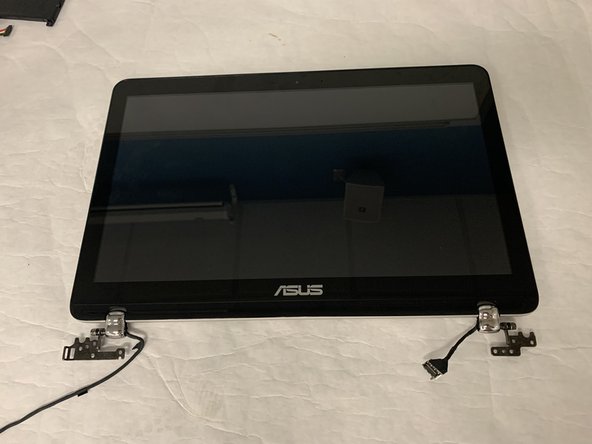
  8. Asus Q504UA-BHI5T13 Display Assembly Replacement: étape 8, image 1 de 2 Asus Q504UA-BHI5T13 Display Assembly Replacement: étape 8, image 2 de 2
    • Hold the display assembly with two hands and pull upwards to remove.

Conclusion

To reassemble your device, follow these instructions in reverse order.

2 autres ont terminé cette réparation.

Jacob Fritsch

Membre depuis le 11/04/19

337 Réputation

3 tutoriels rédigés

Équipe

IUPUI, Team S1-G2, Henning Fall 2019 Membre de l'équipe IUPUI, Team S1-G2, Henning Fall 2019

IUPUI-HENNING-F19S1G2

3 membres

3 tutoriels rédigés

Un commentaire

Is this call soemthing else. I cannot find the complete assembly. My hinges are broken off and the front black bottom is split so I would like to have the entire assembly so that I could replace it all.

smej - Réponse

Ajouter un commentaire

Nombre de vues :

Dernières 24 heures : 1

7 derniers jours : 3

30 derniers jours : 14

Total : 1,261