Aller au contenu principal

Asus Q525U Hard Drive Replacement

Ce dont vous avez besoin

  1. Asus Q525U Hard Drive Replacement, Back Cover: étape 1, image 1 de 3 Asus Q525U Hard Drive Replacement, Back Cover: étape 1, image 2 de 3 Asus Q525U Hard Drive Replacement, Back Cover: étape 1, image 3 de 3
    • Begin by powering off the device and flipping the device over.

    • Carefully remove the two longer 9.5 mm screws on the corners with a Phillips #1 screwdriver.

    • Remove the eight 7.5 mm Phillips #1 screws on the back of the device.

  2. Asus Q525U Hard Drive Replacement: étape 2, image 1 de 3 Asus Q525U Hard Drive Replacement: étape 2, image 2 de 3 Asus Q525U Hard Drive Replacement: étape 2, image 3 de 3
    • Use an opening pick to separate the back cover from the device.

    • For easiest removal, begin by prying at one of the front corners and sliding the tool under the cover in a counter-clockwise motion (to the left) toward the laptop hinge.

  3. Asus Q525U Hard Drive Replacement: étape 3, image 1 de 3 Asus Q525U Hard Drive Replacement: étape 3, image 2 de 3 Asus Q525U Hard Drive Replacement: étape 3, image 3 de 3
    • Once the cover has been separated from the device, carefully lift the back cover off the device (begin by lifting from the front of the cover first).

    • The back cover should be easily removable, allowing full access to all of the internal components.

  4. Asus Q525U Hard Drive Replacement, Hard Drive: étape 4, image 1 de 1
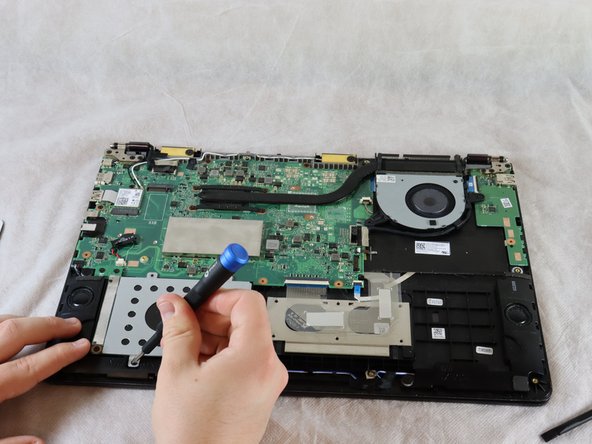
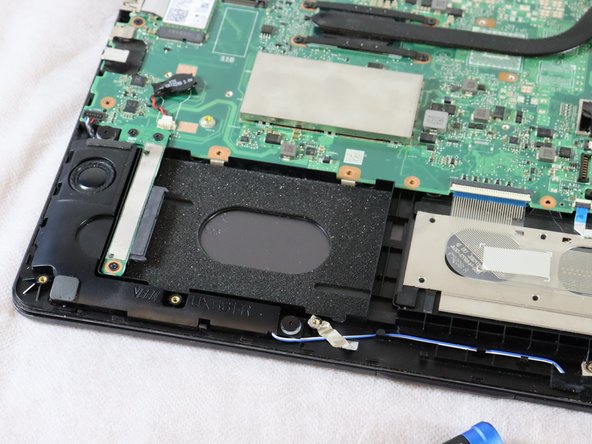
    • The hard drive is located to the left of the battery and below the motherboard.

  5. Asus Q525U Hard Drive Replacement: étape 5, image 1 de 2 Asus Q525U Hard Drive Replacement: étape 5, image 2 de 2
    • Remove the two 4 mm Phillips #1 screws which are holding the hard drive cover in place.

  6. Asus Q525U Hard Drive Replacement: étape 6, image 1 de 2 Asus Q525U Hard Drive Replacement: étape 6, image 2 de 2
    • The hard drive cover is now easily accessible.

    • Lift the cover off, exposing the hard drive underneath [this laptop is missing its hard drive].

    • If replacing the hard drive, lift it up on the right side slightly and pull it from the connecter on the left.

Conclusion

To reassemble your device, follow these instructions in reverse order.

Une autre personne a terminé cette réparation.

Stewart Crandall

Membre depuis le 02/22/22

550 Réputation

5 tutoriels rédigés

Équipe

Clemson, Team 2-5, Hunter Spring 2022 Membre de l'équipe Clemson, Team 2-5, Hunter Spring 2022

CLEM-HUNTER-S22S2G5

4 membres

8 tutoriels rédigés

0 commentaires

Ajouter un commentaire

Nombre de vues :

Dernières 24 heures : 2

7 derniers jours : 8

30 derniers jours : 51

Total : 1,886