Aller au contenu principal

Asus ROG Strix GL702VS Fan Replacement

Ce dont vous avez besoin

  1. Asus ROG Strix GL702VS Fan Replacement, Back Cover: étape 1, image 1 de 1
    • Flip the computer so the bottom of the laptop is facing up.

  2. Asus ROG Strix GL702VS Fan Replacement: étape 2, image 1 de 1
    • Remove the ten JIS #0 screws around the edge of the laptop.

    • The two bottom screws are slightly shorter

  3. Asus ROG Strix GL702VS Fan Replacement: étape 3, image 1 de 2 Asus ROG Strix GL702VS Fan Replacement: étape 3, image 2 de 2
    • Use a Jimmy to carefully free each side of the bottom casing.

  4. Asus ROG Strix GL702VS Fan Replacement: étape 4, image 1 de 1
    • Lift up the back casing from the computer.

    • You may hear clicking or snapping sounds. This is just the plastic clips coming loose.

  5. Asus ROG Strix GL702VS Fan Replacement, Cooling Fans: étape 5, image 1 de 3 Asus ROG Strix GL702VS Fan Replacement, Cooling Fans: étape 5, image 2 de 3 Asus ROG Strix GL702VS Fan Replacement, Cooling Fans: étape 5, image 3 de 3
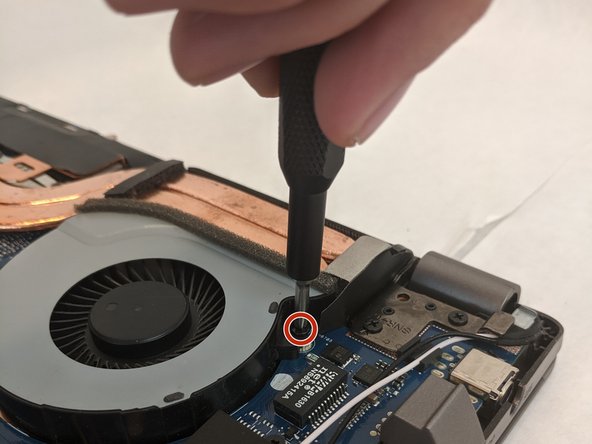
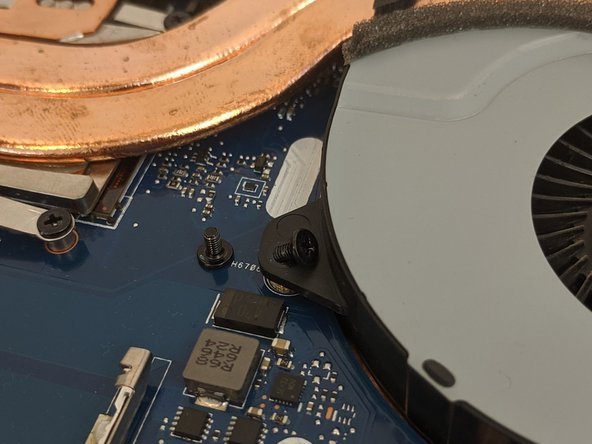
    • Remove the four 4.8mm JIS #0 screws (two on each fan).

  6. Asus ROG Strix GL702VS Fan Replacement: étape 6, image 1 de 3 Asus ROG Strix GL702VS Fan Replacement: étape 6, image 2 de 3 Asus ROG Strix GL702VS Fan Replacement: étape 6, image 3 de 3
    Outil utilisé dans cette étape :
    Tweezers
    $4.99
    J'achète
    • Remove the fan's connector on the motherboard using a pair of tweezers.

    • Be gentle, as the small clips and wires can be easily damaged.

  7. Asus ROG Strix GL702VS Fan Replacement: étape 7, image 1 de 2 Asus ROG Strix GL702VS Fan Replacement: étape 7, image 2 de 2
    • Gently lift each fan up and out of position.

Conclusion

To reassemble your device, follow these instructions in reverse order.


Une autre personne a terminé cette réparation.

0 commentaires

Ajouter un commentaire

Nombre de vues :

Dernières 24 heures : 2

7 derniers jours : 5

30 derniers jours : 20

Total : 2,829